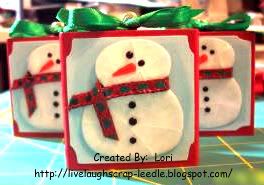
For the base I used wooden blocks that rubber stamps had been unmounted from. Thanks Kelly Scott from the Cricut MB for all of the blocks that yo did not want. Anyone else that wants to get rid of any of them, please let me know!!
I painted the blocks with acrylic paint. I screwed in the eye screws to the top of the block.
The front & back panels were cut from the Stretch Your Imagination Cart. I inked the light blue paper with white pigment ink to soften it a bit.
The snowmen were cut from the Doodle Charms Cart in blackout. I gave the snowmen a little dimension by edging them with light blue and white chalk. I attached the carrot noses. Using a Versamark pad, UTEE, and my heat gun I embossed the snowmen. This gave them a glass-like appearance. I then bent them to make them look like cracked ice. After all of this was set, I used black Liquid Embossing to dot on the eyes and buttons. The Liquid Embossing is shiny and raised giving even more dimension. I attached a ribbon "scarf" around each of the snowmen's necks. Thanks Tracy (Craft Junkie Too) for that idea.
I lightly painted Mod Podge onto the face of the block and the back of the blue panel & attached. When all of them were set, I added another light coat of Mod Podge and to the back of the snowmen and attached.
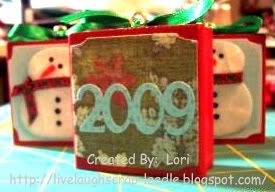
The 2009 is cut from the Alphalicious Cart. I used CDS to weld the numbers together. I attached the 2009 to the panel. Then used the same process as above to attach the panels to the blocks.
I then just tied a ribbon bow the the top of the block around the eye screw. I added a little drop of Glossy dimensions under the knot of the bow to make sure it stayed in place. (I am not the best decorative bow tying person .- LOL)
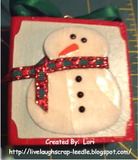
Here is a closer up view of the snowmen to show the crackled ice look. Not sure if it is showing up to good though.
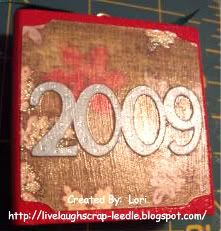
And this is a close up of the back side. After the last layer of Mod Podge dried, I added some dots on the 2009 with a blue glitter pen. Again not sure if this is showing up to good in the pic.
Thanks for looking. Questions & comments are always welcomed.Lori


4 comments:
Lori, they are awesome, what a great job you did. I'm glad that big bag of wooden blocks came in handy for someone!
Thanks for sharing.
That is a great idea, and they are just adorable!
Oh `WoW` Lori these are `gorgeous`
What a fab idea..
Thanks for joining in with the Cuttlebug Challenge this week
Terrie
http://cuttlebugchallenge.blogspot.com/
These snowmen "crack " me up!!! they are so cute!
Thanks for taking the cracked glass challenge with us at, cuttlebug challenge blog~ Shantaie
Post a Comment