Followers, Guestbook, & Comments

My followers are being shown in the right column. My Guestbook is at the bottom. Please follow, comment on posts, & sign my guest book. Your comments encourage me to keep sharing my work. I love hearing from you all.

When you leave a comment, I have to moderate it before it will be posted. So if you have a questions or comments, feel free to ask & if necessary note that you don't want your comment posted.
Showing posts with label Ribbon. Show all posts

Tuesday, July 20, 2010

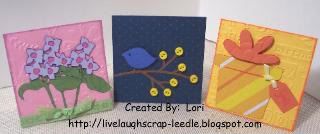
Note Card Set (12) Bird & Monogram

I made this set of note cards & envelopes for my daughter's principle.  I had made her  a set for Teacher Appreciation Week a couple of years ago when she was my daughter's teacher.  We are having a hard time right now & she is helping us out.  She wanted another set of cards & wanted to buy them.  But for all of her help, I made them & am giving them to her as a thank you gift.  These are different than the ones I gave her before.  I hope my techniques have improved since then.  The other ones were really simple.  These were not difficult, but I think they have a little more style.  HERE are the first ones that I made for her.
Details:
I used my Gypsy and Cricut to design & create this set.
Cartridges Used:  Gypsy Font (Monogram), Just Because Cards (Envie & Bird Sticker - Not Shown), Create A Critter (Bird & Branch), Home Decor (Scallop Circle & Circle), All Mixed Up (Title Name)
Cuttlebug with Swiss Dots Embossing Folder
MS Doily Border Punch for the bag closure.
I inked all of the pieces and added ribbon with a single knot as an accent.

Thanks for looking. Questions & comments are always welcomed. Lori

Tuesday, May 18, 2010

Terrier Card: Paper Cutz Challenge #41

I made this card for Challenge # 41 over at Paper Cutz. We had a little Yorkshire Terrier for just over 15 years. She passed away this past January. When I came across this challenge & saw this little terrier on the Create A Critter Cart. I just knew this was the image I was going to use.
Details:
Create A critter cart for the terrier & Ruff
Pop dotted the dog to the front
Cuttlebug w/ Herringbone Embossing Folder on the words
Heat Embossed the words with UTEE.
Inked & doodled on the edges of the card.
Added ribbon with a knot
Thanks for looking. Questions & comments are always welcomed. Lori

Thursday, May 13, 2010

Pause Dream Enjoy: ATC Challenge

This is the 1st ATC that I have ever made. I made it for the 1st ATC challenge over at the Pause Dream Enjoy Blog. An ATC (Artist Trading Card) has to be 2 1/2" x 3 1/2" in size. ATCs are not sold. They are traded amongst other artists. They are generally limited in number by style. For example, if you make 50 of one style they would be numbered 1 of 50, 2 of 50, & on. You usually put some kind of info about yourself on the back. This info will vary among artists. I would put my name, my blog address, the month & year that I made them, # of cards, and if made for a particular convention, meeting, or swap - the name of that convention, meeting, or swap.
For this challenge anything goes. Other than size it could be decorated in any theme, style, or medium of our choice.
I used an idea that I got from Momo. I didn't realize that I didn't use any cricut on this until I went to post it.
I had fun with this challenge. I think it cam out good for my 1st one. But, I hope to get better with the more that I make. It was quick, easy & a great way to use up scraps.
Details:
Martha Stewart Doily Punch, Ribbon, Studio G Stamp
Thanks for looking. Questions & comments are always welcomed. Lori

Thursday, May 6, 2010

Happy Mother's Day - Flower Pot Slider

I started out making this as a shape card w/ the flowers sliding out. I had made a cupcake slider (on a base) & I liked this for the flowerpot too. I find that it helps me to keep from putting the flowers up too high, (I want it to fit into a regular envie.) & this keeps them within the correct frame.
These 2 cards are for my mom & grandmother. I am also entering this into Tracy's (Craft Junkie Too) Mother's Day Post and Cuttlebug Spot Challenge #4. So click on over HERE to check out every one's projects.
Details:
Gypsy to design & cut w/ Cricut
Flowerpot is from Walk In My Garden (blackout, welded at the bottom & edges glued) Flowerpot pieces were also cut in patterned paper & layered to the front of the blackout pot. The rim was embossed using the Cuttlebug & Floral Screen & Paisley folders.
Tag was cut using the Tags, Bags, Boxes, & More cart.
The slider & base were cut from George & Basic Shapes cart.
Flowers are from Sweet Treats, Accent Essentials, & Forever Young carts. They were made using the wet & scrunch method. I then painted them with a mixture of Pearl Ex, Gum Arabic, & water.
Inked all edges & embossed pieces before assembling. Added tag with ribbon tied around one of the flowers.
.gypsy File
Thanks for looking. Questions & comments are always welcomed. Lori

Thursday, April 29, 2010

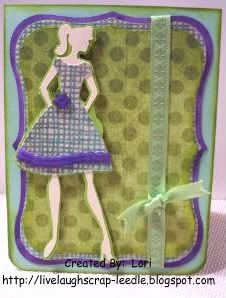
Girly Card - Forever Young

My niece inspired this card. So it will probably be her birthday card. She will be 13 next month & her favorite colors are green & purple.
I designed the card out in my Gypsy, but still didn't know how it would look. The girl is from the Forever Young Cart & the background shapes are from the Accent Essentials cart. I am very pleased with it after adding the ribbon & glossy accents to the flower & strip across the bottom of the dress. of course there is also a lot of inking around the edges w/ distress ink. The shadow layer of the girl is also inked up with Peeled Paint distress ink.
The only disappointment I have in it is the purse (notice it is not there). I had glossy accents on it & it got messed up. Also I attached the girl to the shadow first so the purse wouldn't fit right. Oh well, I'll know for next time.Thanks for looking. Questions & comments are always welcomed.Lori

Shape Card - Present

I made this card for my daughter to give to her teacher for her birthday.
I used the Sweet Treats Cart, Card Feature and cut everything at 5.5". My daughter was so excited when I she saw it. She couldn't wait to give it to her teacher.
.gypsy File
Thanks for looking. Questions & comments are always welcomed. Lori

Tuesday, March 9, 2010

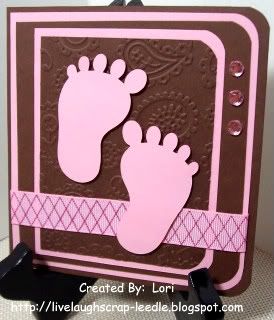
Baby Girl Feet

The pink & brown must be growing on me. I really do like it, but actually I was using what was in my scraps piles.
Details:
Really it is just layers, all 1/4" smaller than the previous one.
I used the Cuttlebug w/ the Paisley Embossing Folder on the top brown layer.
Added ribbon from my stash.
The baby feet are from the New Arrivals Cricut Cart.
3 pink rhinestones for accent.
Thanks for looking. Questions & comments are always welcomed.
Lori

Monday, March 8, 2010

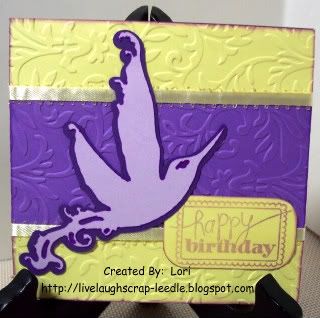
Happy Birthday Card for Stash

I have started making cards to have on hand.  I want to eventually do a craft fair & desperately need inventory.  How do you all do it?  Whenever I get time to craft, I NEED to make something for a party or some other occasion that came up.  This is a slow process for me, but it is steadily growing.
Here is a birthday card that I made.
Details:
Home Accents Cricut Cart for the bird
Cuttlebug (? - embossing folder)
Ribbon
Studio G $1 stamp (I think)

Thanks for looking. Questions & comments are always welcomed.
Lori

Friday, March 5, 2010

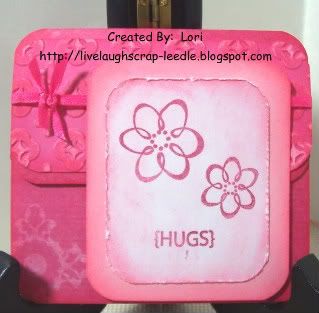
Gift Card Holder & Pocket Envie

Gift Card Holder
Cuttlebug w/ Spots & Dots Embossing Folder
Stamps: My Pink Stamper
Pocket Envelope
Cuttlebug w/ Moroccan Screen Embossing Folder
Stamp: Flowers (?) at the moment
Stamp: {HUGS} My Pink Stamper
Thanks for looking. Questions & comments are always welcomed.
Lori

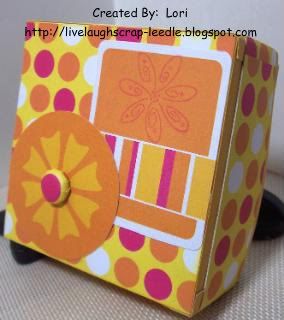
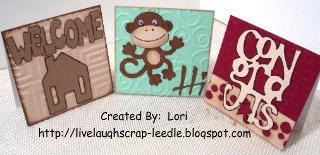
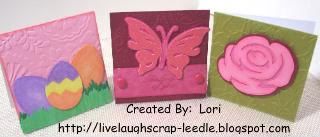
3x3 Assorted Card Set w/ Box

This is a set of 12 3x3 note cards, envelopes, and a 4x4 box that I made to have on hand for a gift or inventory.
I used my Cuttlebug on every card and several embossing folders and Cricut cartridges. I can't remember exactly which ones, but if anyone has questions - don't hesitate to ask.
All cards are blank on the inside.


Thanks for looking. Questions & comments are always welcomed.
Lori

Thursday, March 4, 2010

A Couple of Simple Cricut Cards

Here a a couple of cards that I've made in an attempt to have them on hand or for inventory. I found these packs of 8 cards & envies (5x5) for $1. I thought they would make great bases for some note cards. Just have to remember - these need to be handed out or pay extra postage for square cards.

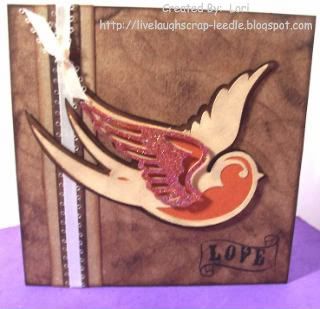
Indie Art Bird:

Details:
5x5 base cardstock inked and texture given with inkpad all over the surface, same done for the cardstock strips.
Cheater method for the ribbon.
Stamp: Recollections - Mark My Heart Set
Bird: Indie Art Cricut Cart.
Lighter layer was sanded, lightly inked & sanded again to give texture. Adhered to the orange layer. Pop dotted to the darker base layer.
Wing - Used Versamark & transparent kaleidoscope (iridescent) embossing powder & heat embossed twice. Pop dotted on top of the bird.

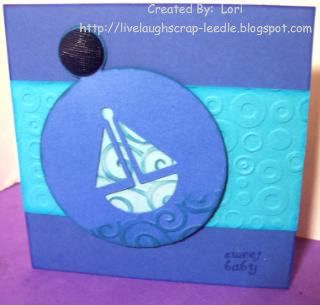
New Arrival Boat:

Details:
5x5 base inked around edges
Strip - Cuttlebug using Spots & Dots Embossing Folder.
Using Cricut Design Studio and the New Arrivals Cart., I placed the circle with the boat cut out over the tag. I did "hide contour" for the circle so that the boar would cut out of the tag. Then, used the circle w/ boat again hiding the boat so that only the circle would cut.
Cuttlebug using the Devine Swirls Embossing Folder on the bottom of the tag (water) and on the circle. Inked over the embossing. Layered these pieces.
Adhered to card base & added a misc. button.
Stamp: My Pink Stamper Stamps - Everyday Occasions

Thanks for looking. Questions & comments are always welcomed.
Lori

Thursday, February 18, 2010

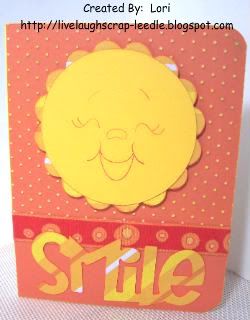
A Smile for Haili

I made this card for a beautiful young lady. She is not only a beautiful girl, but a very lovely person. I have known her since she was in Kindergarten and now she is in high school, whew - hard to believe how fast time flies!!! She got braces yesterday, and just wanted to let her know that we were thinking about her and wishing her well.
I am also entering this into the BBTB2 contest.
Details:
Circle - George & Basic Shapes Cricut Cart.
Scallop Circle - Mini Monograms Cricut Cart.
Smile - Wild Cards Cricut Cart.
Cuttlebug - Swiss Dots Embossing Folder
Ribbon
Peachy Keen Face Stamp
Thanks for looking. Questions & comments are always welcomed.
Lori

Valentine's Card for Hubby

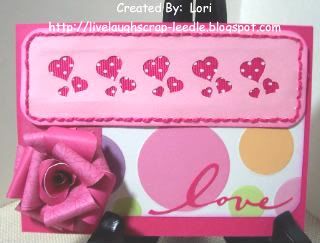
I made this card and decided to give it to my husband for Valentine's Day. I know - a lot pink - but it is Valentine's Day. He loved it anyway, maybe more for the sentiment than the actual card, but he loved it all the same.
Details:
Flower - Plantin School Book Cricut Cart, Grunge Flower Technique
(This was my first try at it - I think it came out pretty good although it could use some inking.)
Love - Beyond Birthdays Cricut Cart
Tonic Border Punch System - Hearts Punch
Stitching & Ribbon
My Pink Stamper Stamps - "I Love You" & "My Sweet One" on the inside.


Thanks for looking. Questions & comments are always welcomed.
Lori

Tuesday, January 19, 2010

Birthday Giftbag

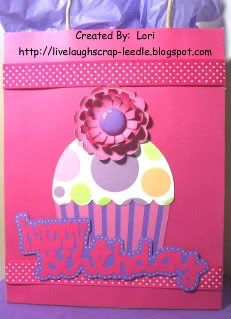
Happy Birthday Laici!! I made this giftbag for a very special little girl that just made 6. I made her card with the Cupcake theme, so went with that for the bag too. It is a little different, but still cupcakes. HERE is her card.
So now for the bag. Details:
I used my I-Top to make the brad in the center of the flower.
Cupcake, Flowers, & Happy Birthday were all cut from the Sweet Treats Cricut Cart.
White Gel Pen to make doodle dots around the Happy Birthday.
Iridescent Glitter Glue on the dot for the "i" in birthday and on the gleam on the brad.

Thanks for looking. Questions & comments are always welcomed.
Lori

Birthday Card - Jean

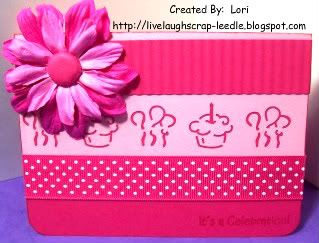
I made this birthday card for my husband's step mom for her birthday. Happy Birthday Jean. We Love You!!!!
Details:
Tonic Border Punch System with the Cupcake & Balloon Punches.
Fiskars Paper Crimper
Prima Flowers
I made the brad in the center of the flower using my I-Top.
Stamps ( I can't remember the stamp sets at the moment) Front: It's a Celebration, Inside: Happy Birthday
Corner Rounder
Thanks for looking. Questions & comments are always welcomed.
Lori

Monday, January 11, 2010

Valentines & Valentine's Party Favors

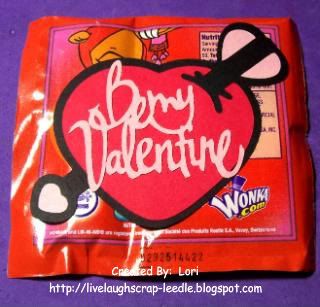
I made these for my daughter to give out for Valentine's Day. The heart and arrow were cut from the Hello Kitty Greeting Cricut Cart.
The Be My Valentine was cut from the Wild Card Cricut Cart.
Then I just adhered them to individual Valentine Lik-N-Dip Packs and wrote her name in the From space on the other side.


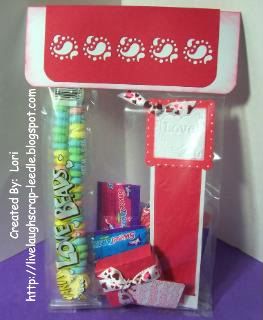
This pic is of the Valentine's Party favor bags that I made for my daughter's class.
For the topper I just cut white cardstock & scored down the middle, rounded the corners & inked with Tim Holtz's Distress Ink Pad (Worn Lipstick). I cut the red cardstock a little smaller, scored down the middle & rounded the corners. Then I used my Tonic Border Punch System with the Paisley II Punch to make the design across the front. (Info about the Tonic Border punch System is at the bottom of this post.) I have the Heats Punch on its way to me, but I was impatient & wanted to get these done over the weekend. I still think it is cute & the boys will like it too. I filled with Misc. Candy, Candy Love Beads, Bookmark, and Decorated Mini Nerds. I then stapled the white part of the topper to the bag. I layered the red part of the topper over the white (adhered with ATG), this hid the staple. From is stamped on the back of the topper & my daughter wrote in her name.

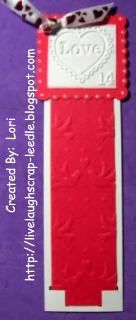
This is the bookmark that I made.
I cut red & white rectangles, just using my paper trimmer. I cut the red ones a little smaller for layering.
I used my Marvy 2 1/2" Scallop Square Punch (red - 2 for each bookmark) and the 2" Square Punch for the white. I ran the white squares through my Cuttlebug using the Love Stamp Embossing Folder. Then I used the Tonic 2-in-1 Arrowhead Corner Punch on the bottom of the white rectangles. The red rectangles were run through my Cuttlebug using the Doves & Hearts (Christmas Set) Sizzix Embossing Plates. I adhered the red rectangles the the white ones tucking the corners into the punched corners. I adhered the red squares on the top, white on top of that. I white doodle dots around the scallop square. I used a 2 slot hole punch on the top left corner & threaded ribbon & tied a knot bow. I then adhered the other red square to the back for a finished off look.

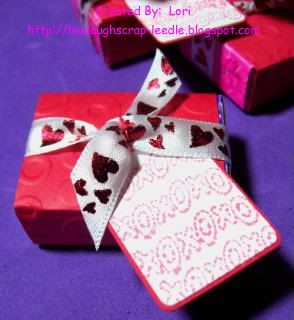
This is the covered Mini Nerds that I decorated.
The inspiration for this came from Angie @ Chic'n Scratch Live. You can see her video for her Valentine Nerds HERE. I'm sure her instructions were clear, but I was doing these in the middle of the night & was confused for some reason (not unusual for me in the middle of the night or not when it comes to measurements - LOL). So this is how I did them.
Red cardstock 4 5/16" x 1 5/8" - Scored @ 5 /16" on both ends then on one end @ 1 13/16" & 2 7/16". I ran it through my Cuttlebug using the Spots & Dots Embossing Folder
I cut the scallop tag from the Plantin School Book Cricut Cart. @ 1 1/2" in white & 1 1/2" shadow in red. I stamped in Worn Lipstick Distressed Inkpad the xoxoxo Studio G $1 Clear Stamps (Feb. Set) on the white tags. layered the white & red tags.
Tied a ribbon knot bow around the box. Using red thread attached the tags to the ribbon.

Tonic Border Punch System Information:
To see videos about it:
Tonic Border Punch System Videos parts 1 & 2
Tonic Boot Punch Videos parts 1 & 2
Tonic Border Punch System Information: Click HERE
To order or for more info, contact Cheryl Horton / Inspire Me HERE
Cheryl is a dear to work with and will answer any questions that you have.
Thanks for looking. Questions & comments are always welcomed.
Lori

Thursday, December 31, 2009

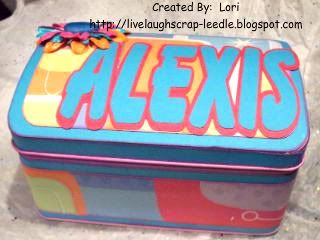
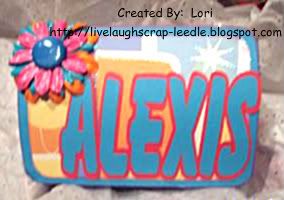
Altered Dome Tin & Stationary Set

This is what kept me busy most of the time. I made 4 of these in total 1 for my daughter & 1 for each of my 3 nieces. They range in age from 8 to 12. I made them all in different color & patterned paper schemes, but all were basically the same design.
Thank you Okieladybug for the .cut file to cover these tins. I don't think I could have done it with out you.
This is the tin that I made for my daughter. She was so excited b/c she knew I was making them for my nieces, but had no idea that one of them would be for her too.
Front & Top:

Top:

I-Top Brad in Prima Flowers coated in Mod Podge.

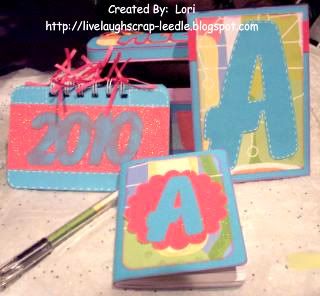
Complete Stationary Set Contents:

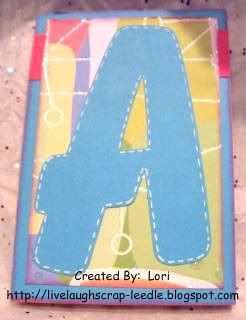
Flip up notepad with very brightly colored pages:

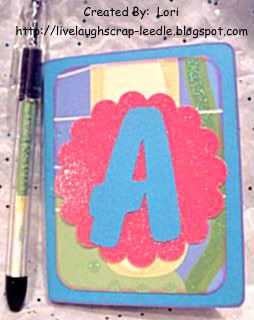
Altered RSVP pen & Altered mini composition notebook:

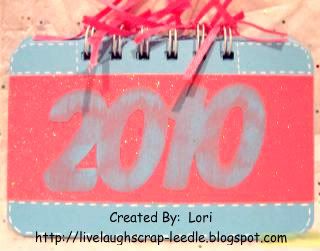
Calendar made with my Bind it All

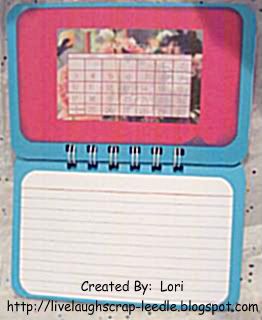
First page inside of calendar, calendar & note card for note & upcoming dates:

Thanks for looking. Questions & comments are always welcomed.
Lori

Gift Bags & Tags

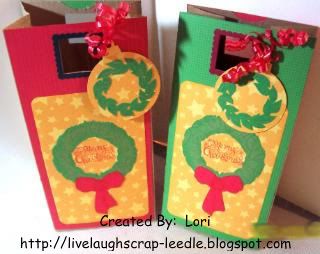
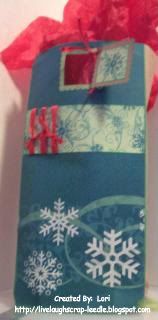
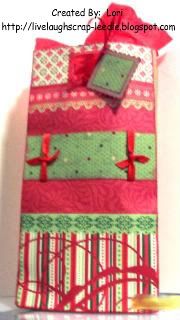
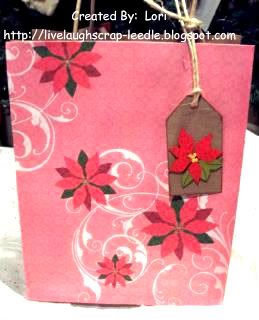
Ok, here is some of what I have been working on for Christmas. I have been very busy since before Thanksgiving trying to get everything made & finished. So in this & then next 5 posts there might not be much detail. You can always leave a comment or send me an email if you want to know something specific about what i used or how I did something. Also there are some things that I did not have a chance to take pics of, but you all will get most of it. Some still can't be shown b/c we have not done our Christmas with everyone yet. Hopefully I will be able to post the rest after this weekend.

Bags that I made to put giftcards in. I thought it made a nice touch as opposed to just having the giftcard holder. They were made from very small craft paper bags.

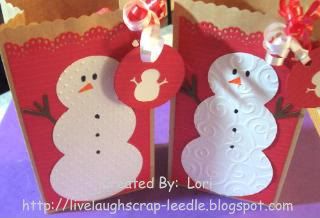
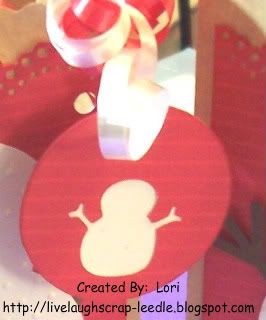
These were made from the same small craft paper bags. I made these to put the snowman ornaments that I made for some family members. You can see the Christmas Ornaments HERE.

The next 3 pics are bags that I made using regular brown paper lunchbags. The first pic I made 10 of these varying a little, but basically the same design. The other 2 are one of a kind.


This bag was a medium sized craft paper gift bag that I decorated and made a tag for.

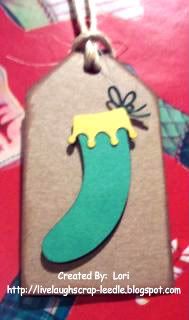
This is the gift tag that I made to put on the small snowman bags.

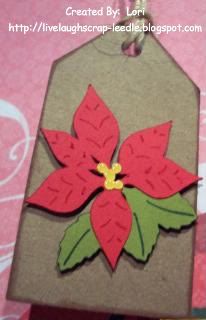
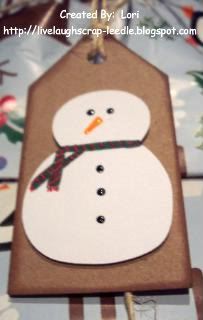
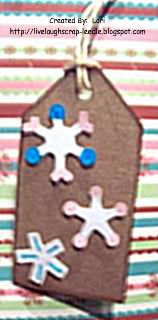
The rest of these tags were just cut from craft paper cardstock inked and embellished with a decorated Cricut cut.


Thanks for looking. Questions & comments are always welcomed.
Lori

Tuesday, December 8, 2009

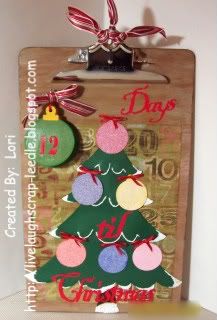
Christmas Countdown Clipboard - 12 Day

Well, this is one of the projects that I have been working on. I'm not sure if I'll be keeping this one or giving it as a present. This is the first clipboard I have done & my first countdown calendar too. I am also entering it into the Practical Scrappers Challenge this week Anything Christmas. Click on over to see what everyone else has made too.
Details:
Paper Doll Dress Up Cart. for the Tree
SnowTex for the snow
SCAL for the ornaments & words
Legal size clipboard

I inked the clipboard with a light brown pigment ink then went over it with a white wash (watered down white acrylic paint). I think this gave it a really nice wood grain look. I inked the edges of the paper & the board with brown pigment ink.
I then used Mod Podge over the entire board & place the printed cardstock in place. Then Used another coat of Mod Modge. The tree was also coated in Mod Podge before adhering to the board. I glittered the ornaments & sprayed with a coat of Krylon Preserve It to keep the glitter from scraping off. Then adhered the ornaments to the tree.
I used a hook that screwed into the board to hold the numbered ornaments.
Thanks for looking. Questions & comments are always welcomed.
Lori

Monday, November 30, 2009

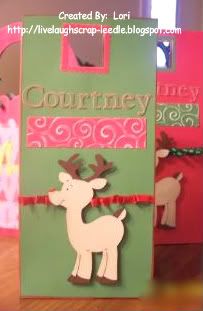
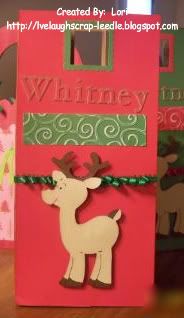
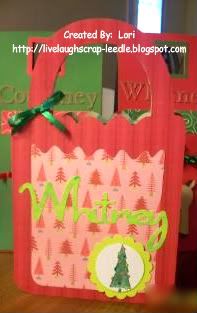
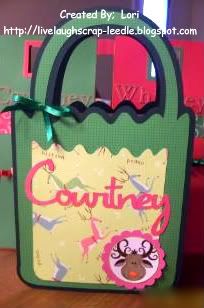
4 Giftbags - Whitney & Courtney

My mom & dad's neighbor asked me to make 2 gift bags for each of his daughters. All he wanted was for them to have a Christmas theme and to have their names on them.
These first 2 were made using Okieladybug's idea. You can check out her video HERE.
Details:
A regular brown paper lunch bag
Plantin Schoolbook Cart for the letters
Paper Doll Dress Up Cart for the reindeer
Cuttlebug & the Divine Swirls Embossing Folder
Misc. Ribbon
2" square punch & 21/2" scallop square punch to make the handles


For these next 2, I used an idea that I found on the Cricut MB from TammaraCarr. You can see her project HERE. thank You Tammara for this wonderful idea. Here is my take on your idea.
Details:
A regular brown paper lunch bag (You have to cut some off the top of the bag so that it does not show over the DC bag cut.)
Doodlecharms Cart for the giftbag and layer (When you cut one for the backside - flip the image so that they match up evenly.)
Opposites Attract Cart for the names
Mini Monograms Cart for the circle & scallop circle
Studio G $1 Stamps colored in with markers
Misc. ribbon (I made the bows using my Cricut Cut Bow Easy.)
Thanks for looking. Questions & comments are always welcomed.
Lori