Followers, Guestbook, & Comments

My followers are being shown in the right column. My Guestbook is at the bottom. Please follow, comment on posts, & sign my guest book. Your comments encourage me to keep sharing my work. I love hearing from you all.

When you leave a comment, I have to moderate it before it will be posted. So if you have a questions or comments, feel free to ask & if necessary note that you don't want your comment posted.
Showing posts with label NA. Show all posts

Wednesday, April 7, 2010

4 More Wall Letters - K, T, G, J

I made wall letters for my niece & 3 nephews for Easter. I still find it a little bit of a challenge to make these for boys, but I think they are turning out pretty good.

"K" for Karissa
She will be 2 in July. Everything we have done for her has been pink & purple & involves butterflies. I used the Gypsy Wanderings cart for the butterflies, Home Accents cart for the branch & flowers, & the Alphalicious Cart. for her name.
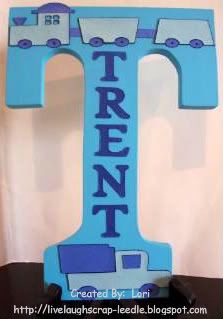
"T" for Trent
He will be 1 in July. I knew I was going with 2 shades of blue. With him being so young, I knew that whatever I did - he will eventually grow out of it. So, I went with a truck & a train from the New Arrivals Cart. His name was cut using the Plantin Schoolbook Cart.
"G" for Garrett
He made 3 in January. He just loves anything to do with balls. So what better cart to use than the Sports Mania Cart. His name was cut using the Plantin Schoolbook Cart.
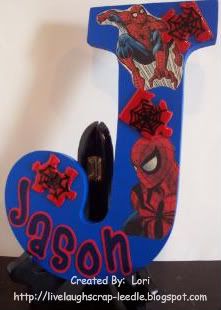
"J" for Jason
Jason is going to be 8 in October. He is a wiz with putting puzzles together and he loves Spiderman. I found some Spiderman comic books (new ones - not collectibles) and cut some of the Spideys out. I sprayed them with Krylon Preserve It so that they will last. Then for the puzzles, I painted some pieces red, freehand painted some spider webs, & coated them with Triple Thick. I cut his name from SCAL.
Thanks for looking. Questions & comments are always welcomed.
Lori

Tuesday, March 9, 2010

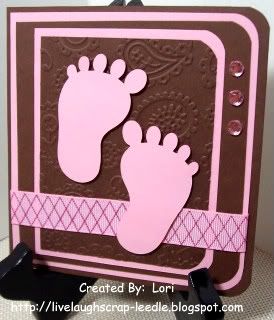
Baby Girl Feet

The pink & brown must be growing on me. I really do like it, but actually I was using what was in my scraps piles.
Details:
Really it is just layers, all 1/4" smaller than the previous one.
I used the Cuttlebug w/ the Paisley Embossing Folder on the top brown layer.
Added ribbon from my stash.
The baby feet are from the New Arrivals Cricut Cart.
3 pink rhinestones for accent.
Thanks for looking. Questions & comments are always welcomed.
Lori

Thursday, March 4, 2010

A Couple of Simple Cricut Cards

Here a a couple of cards that I've made in an attempt to have them on hand or for inventory. I found these packs of 8 cards & envies (5x5) for $1. I thought they would make great bases for some note cards. Just have to remember - these need to be handed out or pay extra postage for square cards.

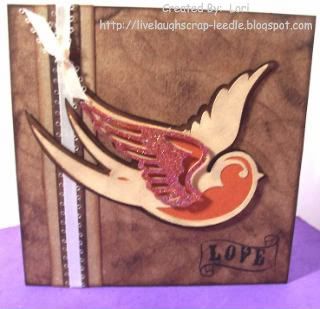
Indie Art Bird:

Details:
5x5 base cardstock inked and texture given with inkpad all over the surface, same done for the cardstock strips.
Cheater method for the ribbon.
Stamp: Recollections - Mark My Heart Set
Bird: Indie Art Cricut Cart.
Lighter layer was sanded, lightly inked & sanded again to give texture. Adhered to the orange layer. Pop dotted to the darker base layer.
Wing - Used Versamark & transparent kaleidoscope (iridescent) embossing powder & heat embossed twice. Pop dotted on top of the bird.

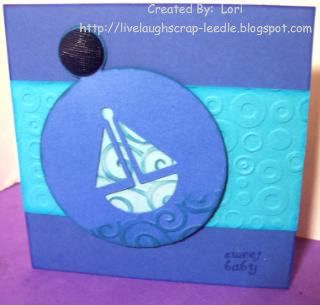
New Arrival Boat:

Details:
5x5 base inked around edges
Strip - Cuttlebug using Spots & Dots Embossing Folder.
Using Cricut Design Studio and the New Arrivals Cart., I placed the circle with the boat cut out over the tag. I did "hide contour" for the circle so that the boar would cut out of the tag. Then, used the circle w/ boat again hiding the boat so that only the circle would cut.
Cuttlebug using the Devine Swirls Embossing Folder on the bottom of the tag (water) and on the circle. Inked over the embossing. Layered these pieces.
Adhered to card base & added a misc. button.
Stamp: My Pink Stamper Stamps - Everyday Occasions

Thanks for looking. Questions & comments are always welcomed.
Lori

Tuesday, December 8, 2009

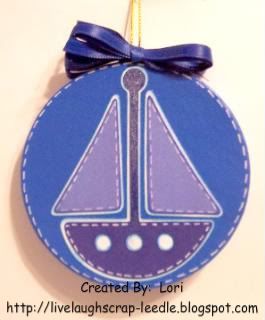
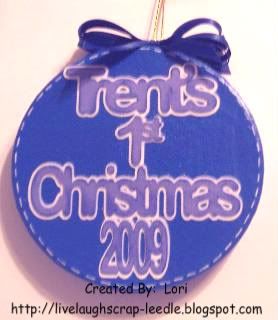
Ornament - Trent's 1st Christmas

This is the ornament that I made for my nephew (& God son) for his 1st Christmas. He will be 5 months old 3 days before Christmas. Last year when I made the ornament for his sister's first Christmas, I made it in shades of pink. So I did his in all blues.
Front:

Back:Thanks for looking. Questions & comments are always welcomed.
Lori

Friday, July 24, 2009

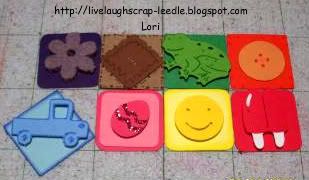
Rainbow inchie Swap (Due: September 30)

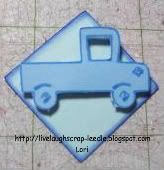
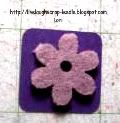
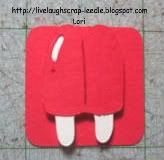
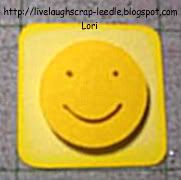
These are the inchies that I made for the Rainbow Inchie Swap on the Cricut MB. We had to make 20 of each color & we could decorate them any way we wanted to. The only stipulation was that they could only include the one color of that group. We could use white minimally as an accent color if needed & black for stamping if needed. The only one that I needed to use whit on was the popsicle (for the sticks - blackout layer). On all of the others I just used different shades of the same color. These are so much fun to do.
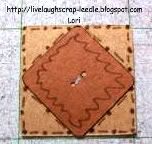
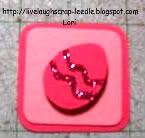
Here are the individual pics to show more detail:

Thanks for looking. Questions & comments are always welcomed.
Lori
A Proud member of The Lime Light. Click on over to see what we are doing.

Monday, July 20, 2009

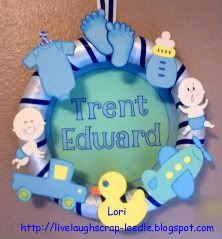
Baby Boy Wreath

I made this wreath for the hospital door for my nephew (Godson) that will be born tomorrow. It is very simple, but I am proud how it turned out. I got the inspiration from TERRYMORROW1 on the Cricut MB. She posted a wreath that she had made. When I saw it, it was perfect timing. You can click HERE to see the one that she made.
Details:
The wreath form and some of the ribbon came from Dollar tree.
Everything else was from my stash.
I used the New Arrival Cart for all of the images and (I think) Plantin Schoolbook for the font.
I wrapped the form with a wide white ribbon. Then I wrapped a light blue (hard to see) ribbon cover the seams of the white ribbon. Over that I wrapped a skinny navy blue ribbon in the center of the light blue one. I cut & decorated all of the images & arranged them on the wreath. I used Terrifically Tack Tape to adhere it all. I used some more ribbon the make a hanger for the wreath.
Thanks for looking. Questions & comments are always welcomed.
Lori
A Proud member of The Lime Light. Click on over to see what we are doing.

Tuesday, July 14, 2009

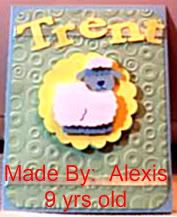
Alexis' 1st Challenge Entry

I came across a post on the Cricut MB about fun things for kid's to do. Well this little girl (with the help of her mom) started a blog for kids to do craft challenges. The name of the blog is Scrappy Piglet. Ainsleigh is the most adorable thing. She likes making cards with her mom, but she didn't want to do the same challenges. So she is making up her own challenges for kids 13 & under to participate in.
The first challenge was to make a card with your favorite animal on it. I have to tell you Alexis loved making this card. I "FINALLY" (as she would say) taught her to use the baby Cricut. She originally wanted to put a horse on it, then she saw the lamb & fell in love with it. She has a baby boy cousin being born in a couple of weeks, so she made this card to welcome him to the family.
She had so much fun using the Cricut, ATG, & Cuttlebug. You should have seen her face when I told her that she could use my ATG. She said "Me, all by myself?!!"
Details:
Carts: Plantin Schoolbook for the name, Mini Monograms for the scalloped circle, & Animal Kingdom for the lamb.
Cuttlebug & Spots & Dots embossing folder.
She used pop dots to pop up the fur of the lamb & the entire scallop.
Misc. ribbon was used for a border on the top & bottom of the card.

Thanks for looking. Questions & comments are always welcomed.
Lori
A Proud member of The Lime Light. Click on over to see what we are doing.

Wednesday, December 10, 2008

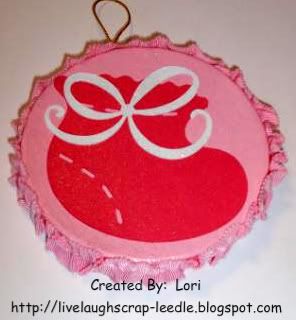
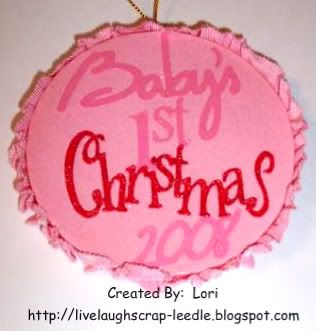
Karissa's 1st Christmas Ornament

I can finally post some of the projects I have been working on. I gave this ornament to my brother for my Godchild's 1st Christmas. I wanted them to be able to have it on the tree this year.

Front:

Back:

I made her shower invites & favors using the baby bootie from the New Arrivals cart. So, I thought it would be fitting to use it for her 1st Christmas ornament as well. I heat embosses the word Christmas with Red Tinsle Embossing Powder. I used CDS to make sure that all of the cuts would fit on the ornament form. The form is just a paper mache form that I painted pink. I cannot remember off hand which carts I used for all of the words, I will post back later with the info.

Thanks for looking. Questions & comments always welcomed.
Lori
Proud member of The Lime Light Design Team. Please click on over to see what we are doing.

Monday, August 25, 2008

A Stitch In Time...

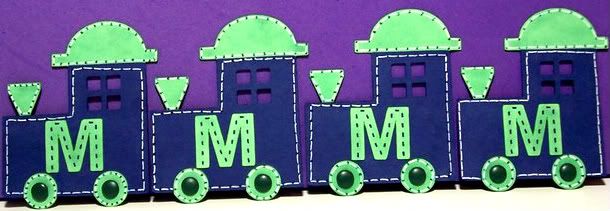
I made these little trains for Ms. Carolyn, "My Snowball Lady". I had made her a train card for her 1st grandchild & she loved it. Her 2nd grandchild (also a boy) is due in October. They are going with a train theme for her shower. So I made these trains for her to put on some glass jars with flowers in them as center pieces on the tables.
They also fit into the challenge this week on Papertake Weekly http://papertakeweekly.blogspot.com/ so I am entering it in that too.
Details:
I used CDS to cut only the train engine & to make sure the M's fit on the train right.
NA for the train & MM for the M
I used my Cutter Bee Piercing Bug (single) to mark the holes for the stitching.
White Gelly Roll pen for the stitching
LePlume II markers for inking & hole marks in the stitching
Brads for the center of the wheels.
Thanks for looking. Comments & questions welcomed.