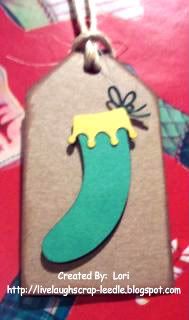
Yet another Teacher Appreciation Week gift. I made this for Challenge Me Monday #10 at Fantabulous Cricut. The challenge was to make something that is 3D and to use the color black. Oh, and it is filled with covered Hershey's Nuggets. So here is my entry:
Front View:
Side View:
Thanks for looking. Questions & comments are always welcomed. Lori
Followers, Guestbook, & Comments
My followers are being shown in the right column. My Guestbook is at the bottom. Please follow, comment on posts, & sign my guest book. Your comments encourage me to keep sharing my work. I love hearing from you all.
When you leave a comment, I have to moderate it before it will be posted. So if you have a questions or comments, feel free to ask & if necessary note that you don't want your comment posted.
Showing posts with label MM. Show all posts
Friday, May 21, 2010
3D Project Using Black
Labels:
Challenges,
FY,
Gift Bags,
Gifts,
MM,
Tags,
Teacher Appreciation,
WIMG
Wednesday, April 14, 2010
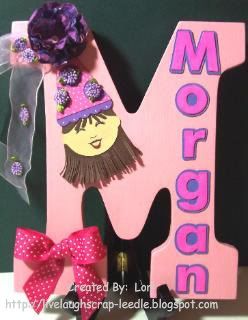
Morgan's M & Giftbag
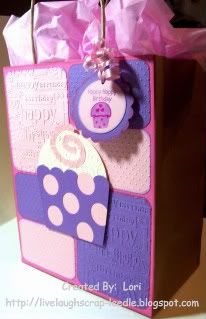
I made these in March for Morgan. A precious little girl that we know that was turning 4.

Details:

Details:Letter:
White wooden M from Michael's painted with acrylic paint. Sprayed w/ Krylon Preserve It along with all of the pieces that were added to the letter.
Name was cut using SCAL.
Princess - Hat was cut from the Sweet Treats cart. Head & hair were cut from the Paper Doll Dress Up cart. face is peachy Keen Stamps. Ribbon is an old hair ribbon that my daughter did not use anymore. Flower is one of my Phone Book Page Flowers.
Giftbag:
Cuttlebug using the Swiss Dots, Happy Birthday & Devine Swirls Embossing Folders
Mini Monograms for the tag w/ My Pink Stamper Stamps.
Cupcake on bag is from the Sweet Treats cart.
Thanks for looking. Questions & comments are always welcomed.
Lori
Lori
Labels:
Acrylic Paint,
CDS,
Cricut,
Cuttlebug,
Gift Bags,
Gifts,
Just Rite Stamps,
MM,
Paper Flowers,
PDDU,
SCAL,
Sweet Treats,
Tags,
Wall Letters
Tuesday, March 9, 2010
Alyssa'a Giftbag & Tag
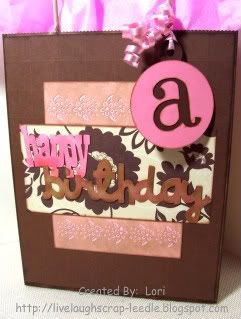
Here is the brown & pink giftbag & tag for Alyssa's "A". You can see that project in the previous post.
Details:
Tag:
The tag was cut from the Mini Monograms Cricut Cart.
I also cut the circle lowercase "a" from the Mini Monograms Cricut Cart. and fit it over the tag.
I inked around the edges and added pink curling ribbon to attach it to the bag.
Bag:
Craft giftbag
Happy Birthday was cut from the Sweet Treats Cricut Cart. Inked with distress inks.
Tonic Border Punch System with the flower punch
It's hard to see in the pic, but i used my score board and scored (embossed up) lines 1" apart horizontally & vertically on the base cardstock covering the bag. I just did this to add a little texture. Here is where a 12x12 embosser would come in handy.
Thanks for looking. Questions & comments are always welcomed.
Lori
Labels:
CDS,
Cricut,
Gift Bags,
MM,
Sweet Treats,
Tags,
Tonic Border Punch System
Thursday, February 18, 2010
A Smile for Haili
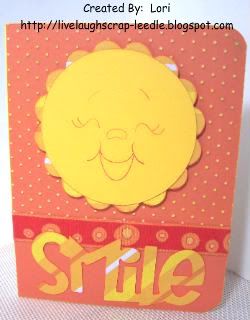
I made this card for a beautiful young lady. She is not only a beautiful girl, but a very lovely person. I have known her since she was in Kindergarten and now she is in high school, whew - hard to believe how fast time flies!!! She got braces yesterday, and just wanted to let her know that we were thinking about her and wishing her well.
I am also entering this into the BBTB2 contest.
Details:
Circle - George & Basic Shapes Cricut Cart.
Scallop Circle - Mini Monograms Cricut Cart.
Smile - Wild Cards Cricut Cart.
Cuttlebug - Swiss Dots Embossing Folder
Ribbon
Peachy Keen Face Stamp
Thanks for looking. Questions & comments are always welcomed.
Lori
I am also entering this into the BBTB2 contest.
Details:
Circle - George & Basic Shapes Cricut Cart.
Scallop Circle - Mini Monograms Cricut Cart.
Smile - Wild Cards Cricut Cart.
Cuttlebug - Swiss Dots Embossing Folder
Ribbon
Peachy Keen Face Stamp
Thanks for looking. Questions & comments are always welcomed.
Lori
Thursday, December 31, 2009
Altered Dome Tin & Stationary Set
This is what kept me busy most of the time. I made 4 of these in total 1 for my daughter & 1 for each of my 3 nieces. They range in age from 8 to 12. I made them all in different color & patterned paper schemes, but all were basically the same design.
Thank you Okieladybug for the .cut file to cover these tins. I don't think I could have done it with out you.
This is the tin that I made for my daughter. She was so excited b/c she knew I was making them for my nieces, but had no idea that one of them would be for her too.
Front & Top:
Top:
I-Top Brad in Prima Flowers coated in Mod Podge.Complete Stationary Set Contents:
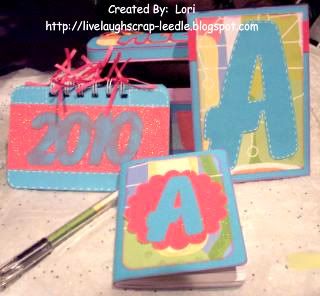
Flip up notepad with very brightly colored pages:Altered RSVP pen & Altered mini composition notebook:
Calendar made with my Bind it All
First page inside of calendar, calendar & note card for note & upcoming dates:Thanks for looking. Questions & comments are always welcomed.
Lori
Gift Bags & Tags
Ok, here is some of what I have been working on for Christmas. I have been very busy since before Thanksgiving trying to get everything made & finished. So in this & then next 5 posts there might not be much detail. You can always leave a comment or send me an email if you want to know something specific about what i used or how I did something. Also there are some things that I did not have a chance to take pics of, but you all will get most of it. Some still can't be shown b/c we have not done our Christmas with everyone yet. Hopefully I will be able to post the rest after this weekend.
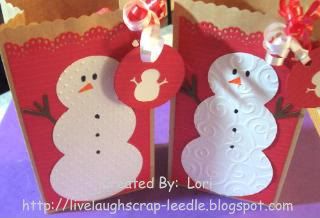
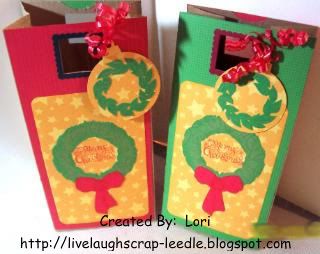
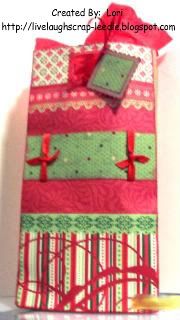
Bags that I made to put giftcards in. I thought it made a nice touch as opposed to just having the giftcard holder. They were made from very small craft paper bags.
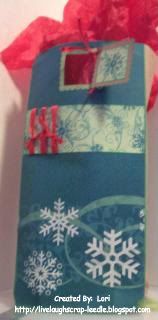
These were made from the same small craft paper bags. I made these to put the snowman ornaments that I made for some family members. You can see the Christmas Ornaments HERE.


Thanks for looking. Questions & comments are always welcomed.
Lori
Bags that I made to put giftcards in. I thought it made a nice touch as opposed to just having the giftcard holder. They were made from very small craft paper bags.
These were made from the same small craft paper bags. I made these to put the snowman ornaments that I made for some family members. You can see the Christmas Ornaments HERE.
The next 3 pics are bags that I made using regular brown paper lunchbags. The first pic I made 10 of these varying a little, but basically the same design. The other 2 are one of a kind.

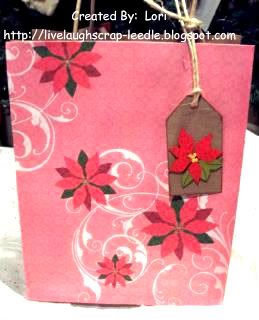
This bag was a medium sized craft paper gift bag that I decorated and made a tag for.
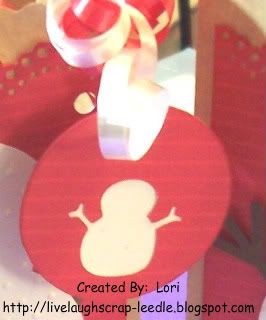
This is the gift tag that I made to put on the small snowman bags.
The rest of these tags were just cut from craft paper cardstock inked and embellished with a decorated Cricut cut.


Lori
Monday, November 30, 2009
Glass Etching - Candle Bowl
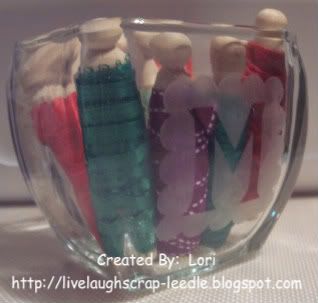
I made this candle bowl for my grandmother Mamie for Christmas. (Yes, I know there are ribbon spools in the bowl.) Than bowl would not photograph well with the candle in it, so I added the colorful ribbon. This was the first etching I had done since high school, too many years ago to worry about. But it was fun & I will be making several more to Christmas gifts.
Details:
The scallop square is cut from the Mini Monograms Cart.
The M is from the Plantin Schoolbook Cart.
I used clear contact paper to cut the design out of & layered it onto the glass.
Armour Etch. I left it on for a good 30-45 min with great results. I knew I had to leave it on longer that recommended, so I really didn't time it. I put it on 7 started working on some other stuff then just checked it a while later. I scraped off as much as I could & put it back into the bottle. Then I rinsed it off thoroughly before removing the contact paper. Wash well & dry.
Thanks for looking. Questions & comments are always welcomed.
Lori
Details:
The scallop square is cut from the Mini Monograms Cart.
The M is from the Plantin Schoolbook Cart.
I used clear contact paper to cut the design out of & layered it onto the glass.
Armour Etch. I left it on for a good 30-45 min with great results. I knew I had to leave it on longer that recommended, so I really didn't time it. I put it on 7 started working on some other stuff then just checked it a while later. I scraped off as much as I could & put it back into the bottle. Then I rinsed it off thoroughly before removing the contact paper. Wash well & dry.
Thanks for looking. Questions & comments are always welcomed.
Lori
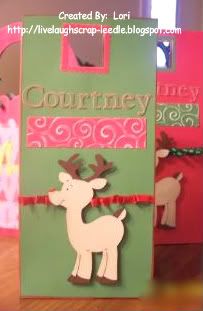
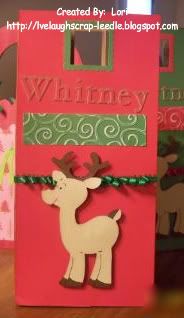
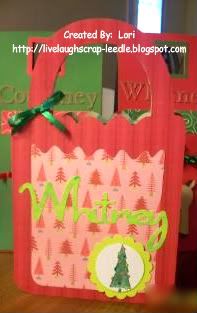
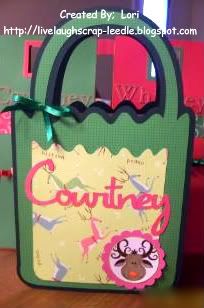
4 Giftbags - Whitney & Courtney
My mom & dad's neighbor asked me to make 2 gift bags for each of his daughters. All he wanted was for them to have a Christmas theme and to have their names on them.
These first 2 were made using Okieladybug's idea. You can check out her video HERE.
Details:
A regular brown paper lunch bag
Plantin Schoolbook Cart for the letters
Paper Doll Dress Up Cart for the reindeer
Cuttlebug & the Divine Swirls Embossing Folder
Misc. Ribbon
2" square punch & 21/2" scallop square punch to make the handles


For these next 2, I used an idea that I found on the Cricut MB from TammaraCarr. You can see her project HERE. thank You Tammara for this wonderful idea. Here is my take on your idea.
Details:
A regular brown paper lunch bag (You have to cut some off the top of the bag so that it does not show over the DC bag cut.)
Doodlecharms Cart for the giftbag and layer (When you cut one for the backside - flip the image so that they match up evenly.)
Opposites Attract Cart for the names
Mini Monograms Cart for the circle & scallop circle
Studio G $1 Stamps colored in with markers
Misc. ribbon (I made the bows using my Cricut Cut Bow Easy.)

Thanks for looking. Questions & comments are always welcomed.
Lori
These first 2 were made using Okieladybug's idea. You can check out her video HERE.
Details:
A regular brown paper lunch bag
Plantin Schoolbook Cart for the letters
Paper Doll Dress Up Cart for the reindeer
Cuttlebug & the Divine Swirls Embossing Folder
Misc. Ribbon
2" square punch & 21/2" scallop square punch to make the handles


For these next 2, I used an idea that I found on the Cricut MB from TammaraCarr. You can see her project HERE. thank You Tammara for this wonderful idea. Here is my take on your idea.
Details:
A regular brown paper lunch bag (You have to cut some off the top of the bag so that it does not show over the DC bag cut.)
Doodlecharms Cart for the giftbag and layer (When you cut one for the backside - flip the image so that they match up evenly.)
Opposites Attract Cart for the names
Mini Monograms Cart for the circle & scallop circle
Studio G $1 Stamps colored in with markers
Misc. ribbon (I made the bows using my Cricut Cut Bow Easy.)

Thanks for looking. Questions & comments are always welcomed.Lori
Tuesday, November 3, 2009
Sticky Note Holders
I made Sticky Note Holders in several different styles. The inspiration for all of theses came from Angie & her Chic'n Scratch Live Videos.
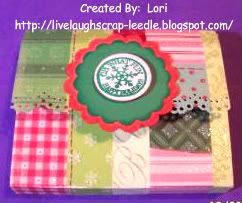
These first 2 holders are an adaptation from the Pocket Card. I just didn't put pockets on the inside, I added sticky notes. The cardstock measurements & score line measurements are just altered to fit the sticky noted.
1st one:
Mini Monograms Cart for scallops & circle
MS Doily Border Punch
Studio G December Stamp Set
Velcro for closure
ATG
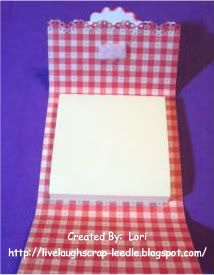
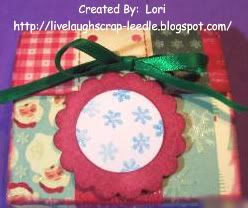
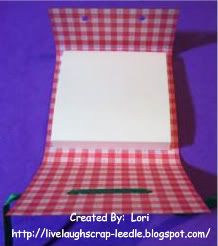
2nd one:
Mini Monograms Cart for circle & scallop
Ribbon for decoration & closure
CAD to punch holes for ribbon
Stamp- ?
ATG & Pop Dots
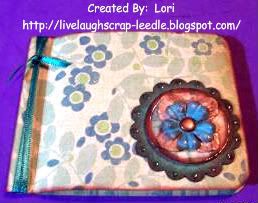
I got the inspiration for this one from This Video of Angie's.
Crimper Book Style:
Fiskar's Crimper
Ribbon
ATG
Mini Monograms Cart for circle & scallop
Glossy Accents
Prima flower
Making Memories Bronze Snap
CAD to attach snap
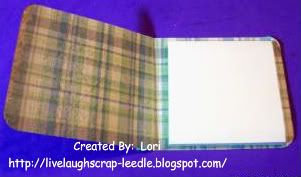
I think this one is my most favorite of all. The inspiration for this one came from This Video of Angie's.
Coaster & Binder Clip Style:
4x4 140 lb. Watercolor Paper (chipboard or coaster work well too)
4x4 Patterned cardstock for both sides.
A small piece of matching cardstock to fit on the binder clip
Ribbon
Mod Podge to cover each side after printed cardstock is attached. I also put some on the edges. I think it helps to seal it a little better.
ATG
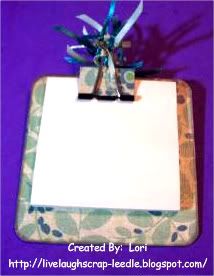
The back side. This sticky note holder can be used either way depending on the user's mood. Also the sticky notes are not stuck down, so no damage when they are finished. Just add a new pad of sticky notes.
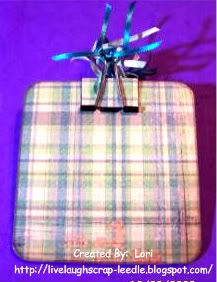
Thanks for looking. Questions & comments are always welcomed.
Lori
These first 2 holders are an adaptation from the Pocket Card. I just didn't put pockets on the inside, I added sticky notes. The cardstock measurements & score line measurements are just altered to fit the sticky noted.
1st one:
Mini Monograms Cart for scallops & circle
MS Doily Border Punch
Studio G December Stamp Set
Velcro for closure
ATG


2nd one:
Mini Monograms Cart for circle & scallop
Ribbon for decoration & closure
CAD to punch holes for ribbon
Stamp- ?
ATG & Pop Dots


I got the inspiration for this one from This Video of Angie's.
Crimper Book Style:
Fiskar's Crimper
Ribbon
ATG
Mini Monograms Cart for circle & scallop
Glossy Accents
Prima flower
Making Memories Bronze Snap
CAD to attach snap


I think this one is my most favorite of all. The inspiration for this one came from This Video of Angie's.
Coaster & Binder Clip Style:
4x4 140 lb. Watercolor Paper (chipboard or coaster work well too)
4x4 Patterned cardstock for both sides.
A small piece of matching cardstock to fit on the binder clip
Ribbon
Mod Podge to cover each side after printed cardstock is attached. I also put some on the edges. I think it helps to seal it a little better.
ATG

The back side. This sticky note holder can be used either way depending on the user's mood. Also the sticky notes are not stuck down, so no damage when they are finished. Just add a new pad of sticky notes.
Thanks for looking. Questions & comments are always welcomed.Lori
Labels:
ATG,
Crimper,
Crop-A-Dile,
MM,
Mod Podge,
MS Doily Border Punch,
Ribbon,
Stamps,
Sticky Note Holders
Wednesday, August 12, 2009
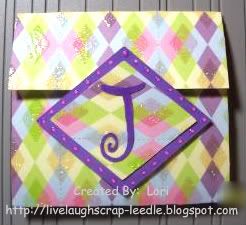
Another Pocket Card/Envie
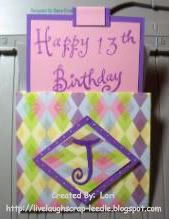
This one is for some friends' daughter. It's hard to believe we have known Jordan since she was in Kindergarten. Now she is 13.
I used George & Basic Shapes for the diamonds and Mini Monograms (I think) for the J.
Front:
Open & Pull Out:
Thanks for looking. Questions & comments are always welcomed.
Lori
A Proud member of The Lime Light. Click on over to see what we are doing.
I used George & Basic Shapes for the diamonds and Mini Monograms (I think) for the J.
Front:
Open & Pull Out:
Thanks for looking. Questions & comments are always welcomed.Lori
A Proud member of The Lime Light. Click on over to see what we are doing.
Labels:
ATG,
CDS,
GBS,
Liquid Embossing,
MM,
Pocket Envelope Card,
Scor-Pal,
Stamps
Tuesday, July 14, 2009
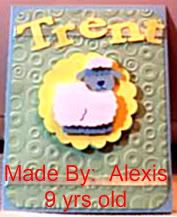
Alexis' 1st Challenge Entry
I came across a post on the Cricut MB about fun things for kid's to do. Well this little girl (with the help of her mom) started a blog for kids to do craft challenges. The name of the blog is Scrappy Piglet. Ainsleigh is the most adorable thing. She likes making cards with her mom, but she didn't want to do the same challenges. So she is making up her own challenges for kids 13 & under to participate in.
The first challenge was to make a card with your favorite animal on it. I have to tell you Alexis loved making this card. I "FINALLY" (as she would say) taught her to use the baby Cricut. She originally wanted to put a horse on it, then she saw the lamb & fell in love with it. She has a baby boy cousin being born in a couple of weeks, so she made this card to welcome him to the family.
She had so much fun using the Cricut, ATG, & Cuttlebug. You should have seen her face when I told her that she could use my ATG. She said "Me, all by myself?!!"
Details:
Carts: Plantin Schoolbook for the name, Mini Monograms for the scalloped circle, & Animal Kingdom for the lamb.
Cuttlebug & Spots & Dots embossing folder.
She used pop dots to pop up the fur of the lamb & the entire scallop.
Misc. ribbon was used for a border on the top & bottom of the card.
Thanks for looking. Questions & comments are always welcomed.
Lori
A Proud member of The Lime Light. Click on over to see what we are doing.
Thursday, July 2, 2009
More Trinchies and Inchies Swaps (Due Aug 31)
Well, someone in our Trinchies Swap could not fulfill their commitment. So I took 2 extra spots. Not a problem b/c I have become so addicted to making these Inchies, Twinchies, and Trinchies and am having a ball.
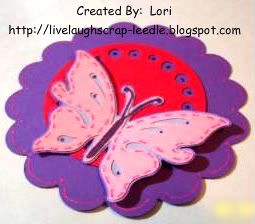
I used Mini Monograms for the Scallop & the center circle. i used the indie Art cart for the butterfly.
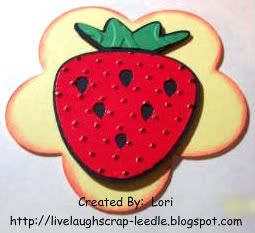
I think i used the Mini Monograms Cart for the shadow flower base. I used Indie Art for the strawberry & ran the red & green parts through the Cuttlebug with embossing folders.
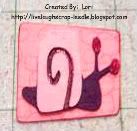
Now onto the inchies. The bee, turtle, & snail are all from the Walk In My Garden Cart. The Fleur di lis is from the Wild Card Cart. I like trying to do the bases a little different shape as long as they fit the size requirement. I used the cylinder (bee) and the (Shift H) (snail) on the George & Basic Shaped Cart.
Thanks for looking. Questions & comments are always welcomed.Lori
A Proud member of The Lime Light. Click on over to see what we are doing.
Monday, May 25, 2009
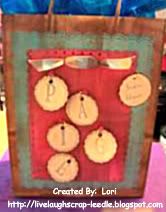
Happy Birthday Paige (Gift Bag)
I made this gift bag for one of my daughter's best friend's birthday. They don't go to school together anymore & don't get to see each other as much as they would like. So, I wanted her bag to be a little special. I'm sorry the pics don't really do it justice.
Details:
I ran a brown ink pad over the craft paper brown bag & pink & aqua cardstock.
On the aqua cardstock, I used that MS Doily Border Punch (all 4 sides)
On the pink cardstock, I used the Fiskar's Threading Water Border Punch (all 4 sides)
I used the faux bow technique on the top of the pink cardstock.
I cut out scallop circles using the Mini Monograms Cart.
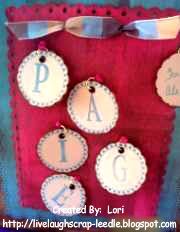
I spelled out her name with the scallop circles using my 1 5/8" Stamp Rite wooden stamper and the large letters & the dotted border from The Stamp Castle.
I used my CAD II to kind of randomly punch 5 holes in the pink cardstock. I knotted pink ribbon in the holes and taped in on the back.
I then used a jump ring to attach the letters to the ribbon.
We used an extra scallop circle to have a from tag & attached it to the edge of the top layer.
I layered them all together & attached it to the front of the bag.
Close up:
Thanks for looking. Questions & comments are always welcomed.Lori
A Proud member of The Lime Light. Click on over to see what we are doing.
Subscribe to:
Posts (Atom)