Click on the title to see how to be entered for this SUPER Blog Candy. You won't want to miss this one.
Thanks for looking. Questions & comments are always welcomed.
Lori
A Proud member of The Lime Light. Click on over to see what we are doing.
Monday, July 27, 2009
Sunday, July 26, 2009
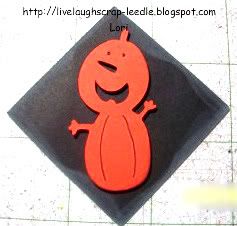
Halloween Twinchies & Inchies (Oct. 10) & Christmas Twinchies & Inchies (Nov. 30)
Twinchies:
Inchies:
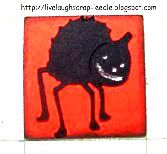
 These are my last Twinchies & Inchies for the Cricut MB swaps. I know they won't be my last, but they are for a little while. They are so much fun to make. I can't wait to get all of mine back & see everyone else's great work.
Inchies:
These are my last Twinchies & Inchies for the Cricut MB swaps. I know they won't be my last, but they are for a little while. They are so much fun to make. I can't wait to get all of mine back & see everyone else's great work.Thanks for looking. Questions & comments are always welcomed.
Lori
A Proud member of The Lime Light. Click on over to see what we are doing.
Lori
A Proud member of The Lime Light. Click on over to see what we are doing.
Friday, July 24, 2009
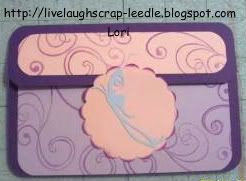
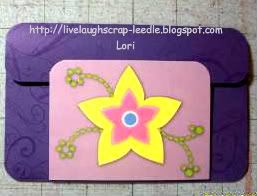
Pocket Envelope / Card
I want to thank Angie for her wonderful videos. There is a link on the right side of my blog under "My Favorite Videos", where you can see all of her videos - Chic 'n Scratch Videos. You can see this one HERE, this is where I got the inspiration for these Pocket Envelope / Cards.
I made both of these for my BFF's daughter. Her name is Fallyn and she has a birthday coming up and a dance review.
This one is going to be for her birthday.
This one is going to be for her dance review.
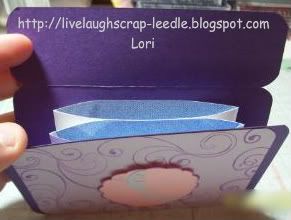
This pic kind of shows how it works. There are 2 pockets inside, one for a message and the other for a gift card, money, or whatever will fit. The image on the front holds the flap of the envelope closed.
I can see me making so many more of these. They are so easy and fun to make.
Thanks for looking. Questions & comments are always welcomed.Lori
A Proud member of The Lime Light. Click on over to see what we are doing.
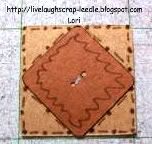
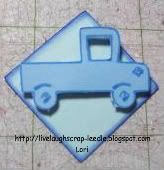
Rainbow inchie Swap (Due: September 30)
These are the inchies that I made for the Rainbow Inchie Swap on the Cricut MB. We had to make 20 of each color & we could decorate them any way we wanted to. The only stipulation was that they could only include the one color of that group. We could use white minimally as an accent color if needed & black for stamping if needed. The only one that I needed to use whit on was the popsicle (for the sticks - blackout layer). On all of the others I just used different shades of the same color. These are so much fun to do.
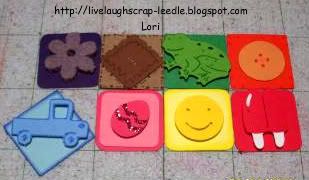
Here are the individual pics to show more detail:


Thanks for looking. Questions & comments are always welcomed.
Lori
A Proud member of The Lime Light. Click on over to see what we are doing.
Tuesday, July 21, 2009
The Lime Light (Task 9): DBCC
Click the The Lime Light, to see everything that we are doing.
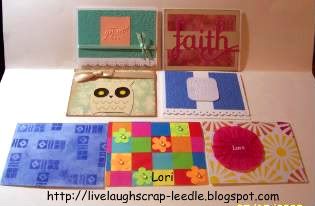
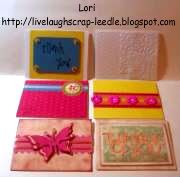
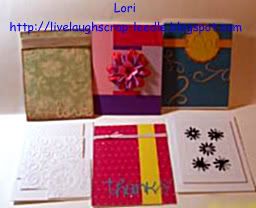
These cards were made to benefit the patients & staff at the Delaware Breast Cancer Coalition. One of our design team members has a sister-in-law that is a breast cancer survivor & now works for this wonderful organization. Please click the link above to see what all they do & what they are about. You can click Cheryl Doucette to see what she has to say about DBCC.

Lori
A Proud member of The Lime Light. Click on over to see what we are doing.
Monday, July 20, 2009
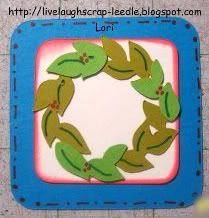
Baby Boy Wreath
I made this wreath for the hospital door for my nephew (Godson) that will be born tomorrow. It is very simple, but I am proud how it turned out. I got the inspiration from TERRYMORROW1 on the Cricut MB. She posted a wreath that she had made. When I saw it, it was perfect timing. You can click HERE to see the one that she made.
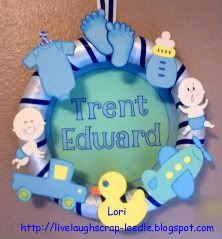
Details:
The wreath form and some of the ribbon came from Dollar tree.
Everything else was from my stash.
I used the New Arrival Cart for all of the images and (I think) Plantin Schoolbook for the font.
I wrapped the form with a wide white ribbon. Then I wrapped a light blue (hard to see) ribbon cover the seams of the white ribbon. Over that I wrapped a skinny navy blue ribbon in the center of the light blue one. I cut & decorated all of the images & arranged them on the wreath. I used Terrifically Tack Tape to adhere it all. I used some more ribbon the make a hanger for the wreath.
Thanks for looking. Questions & comments are always welcomed.Lori
A Proud member of The Lime Light. Click on over to see what we are doing.
Tuesday, July 14, 2009
Alexis' 1st Challenge Entry
I came across a post on the Cricut MB about fun things for kid's to do. Well this little girl (with the help of her mom) started a blog for kids to do craft challenges. The name of the blog is Scrappy Piglet. Ainsleigh is the most adorable thing. She likes making cards with her mom, but she didn't want to do the same challenges. So she is making up her own challenges for kids 13 & under to participate in.
The first challenge was to make a card with your favorite animal on it. I have to tell you Alexis loved making this card. I "FINALLY" (as she would say) taught her to use the baby Cricut. She originally wanted to put a horse on it, then she saw the lamb & fell in love with it. She has a baby boy cousin being born in a couple of weeks, so she made this card to welcome him to the family.
She had so much fun using the Cricut, ATG, & Cuttlebug. You should have seen her face when I told her that she could use my ATG. She said "Me, all by myself?!!"
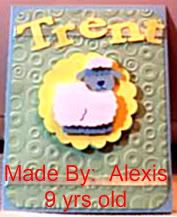
Details:
Carts: Plantin Schoolbook for the name, Mini Monograms for the scalloped circle, & Animal Kingdom for the lamb.
Cuttlebug & Spots & Dots embossing folder.
She used pop dots to pop up the fur of the lamb & the entire scallop.
Misc. ribbon was used for a border on the top & bottom of the card.
Thanks for looking. Questions & comments are always welcomed.
Lori
A Proud member of The Lime Light. Click on over to see what we are doing.
Friday, July 10, 2009
Want to Win $1000?!!!

The Cuttlebug Spot is giving away $1000 (a gift Certificate from Custom Crops)!!! All you need to do is click HERE to see all of the details. They want to reach 1000 followers. But to top it off they are going to give away a $50 gift certificate every Friday until they reach their goal.
Thanks for looking. Questions & comments are always welcomed.Lori
A Proud member of The Lime Light. Click on over to see what we are doing.
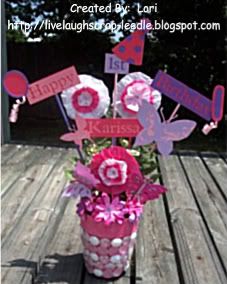
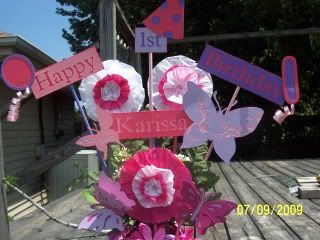
Birthday Bouquet: Revamped Newborn Bouquet
You can click HERE to see what the Newborn Bouquet looked like. This was for my God Daughter. I told my brother that I would re-do it for special occasions in her life. I took out all of the sticks & newborn cuts & gave them to them to use in her scrapbook.
Then I turned it into a Happy 1st Birthday Bouquet:
I used Plantin Schoolbook for the signs & Doodlecharms for the Birthday hat. I can't remember which cart the balloons came from. The butterflies came from Home Accents & Indie Art.
The big pink & white flowers I made. I used crept paper streamers that I had left over from Karissa's baby shower. I ran thread down one side of the crept paper & gathered it. The I attached the 2 ends together to make a circle. To get the circled in different sized just trim the crept paper to varying widths. I layered them & added a skittle to the center. I got this wonderful idea from Johanna, so thanks Johanna. I saw her describing these on this VIDEO, please go check it out - she has other great ideas for that crept paper.
 Thanks for looking. Questions & comments are always welcomed.
Lori
A Proud member of The Lime Light. Click on over to see what we are doing.
Then I turned it into a Happy 1st Birthday Bouquet:
I used Plantin Schoolbook for the signs & Doodlecharms for the Birthday hat. I can't remember which cart the balloons came from. The butterflies came from Home Accents & Indie Art.
The big pink & white flowers I made. I used crept paper streamers that I had left over from Karissa's baby shower. I ran thread down one side of the crept paper & gathered it. The I attached the 2 ends together to make a circle. To get the circled in different sized just trim the crept paper to varying widths. I layered them & added a skittle to the center. I got this wonderful idea from Johanna, so thanks Johanna. I saw her describing these on this VIDEO, please go check it out - she has other great ideas for that crept paper.
Thanks for looking. Questions & comments are always welcomed.Lori
A Proud member of The Lime Light. Click on over to see what we are doing.
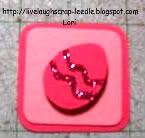
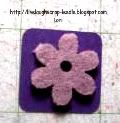
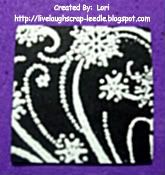
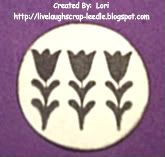
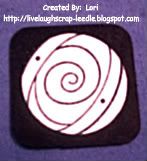
Black & White Inchie Swap (Due Sept. 15)
These are the inchies for the Black & White Inchie Swap on the Cricut MB. These are so addicting. I just love making these.

Thanks for looking. Questions & comments are always welcomed.
Lori
A Proud member of The Lime Light. Click on over to see what we are doing.
The Lime Light 2009-2010 Team Members
I want to welcome all of our new Design Team Members. For those of you that don't know, The Lime Light is a Charitable Design Team. We use our love of crafts to help those in local and national communities. Our crafts have been used to lift the spirts of our American troops and the families and patient of Children's hospitals. We have made cards for a local organizations to use as a fundraiser to re-build a children's playground. We made thousands of butterflies for the Holocaust Museum. There is so much more we have done in just a very quick short year. Our team member count has expanded this year & we are so happy to have our new members aboard. Please click The Lime Light site to see what we have done and to see what will be coming up.
Also please visit our member's blogs to welcome them & to enjoy their wonderful creations. I am so proud to be a member of this wonderful team.
Our members are:
Bonnie Rose: alifeunrehearsed2.blogspot.com
Chris: mudmaven.blogspot.com
Crystal: http://www.scrapcandydesigns.blogspot.com/
Diana: dianasausomecreationsetc.blogspot.com
Gracie: everythingcricut.blogspot.com (Team Leader)
Joy: http://www.obsessedwithscrapbooking.com/ (Design Director)
Leah: paperblossoms.blogspot.com
Lisa R.: Blog Coming Soon
Lori: http://livelaughscrap-leedle.blogspot.com/
Lorraine: coldwaters2.blogspot.com (Consulting Ambassador)
Melanie: courtney-lane.blogspot.com
Peg: pegscraftingcorner.blogspot.com
Randi: randijc.blogspot.com
Ruth: ruelysicreativecards.blogspot.com (Quarterly Project Co-Director)
Sammye Jo: http://www.62cards.blogspot.com/
Sandra: t42originals.blogspot.com
Susan: suescricutandcrafts.blogspot.com (Training Director)
Tammy: ladybugandcompany.blogspot.com (Quarterly Task Co-Director)
Terry: inspire-a-tion.blogspot.com (Publicity Director)
Thanks for looking. Questions & comments are always welcomed.
Lori
A Proud member of The Lime Light. Click on over to see what we are doing.
Thursday, July 2, 2009
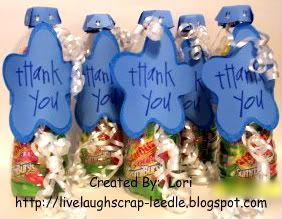
Water Bottle Party Favors
I want to Thank Scrapalette from the Cricut MB for this idea. She made 2 Liter Bottle Gifts & was kind enough to show us how she did it.
HERE is the link to her project & directions.
So I just did the same with the regular size water bottles. I thought it would be fun to see the "know-it-all" thirteen year old boys trying to get it open. And better yet trying to figure out how i got the big items in the bottle in the first place. All they wanted to do was cut it open to get the stuff out. Oh well, it was a fun way to package the favors anyway.
 Thanks for looking. Questions & comments are always welcomed.
Lori
A Proud member of The Lime Light. Click on over to see what we are doing.
HERE is the link to her project & directions.
So I just did the same with the regular size water bottles. I thought it would be fun to see the "know-it-all" thirteen year old boys trying to get it open. And better yet trying to figure out how i got the big items in the bottle in the first place. All they wanted to do was cut it open to get the stuff out. Oh well, it was a fun way to package the favors anyway.
Thanks for looking. Questions & comments are always welcomed.Lori
A Proud member of The Lime Light. Click on over to see what we are doing.
More Trinchies and Inchies Swaps (Due Aug 31)
Well, someone in our Trinchies Swap could not fulfill their commitment. So I took 2 extra spots. Not a problem b/c I have become so addicted to making these Inchies, Twinchies, and Trinchies and am having a ball.
I used Mini Monograms for the Scallop & the center circle. i used the indie Art cart for the butterfly.

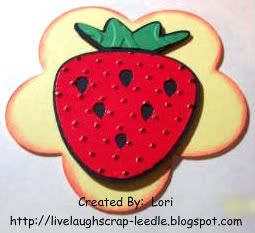
I think i used the Mini Monograms Cart for the shadow flower base. I used Indie Art for the strawberry & ran the red & green parts through the Cuttlebug with embossing folders.
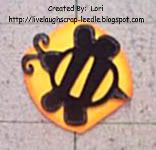
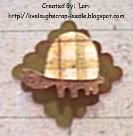
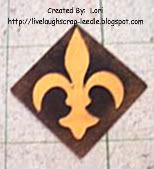
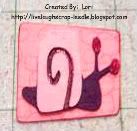
Now onto the inchies. The bee, turtle, & snail are all from the Walk In My Garden Cart. The Fleur di lis is from the Wild Card Cart. I like trying to do the bases a little different shape as long as they fit the size requirement. I used the cylinder (bee) and the
Lori
A Proud member of The Lime Light. Click on over to see what we are doing.
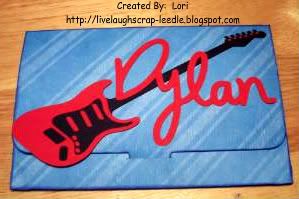
Dylan's 13 YO Card/Envie
This card/Envie was for my son's best friend. I was having a hard time coming up with an idea of what to do. Masculine cards are hard enough, but for a 13 YO boy - geez. I was stressing. I want to thank VickiPowell1 from the Cricut MB again. She gave me some wonderful ideas & this is what I came up with.
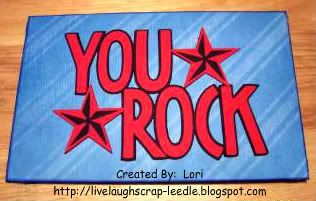
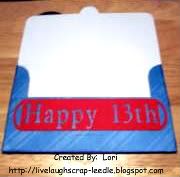
I cut the All in One Envie from the Tags, Bags, Boxes, & More Cart. Decorated it with Indie Art Guitar & Stars. The font used was from Opposites Attract. The Tag inside was from Plantin Schoolbook.
Front:
Back:
Inside:
 Thanks for looking. Questions & comments are always welcomed.
Lori
A Proud member of The Lime Light. Click on over to see what we are doing.
I cut the All in One Envie from the Tags, Bags, Boxes, & More Cart. Decorated it with Indie Art Guitar & Stars. The font used was from Opposites Attract. The Tag inside was from Plantin Schoolbook.
Front:
Back:
Inside:
Thanks for looking. Questions & comments are always welcomed.Lori
A Proud member of The Lime Light. Click on over to see what we are doing.
Father's Day T-Shirts & a Card
I haven't posted in a while, so the next few posts will be things that I have made recently. I don't remember all of the details of everything i used or did. But I will try to put as much information as I can. I used the Freezer Paper Technique (See This Post for a video link) for both T-shirts. This technique is so easy & fun.
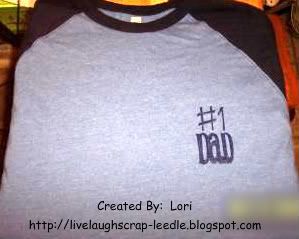
This is the T-shirt that I made for my husband for Father's Day. I'm pretty sure that the DaD is from Beyond Birthdays & I think the #1 came from George.
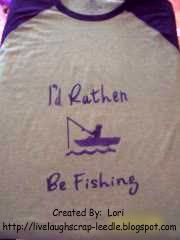
Here is the one that i made for my dad. I can't remember which cart I got the font from on this shirt, but the image is from Cricut Sampler.
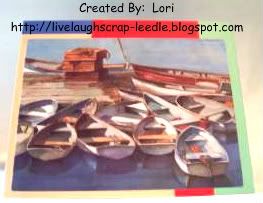
I made this card for my dad for Father's Day. My son's b-day was in May. The boat image was the front of a card that he received. I thought it fit perfectly with my dad's fishing shirt & would do a fishing card too. So I cut the front of the card off & pulled colors from it to make the card front of my card.
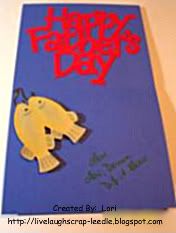
Here is the inside. The Fish & the sentiment came from the Wild Card Cart. I used markers & chalks to shade & give detail to the fish. I them gave the fish a coat of Mod Podge to give it a little shine, pop dotted the fish & done.
Lori
A Proud member of The Lime Light. Click on over to see what we are doing.
Subscribe to:
Posts (Atom)