Followers, Guestbook, & Comments

My followers are being shown in the right column. My Guestbook is at the bottom. Please follow, comment on posts, & sign my guest book. Your comments encourage me to keep sharing my work. I love hearing from you all.

When you leave a comment, I have to moderate it before it will be posted. So if you have a questions or comments, feel free to ask & if necessary note that you don't want your comment posted.

Friday, February 27, 2009

My First Wordbook: I Finally Did It!!!

I want to thank everyone & anyone that has ever posted pictures and/or directions on how to make a wordbook. I probably have looked at it & got inspiration to make this.
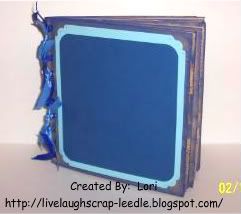
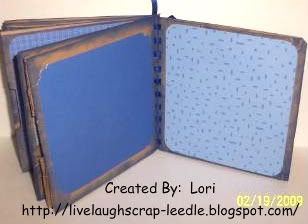
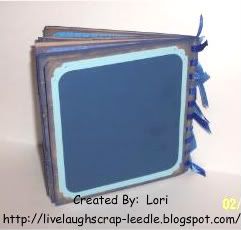
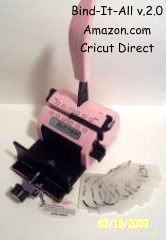
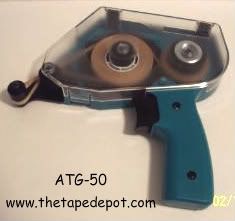
I am so glad I waited to get my ATG and BIA to do this. I don't think it would have been as easy or as fun to do. I made this with my daughter's name. It was a test run piece and there are some flaws, but that's why I made this one for us. Overall I am very proud of it. I still have to add pics, but it is fully decorated & put together.
Details:
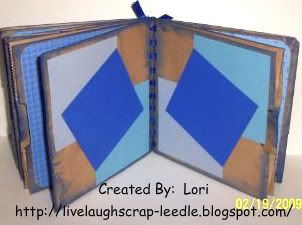
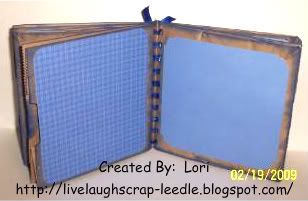
I used CDS with George and Basic Shapes & Opposites Attract (shadow for the letters) to make the pages. I used a cereal box for one page and some cardboard from a Crayola Stamp Set box as chipboard. I covered front of each page with a dark pink cardstock and the back of each page with a light pink cardstock. I then sanded down any rough edges and inked around the edges on both sides of each page.
I punched the holes & bound the book using my new BIA and 3/4' o-wires.
I cut the letters out again not using the shadow feature and layered them onto the shadow letters of the pages.
For decorations I used:
Misc. cardstock, skittles (plastic Decorative Accents from M's), Fastenator & Staples, Ribbon, Cuttlebug Embossing Folders & Sizzix Embossing Plates, Border Punches - Leave-it-to-Weaver, Fleur-di-lis, & Threading Water, Misc. Brads, Prima Flowers, Misc. Buttons, Sanding Block for embossing, & ColorBox Pigment Inks for details & embossed papers.
Thanks for looking. Questions and comments are alwyas welcomed.
Lori
A Proud member of The Lime Light. Click on over to see what we are doing.

Friday, February 20, 2009

I've Been Purse Tagged

Thanks Angelique, she says with a sigh!! Don't worry your stone will be coming back at you when you least expect it, Ha Ha.
Disclaimer to this tag: I don't mind tags, I generally think they are kind of fun, however after this one - I will only play along with craft related tags.
Well, Angelique if you thought your purse was a let down for purse fanatics. Mine will be downright horrifying. I carry a purse on a daily basis for necessities. However, I am not a purse person. I generally buy a new purse when the current one is falling apart. Sometimes I might switch for a little while to basically a wallet on a strap. As for clutches or any kind of nighttime or dress up bag - forget it. If I'm out with hubby or out to have fun, I don't carry one at all. I don't remember exactly how much it was, probably around $20. No story, it was just time for a new one & this one was in front of me at of all places Sports Authority.
OK, the rules:
1) Show a pic of the purse you are using right now - not last weekend when you had a great date or special occasion - NO CHEATING!!!
2) Tell us how much it cost - No judgements will be made. And if there is a story behind the purse or you you got - Tell Us Please!!
Well here is my catastrophe of a purse........
Now I guess I have to pick 5 others for this daunting task. And for those that get this from me: 1) I am sorry. 2) Given my disclaimer, I understand if you don't pass it on.
The victims are:
KLW520 - Sorry I don't know your name.
Lori
A Proud member of The Lime Light. Click on over to see what we are doing.

Thursday, February 19, 2009

Paper Bag Album: 1st Project with BIA & ATG

This is the first project that I have done with my BIA & ATG. I still don't have the wires to bind with my BIA so I just used it to punch the binding holes. This was so much easier to get it all lined up correctly & all holes were punched at the same time so all are aligned properly. I just use varying shades of blue ribbon to bind the Paper Bag Album. I inked around the pages with ColorBox Petals Pigment Ink before putting the cardstock mats on the pages. I used my Fiskars (Heritage) corner rounder on some of the pages and a Fiskars round corner rounder on other pages. My ATG was used to adhere all of the cardstock to the paper bag pages. I'm still not sure where this album will be going, so it still needs to be embellished. That will be done mostly with Cricut cuts and lots of other embellies.

I just can't say enough about my ATG. I just LOVE it.

Front Cover: It is hard to see but there are iridescent glitter glue dots on each corner of the light blue.
Pgs. 1 & 2:
Pgs. 3 & 4:
Pgs. 5 & 6:
Pgs. 7 & 8:
Pgs. 9 & 10:
Back Cover: Same as the front with the glitter glue.
Thanks for looking. Questions and comments are always welcomed.
Lori
A Proud member of The Lime Light. Click on over to see what we are doing.

Happy Dance! Happy Dance! Happy Dance! Bind-It-All & ATG

Well here are my newest and favorite tools, Bind-It-All v. 2.0 and ATG (Automatic Tape Gun). Newest & favorite next to my Cricut that is! These are really belated Christmas gifts and I am so glad to have them.
My BIA: My SIL & BIL gave me a gift certificate for Amazon.com so this is what it went towards. I have played with it a little (project in future post). I say a little, b/c I still don't have any binding wires. I have them on order from a gift certificate from Hobby Lobby from my other BIL & SIL - with that I am also getting the tool kit (blue) and the Round-It-All (pink 1/2") for the corners of my books & projects.
My ATG: My grandmother always gives us money for Christmas. I try ( doesn't always happen) to use it for something that I really want. This year I did. Well this is the one I have been waiting for ever since I found the Cricut MB. Those people over there really do enable. This has been a topic of many debates on which one to get. I chose the ATG 50, b/c it was much more cost effective. The Tape Depot offers free shipping and I have heard so many great reviews on this gun and the company. Their tape is cheaper than I have found anywhere else & so far I don't have any problems with it.
Tip on loading the ATG: The tape has to pushed down completely onto the front wheel. There is little tab on the base of the front wheel. This has to be lined up with one of the holes in the core of the tape and push it on all the way. There are also 2 notches on the back wheel. I threaded the tip of the tape into it to hold it securely. If you do these 2 things, you will not have any problem with your tape rolling firmly onto the back wheel.
I just found a great video on youtube from CCCamigos that explains it perfectly how to load & use the ATG-50. Click HERE to see it.
Thanks for looking. Questions and comments are always welcomed.
Lori
A Proud member of The Lime Light. Click on over to see what we are doing.

25 More Butterflies

These are the rest of the butterflies that I made for "The Butterfly Project" that The Lime Light is doing. This is a really great cause, please try to help if you can. Any amount even 1 will help and you can get your friends and children involved as well. Click on the title for instructions & more details.
HERE is the post for my 1st 25 plus 2 that my daughter made.
Don't forget: We have members that are offering BLOG CANDY for BUTTERFLIES!
LEAH and GRACIE Click their names to get to their blog candy.
Thanks for looking. Questions and comments are always welcomed.
Lori
A Proud member of The Lime Light. Click on over to see what we are doing.

Friday, February 13, 2009

Valentine's Party Favors

Well, these are the party favors for my daughter's second grade class. I was having a hard time with how to make favors for boys for Valentines day that were not too "girly". Well, they will like the candy inside anyway.
I made 4 red ones for the boys. I stamped the red cardstock with white ink. I used the XOXOXO stamp in the Studio G Feb. set. Then I made bookmarks (using CDS to weld hearts & a rectangle) stamped with red on red hearts & layered silhouette ans solid hearts on the ends of the bookmark. I used white ribbon with red hearts on the end of the bookmarks and to attach them to the sour cream containers. Click HERE for instructions. I also used my crimper & Terrifically Tacky Tape to seal the edges. To make the containers I used 8 x 5 1/2 cardstock. I wanted these to be a little bigger. They are filled with a mini fruit roll up, a fruit by the foot, and a plastic heart maze.
I made 7 pink ones for the girls. The girl's containers are pink with red hearts stamped (misc. stamp that I picked up somewhere). For the bookmarks I used a deeper pink & stamped love on them from the Feb. Studio G set. I made the ends of these with white & lighter pink hearts. The ribbon on these where pink with red hearts.
Thanks for looking. Questions and comments are always welcomed.
Lori
A Proud member of The Lime Light. Click on over to see what we are doing.

Wednesday, February 11, 2009

Kreativ Blogger Award - Thanks Diane


Thank You, Thank You, Thank You Diane!!
She sent my blog an award, AGAIN. With so many very talented bloggers out there, I really consider this an honor. So this is what I have to do: I have to pick 7 bloggers that I think deserve this award. This is a very hard task , b/c so many of you are so very deserving of this.
Here are the 7 that are getting the award from me:
Michelle - Everyday Me
Thanks for looking. Questions and comments are always welcomed.
Lori
A Proud member of The Lime Light. Click on over to see what we are doing.

Tuesday, February 10, 2009

2 Plus 25 Butterflies for "The Lime Light"

Here is the 1st set of butterflies that I have made for "The Butterfly Project". You can click the title of this post to see what we are doing and how you can help. That link will also have a direct link to "The Butterfly Project" for more information on why we are doing this. Please also visit Leah's Blog for Blog Candy for Butterflies. She is one of our newest & very generous Lime Light Team members.

The first 2 butterflies were made by my 8 yr. old daughter. I told her that I was making butterflies for my design team. When I told her that they were going to a museum to represent so many children that were killed so long ago, she wanted to help too. I inspired her, so I hope some of my butterflies will inspire you to make some too. Even a few help, whatever you can do will be appreciated.

Alexis used her Cuttlekids and a die to make the little butterflies and flower shapes. I gave her some of the butterfly bases & she took it from there. She is so proud of herself. Please leave a comment for her. It will make her day.


The next 25 are the ones that I made.


Thanks for looking. Questions and comments are always welcomed.
Lori
A Proud member of The Lime Light. Click on over to see what we are doing.