This tag was made for 2 challenges.
1) Paper Cutz Challenge #47: Make any project incorporating either circles, stars, or squares. So on this one I used all three.
2) My Pink Stamper: Robyn gave a color challenge. The colors to use were Pink, Orange, Brown, & Green. At first, I thought "No Way!!!" But, after seeing all of the sample projects, it didn't seem so bad. Also, Craft Junkie Too was asked to be a guest designer for this challenge. On her blog she has a prize for this challenge.
So click on over to all 3 blogs to check out every one's great work & join in on the fun.
Details:
I used my Gypsy and Cricut to design & create this project.
Cartridges used: Plantin Schoolbook (Tag), George & Basic Shapes (Star), Forever Young (Flower & Circle)
Cuttlebug with the Spots & Dots Embossing folder
Fastenator
Ribbon
MS Glitter
Thanks for looking. Questions & comments are always welcomed. Lori
Followers, Guestbook, & Comments
My followers are being shown in the right column. My Guestbook is at the bottom. Please follow, comment on posts, & sign my guest book. Your comments encourage me to keep sharing my work. I love hearing from you all.
When you leave a comment, I have to moderate it before it will be posted. So if you have a questions or comments, feel free to ask & if necessary note that you don't want your comment posted.
Showing posts with label PSB. Show all posts
Thursday, July 1, 2010
Monday, June 28, 2010
Tyler "T"
A friend requested this letter for her nephew. I will be very interested in his response to getting this as a gift. I know young boys would probably like these letters, but this is for a sophomore in High School. He plays baseball at the playground and is into bowling. I did his name in his school colors. Details:
I used my Gypsy & Cricut to design & decorate this letter.
Cartridges used: Sports Mania (Glove, Bats, & Baseball), Paper Doll Dress Up & George & Basic Shapes (Bowling Ball & Pins) The pins are actually the caveman's club. I just stretched it a bit & added a rectangle for the stripe.
Thanks for looking. Questions & comments are always welcomed. Lori
Labels:
Acrylic Paint,
Cricut,
GBS,
Gypsy,
PDDU,
PSB,
SM,
Wall Letters
Monday, June 14, 2010
Wall Letters - Meagan & Natalie
I made these letters quite a while back. A friend of mine wanted them for her daughters birthdays. I had to wait until they received them to be able to post. Then time got away from me, but there they are.
I used my Gypsy, SCAL, & Cricut to design and create these letters.
Natalie likes swimming, acting, music, & loves writing stories. Her room is a dark aqua color. So this is the letter that represents her.
The cartridges that I used for Natalie's letter are: Tear Drop (Name), Sports Mania (Swimmer), Locker Talk (Paper, Comedy/Tragedy Masks, & Music Plaque), & Stretch Your Imagination (Music Notes)
Thanks for looking. Questions & comments are always welcomed. Lori
I used my Gypsy, SCAL, & Cricut to design and create these letters.
Natalie likes swimming, acting, music, & loves writing stories. Her room is a dark aqua color. So this is the letter that represents her.
The cartridges that I used for Natalie's letter are: Tear Drop (Name), Sports Mania (Swimmer), Locker Talk (Paper, Comedy/Tragedy Masks, & Music Plaque), & Stretch Your Imagination (Music Notes)
Meagan is all about high school right now. She is going to be a freshman this coming school year. Therefore we have the school mascot (Go Yellow Jackets!!!! - My son is in school with Meagan- LOL) & the "H". She is on the dance team and softball team. Her room is a very dark purple. This is why we have the purple letter with all of the black & gold school themed cuts.
The mascot was done using SCAL. I want to throw out a HUGE THANK YOU to Aymee @ A Southernbelle's SVG's. I was having the hardest time making a file for the mascot & she did it and did it quick. So Thank You Aymee!!!!! You can visit her blog to get that file if you need it for anything.
The cartridges that I used on this letter are: Gypsy Font (Name), Beyond Birthdays (Girl - that I converted to a dancer), Locker Talk (Dance Sign), Plantin Schoolbook (H), & Sports Mania (Softball).
Oh, BTW - They Loved Them!!!!Thanks for looking. Questions & comments are always welcomed. Lori
Labels:
Beyond Birthdays,
GF,
LT,
PSB,
SCAL,
SM,
SYI,
TD,
Wall Letters
Sunday, April 11, 2010
Cruise Luggage Tags
My aunt is going on a cruise next month. I made some luggage tags for her & her friend. I cut them using my Gypsy & SCAL.
Front:
The tags were cut using the Plantin Schoolbook Cart. I got the svg file for the Cruise Ship from A Southernbelle's SVG's. Please click on over to visit her blog. She is very talented & so very generous to share her work.
Back:
I put their names on the back.
Allen was cut out with the Plantin Schoolbook Cart.
Simone was cut out using the Gypsy Font Cart.
Thanks for looking. Questions & comments are always welcomed.
Lori
Wednesday, April 7, 2010
4 More Wall Letters - K, T, G, J
I made wall letters for my niece & 3 nephews for Easter. I still find it a little bit of a challenge to make these for boys, but I think they are turning out pretty good.
"K" for Karissa
She will be 2 in July. Everything we have done for her has been pink & purple & involves butterflies. I used the Gypsy Wanderings cart for the butterflies, Home Accents cart for the branch & flowers, & the Alphalicious Cart. for her name.
"T" for Trent
He will be 1 in July. I knew I was going with 2 shades of blue. With him being so young, I knew that whatever I did - he will eventually grow out of it. So, I went with a truck & a train from the New Arrivals Cart. His name was cut using the Plantin Schoolbook Cart.
"G" for Garrett
He made 3 in January. He just loves anything to do with balls. So what better cart to use than the Sports Mania Cart. His name was cut using the Plantin Schoolbook Cart.
"J" for Jason
Jason is going to be 8 in October. He is a wiz with putting puzzles together and he loves Spiderman. I found some Spiderman comic books (new ones - not collectibles) and cut some of the Spideys out. I sprayed them with Krylon Preserve It so that they will last. Then for the puzzles, I painted some pieces red, freehand painted some spider webs, & coated them with Triple Thick. I cut his name from SCAL.
Thanks for looking. Questions & comments are always welcomed.
Lori
Labels:
Acrylic Paint,
Alpha,
Door Hanger,
GW,
Gypsy,
Gypsy Wanderings,
NA,
PSB,
SCAL,
SM,
Wall Letters
Easter "Easel" or "Pedestal" Card
This is the first "Easel" or "Pedestal" Card that I have made. I have to tell you that I love them. They are so easy to design & put together. I also think they make such a wonderful presentation. Thanks to Mary at Cardz TV for her video tutorial. Click on over to see it.
Front:
Standing: Sorry about the color - don't know what happened. The first pic is more of how it actually looks.
Thanks for looking. Questions & comments are always welcomed.
Lori
Front:
Standing: Sorry about the color - don't know what happened. The first pic is more of how it actually looks.
Thanks for looking. Questions & comments are always welcomed.
Lori
Thursday, February 18, 2010
Valentine's Card for Hubby
I made this card and decided to give it to my husband for Valentine's Day. I know - a lot pink - but it is Valentine's Day. He loved it anyway, maybe more for the sentiment than the actual card, but he loved it all the same.
Details:
Flower - Plantin School Book Cricut Cart, Grunge Flower Technique
(This was my first try at it - I think it came out pretty good although it could use some inking.)
Love - Beyond Birthdays Cricut Cart
Tonic Border Punch System - Hearts Punch
Stitching & Ribbon
My Pink Stamper Stamps - "I Love You" & "My Sweet One" on the inside.
Thanks for looking. Questions & comments are always welcomed.
Lori
Labels:
Beyond Birthdays,
Cricut,
Grunge Flower,
PSB,
Ribbon,
Stamps,
Stitching,
Tonic Border Punch System
Monday, January 11, 2010
Valentines & Valentine's Party Favors
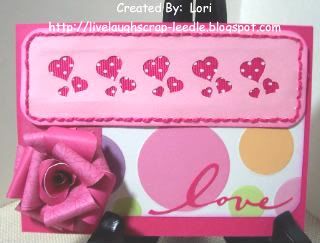
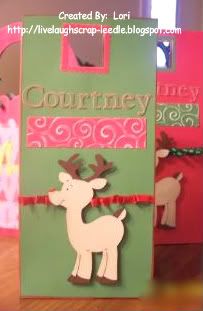
I made these for my daughter to give out for Valentine's Day. The heart and arrow were cut from the Hello Kitty Greeting Cricut Cart.
The Be My Valentine was cut from the Wild Card Cricut Cart.
Then I just adhered them to individual Valentine Lik-N-Dip Packs and wrote her name in the From space on the other side.
To see videos about it:
Tonic Border Punch System Videos parts 1 & 2
Tonic Boot Punch Videos parts 1 & 2
Tonic Border Punch System Information: Click HERE
To order or for more info, contact Cheryl Horton / Inspire Me HERE
Cheryl is a dear to work with and will answer any questions that you have.
Thanks for looking. Questions & comments are always welcomed.
Lori
The Be My Valentine was cut from the Wild Card Cricut Cart.
Then I just adhered them to individual Valentine Lik-N-Dip Packs and wrote her name in the From space on the other side.
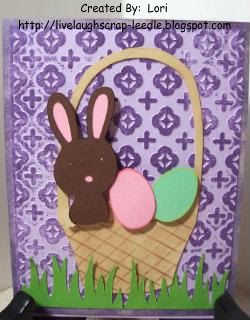
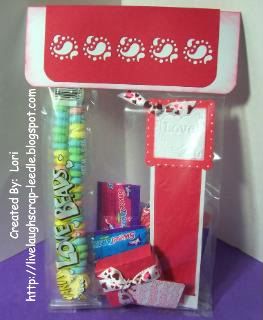
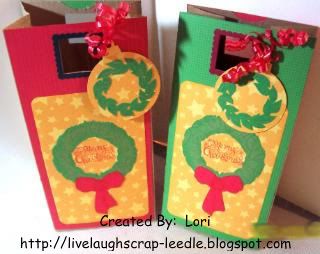
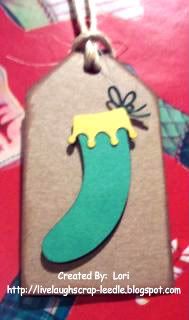
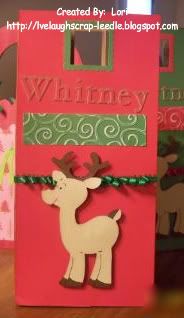
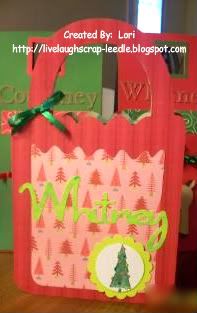
This pic is of the Valentine's Party favor bags that I made for my daughter's class.
For the topper I just cut white cardstock & scored down the middle, rounded the corners & inked with Tim Holtz's Distress Ink Pad (Worn Lipstick). I cut the red cardstock a little smaller, scored down the middle & rounded the corners. Then I used my Tonic Border Punch System with the Paisley II Punch to make the design across the front. (Info about the Tonic Border punch System is at the bottom of this post.) I have the Heats Punch on its way to me, but I was impatient & wanted to get these done over the weekend. I still think it is cute & the boys will like it too. I filled with Misc. Candy, Candy Love Beads, Bookmark, and Decorated Mini Nerds. I then stapled the white part of the topper to the bag. I layered the red part of the topper over the white (adhered with ATG), this hid the staple. From is stamped on the back of the topper & my daughter wrote in her name.
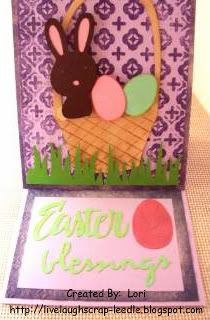
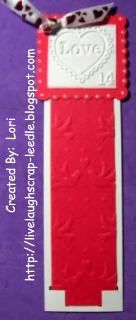
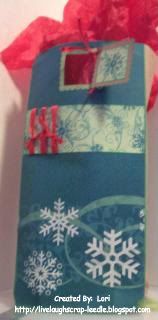
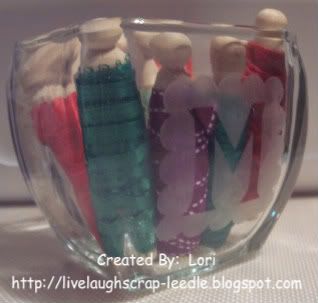
This is the bookmark that I made.
I cut red & white rectangles, just using my paper trimmer. I cut the red ones a little smaller for layering.
I used my Marvy 2 1/2" Scallop Square Punch (red - 2 for each bookmark) and the 2" Square Punch for the white. I ran the white squares through my Cuttlebug using the Love Stamp Embossing Folder. Then I used the Tonic 2-in-1 Arrowhead Corner Punch on the bottom of the white rectangles. The red rectangles were run through my Cuttlebug using the Doves & Hearts (Christmas Set) Sizzix Embossing Plates. I adhered the red rectangles the the white ones tucking the corners into the punched corners. I adhered the red squares on the top, white on top of that. I white doodle dots around the scallop square. I used a 2 slot hole punch on the top left corner & threaded ribbon & tied a knot bow. I then adhered the other red square to the back for a finished off look.
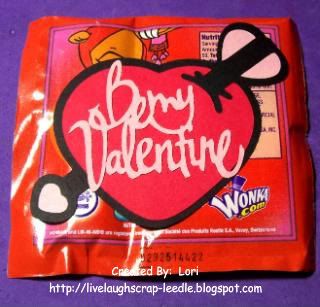
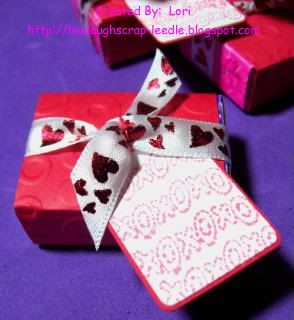
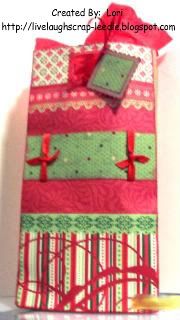
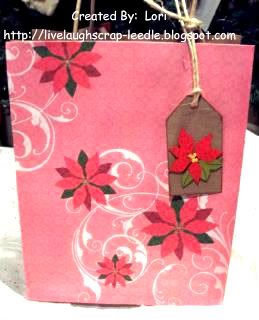
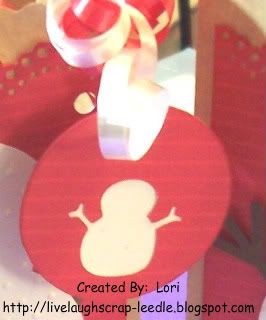
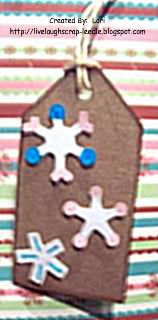
This is the covered Mini Nerds that I decorated.
The inspiration for this came from Angie @ Chic'n Scratch Live. You can see her video for her Valentine Nerds HERE. I'm sure her instructions were clear, but I was doing these in the middle of the night & was confused for some reason (not unusual for me in the middle of the night or not when it comes to measurements - LOL). So this is how I did them.
Red cardstock 4 5/16" x 1 5/8" - Scored @ 5 /16" on both ends then on one end @ 1 13/16" & 2 7/16". I ran it through my Cuttlebug using the Spots & Dots Embossing Folder
I cut the scallop tag from the Plantin School Book Cricut Cart. @ 1 1/2" in white & 1 1/2" shadow in red. I stamped in Worn Lipstick Distressed Inkpad the xoxoxo Studio G $1 Clear Stamps (Feb. Set) on the white tags. layered the white & red tags.
Tied a ribbon knot bow around the box. Using red thread attached the tags to the ribbon.
Tonic Border Punch System Information:To see videos about it:
Tonic Border Punch System Videos parts 1 & 2
Tonic Boot Punch Videos parts 1 & 2
Tonic Border Punch System Information: Click HERE
To order or for more info, contact Cheryl Horton / Inspire Me HERE
Cheryl is a dear to work with and will answer any questions that you have.
Thanks for looking. Questions & comments are always welcomed.
Lori
Labels:
CDS,
Cricut,
Cuttlebug,
Gifts,
HKG,
Party Favors,
PSB,
Punches,
Ribbon,
Stamps,
Tonic Border Punch System,
Valentines,
WC
Thursday, December 31, 2009
Gift Bags & Tags
Ok, here is some of what I have been working on for Christmas. I have been very busy since before Thanksgiving trying to get everything made & finished. So in this & then next 5 posts there might not be much detail. You can always leave a comment or send me an email if you want to know something specific about what i used or how I did something. Also there are some things that I did not have a chance to take pics of, but you all will get most of it. Some still can't be shown b/c we have not done our Christmas with everyone yet. Hopefully I will be able to post the rest after this weekend.
Bags that I made to put giftcards in. I thought it made a nice touch as opposed to just having the giftcard holder. They were made from very small craft paper bags.
These were made from the same small craft paper bags. I made these to put the snowman ornaments that I made for some family members. You can see the Christmas Ornaments HERE.


Thanks for looking. Questions & comments are always welcomed.
Lori
Bags that I made to put giftcards in. I thought it made a nice touch as opposed to just having the giftcard holder. They were made from very small craft paper bags.
These were made from the same small craft paper bags. I made these to put the snowman ornaments that I made for some family members. You can see the Christmas Ornaments HERE.
The next 3 pics are bags that I made using regular brown paper lunchbags. The first pic I made 10 of these varying a little, but basically the same design. The other 2 are one of a kind.

This bag was a medium sized craft paper gift bag that I decorated and made a tag for.
This is the gift tag that I made to put on the small snowman bags.
The rest of these tags were just cut from craft paper cardstock inked and embellished with a decorated Cricut cut.


Lori
Monday, November 30, 2009
Glass Etching - Candle Bowl
I made this candle bowl for my grandmother Mamie for Christmas. (Yes, I know there are ribbon spools in the bowl.) Than bowl would not photograph well with the candle in it, so I added the colorful ribbon. This was the first etching I had done since high school, too many years ago to worry about. But it was fun & I will be making several more to Christmas gifts.
Details:
The scallop square is cut from the Mini Monograms Cart.
The M is from the Plantin Schoolbook Cart.
I used clear contact paper to cut the design out of & layered it onto the glass.
Armour Etch. I left it on for a good 30-45 min with great results. I knew I had to leave it on longer that recommended, so I really didn't time it. I put it on 7 started working on some other stuff then just checked it a while later. I scraped off as much as I could & put it back into the bottle. Then I rinsed it off thoroughly before removing the contact paper. Wash well & dry.
Thanks for looking. Questions & comments are always welcomed.
Lori
4 Giftbags - Whitney & Courtney
My mom & dad's neighbor asked me to make 2 gift bags for each of his daughters. All he wanted was for them to have a Christmas theme and to have their names on them.
These first 2 were made using Okieladybug's idea. You can check out her video HERE.
Details:
A regular brown paper lunch bag
Plantin Schoolbook Cart for the letters
Paper Doll Dress Up Cart for the reindeer
Cuttlebug & the Divine Swirls Embossing Folder
Misc. Ribbon
2" square punch & 21/2" scallop square punch to make the handles


For these next 2, I used an idea that I found on the Cricut MB from TammaraCarr. You can see her project HERE. thank You Tammara for this wonderful idea. Here is my take on your idea.
Details:
A regular brown paper lunch bag (You have to cut some off the top of the bag so that it does not show over the DC bag cut.)
Doodlecharms Cart for the giftbag and layer (When you cut one for the backside - flip the image so that they match up evenly.)
Opposites Attract Cart for the names
Mini Monograms Cart for the circle & scallop circle
Studio G $1 Stamps colored in with markers
Misc. ribbon (I made the bows using my Cricut Cut Bow Easy.)

Thanks for looking. Questions & comments are always welcomed.
Lori
These first 2 were made using Okieladybug's idea. You can check out her video HERE.
Details:
A regular brown paper lunch bag
Plantin Schoolbook Cart for the letters
Paper Doll Dress Up Cart for the reindeer
Cuttlebug & the Divine Swirls Embossing Folder
Misc. Ribbon
2" square punch & 21/2" scallop square punch to make the handles


For these next 2, I used an idea that I found on the Cricut MB from TammaraCarr. You can see her project HERE. thank You Tammara for this wonderful idea. Here is my take on your idea.
Details:
A regular brown paper lunch bag (You have to cut some off the top of the bag so that it does not show over the DC bag cut.)
Doodlecharms Cart for the giftbag and layer (When you cut one for the backside - flip the image so that they match up evenly.)
Opposites Attract Cart for the names
Mini Monograms Cart for the circle & scallop circle
Studio G $1 Stamps colored in with markers
Misc. ribbon (I made the bows using my Cricut Cut Bow Easy.)

Thanks for looking. Questions & comments are always welcomed.Lori
Tuesday, November 24, 2009
My First Mini Lunch Kit (Still Unfinished)
This lunch kit is still unfinished, but I wanted to show it just basically covered. I want to Thank Okieladybug for sharing her .cut files and video for this project HERE.
Like I said, this was my first one - so improvements are needed. But all in all, I think it came out well. I did cut out the holes for the handle & will probably wrap it with ribbon scraps. Okie's .cut files made it so much easier though. Thank You So Much!!!
I will post again when I get it all decorated. I still have to figure out what will fill it & who will get it.
Like I said, this was my first one - so improvements are needed. But all in all, I think it came out well. I did cut out the holes for the handle & will probably wrap it with ribbon scraps. Okie's .cut files made it so much easier though. Thank You So Much!!!
I will post again when I get it all decorated. I still have to figure out what will fill it & who will get it.Thanks for looking. Questions & comments are always welcomed.
Lori
Lori
Labels:
.cut file,
CDS,
Mini Lunch Kits,
Okieladybug,
PSB
Monday, October 19, 2009
Halloween Party Favors
These are the Halloween Party Favors that I made for my daughter's class. I covered toilet paper rolls with either orange or black cardstock. The I attached the Paper Doll Witches & Frankensteins to them. I cut out circles and attached them to the bottoms of the rolls with Zip Dry Glue (This stuff made an excellent bottom - holds great even when filled.)
I filled them with Skittles, Starbursts, Halloween Kaleidoscopes, Halloween Pencils, and Halloween Bookmarks.
Details:
Dolls are all Paper Doll Dress Up Cart.
Faces are Peachy Keen Stamps & hand doodled.
I used markers & gel pens to hand embellish the dolls & clothing.
Bookmarks: Base is from the Tags Bags Boxes & More Cart. The stacked pumpkins are from the Stretch Your Imagination Cart. I cut off the feet, arms, & scarf.
Tag is from the Plantin Schoolbook Cart. "BOO" is stamped from a Martha Stewart Halloween stamp set that I got on clearance at M's last year. I also edged with a black stamp pad
Thanks for looking. Questions & comments are always welcomed.
Lori
I filled them with Skittles, Starbursts, Halloween Kaleidoscopes, Halloween Pencils, and Halloween Bookmarks.
Details:
Dolls are all Paper Doll Dress Up Cart.
Faces are Peachy Keen Stamps & hand doodled.
I used markers & gel pens to hand embellish the dolls & clothing.
Bookmarks: Base is from the Tags Bags Boxes & More Cart. The stacked pumpkins are from the Stretch Your Imagination Cart. I cut off the feet, arms, & scarf.
Tag is from the Plantin Schoolbook Cart. "BOO" is stamped from a Martha Stewart Halloween stamp set that I got on clearance at M's last year. I also edged with a black stamp pad
Standing & wrapped in Cello bags.

Lori
Labels:
Bookmarks,
Crop-A-Dile,
GBS,
Gifts,
Halloween,
Party Favors,
PDDU,
Peachy Keen Stamps,
PSB,
Stamps,
SYI,
TBBM,
Zip Dry Glue
Monday, July 20, 2009
Baby Boy Wreath
I made this wreath for the hospital door for my nephew (Godson) that will be born tomorrow. It is very simple, but I am proud how it turned out. I got the inspiration from TERRYMORROW1 on the Cricut MB. She posted a wreath that she had made. When I saw it, it was perfect timing. You can click HERE to see the one that she made.
Details:
The wreath form and some of the ribbon came from Dollar tree.
Everything else was from my stash.
I used the New Arrival Cart for all of the images and (I think) Plantin Schoolbook for the font.
I wrapped the form with a wide white ribbon. Then I wrapped a light blue (hard to see) ribbon cover the seams of the white ribbon. Over that I wrapped a skinny navy blue ribbon in the center of the light blue one. I cut & decorated all of the images & arranged them on the wreath. I used Terrifically Tack Tape to adhere it all. I used some more ribbon the make a hanger for the wreath.
Thanks for looking. Questions & comments are always welcomed.Lori
A Proud member of The Lime Light. Click on over to see what we are doing.
Labels:
Cricut,
NA,
Peachy Keen Stamps,
PSB,
Wreaths
Tuesday, July 14, 2009
Alexis' 1st Challenge Entry
I came across a post on the Cricut MB about fun things for kid's to do. Well this little girl (with the help of her mom) started a blog for kids to do craft challenges. The name of the blog is Scrappy Piglet. Ainsleigh is the most adorable thing. She likes making cards with her mom, but she didn't want to do the same challenges. So she is making up her own challenges for kids 13 & under to participate in.
The first challenge was to make a card with your favorite animal on it. I have to tell you Alexis loved making this card. I "FINALLY" (as she would say) taught her to use the baby Cricut. She originally wanted to put a horse on it, then she saw the lamb & fell in love with it. She has a baby boy cousin being born in a couple of weeks, so she made this card to welcome him to the family.
She had so much fun using the Cricut, ATG, & Cuttlebug. You should have seen her face when I told her that she could use my ATG. She said "Me, all by myself?!!"
Details:
Carts: Plantin Schoolbook for the name, Mini Monograms for the scalloped circle, & Animal Kingdom for the lamb.
Cuttlebug & Spots & Dots embossing folder.
She used pop dots to pop up the fur of the lamb & the entire scallop.
Misc. ribbon was used for a border on the top & bottom of the card.
Thanks for looking. Questions & comments are always welcomed.
Lori
A Proud member of The Lime Light. Click on over to see what we are doing.
Friday, July 10, 2009
Birthday Bouquet: Revamped Newborn Bouquet
You can click HERE to see what the Newborn Bouquet looked like. This was for my God Daughter. I told my brother that I would re-do it for special occasions in her life. I took out all of the sticks & newborn cuts & gave them to them to use in her scrapbook.
Then I turned it into a Happy 1st Birthday Bouquet:
I used Plantin Schoolbook for the signs & Doodlecharms for the Birthday hat. I can't remember which cart the balloons came from. The butterflies came from Home Accents & Indie Art.
The big pink & white flowers I made. I used crept paper streamers that I had left over from Karissa's baby shower. I ran thread down one side of the crept paper & gathered it. The I attached the 2 ends together to make a circle. To get the circled in different sized just trim the crept paper to varying widths. I layered them & added a skittle to the center. I got this wonderful idea from Johanna, so thanks Johanna. I saw her describing these on this VIDEO, please go check it out - she has other great ideas for that crept paper.

Thanks for looking. Questions & comments are always welcomed.
Lori
A Proud member of The Lime Light. Click on over to see what we are doing.
Then I turned it into a Happy 1st Birthday Bouquet:
I used Plantin Schoolbook for the signs & Doodlecharms for the Birthday hat. I can't remember which cart the balloons came from. The butterflies came from Home Accents & Indie Art.
The big pink & white flowers I made. I used crept paper streamers that I had left over from Karissa's baby shower. I ran thread down one side of the crept paper & gathered it. The I attached the 2 ends together to make a circle. To get the circled in different sized just trim the crept paper to varying widths. I layered them & added a skittle to the center. I got this wonderful idea from Johanna, so thanks Johanna. I saw her describing these on this VIDEO, please go check it out - she has other great ideas for that crept paper.

Thanks for looking. Questions & comments are always welcomed.Lori
A Proud member of The Lime Light. Click on over to see what we are doing.
Thursday, July 2, 2009
Dylan's 13 YO Card/Envie
This card/Envie was for my son's best friend. I was having a hard time coming up with an idea of what to do. Masculine cards are hard enough, but for a 13 YO boy - geez. I was stressing. I want to thank VickiPowell1 from the Cricut MB again. She gave me some wonderful ideas & this is what I came up with.
I cut the All in One Envie from the Tags, Bags, Boxes, & More Cart. Decorated it with Indie Art Guitar & Stars. The font used was from Opposites Attract. The Tag inside was from Plantin Schoolbook.
Front:

Back:

Inside:
Thanks for looking. Questions & comments are always welcomed.
Lori
A Proud member of The Lime Light. Click on over to see what we are doing.
I cut the All in One Envie from the Tags, Bags, Boxes, & More Cart. Decorated it with Indie Art Guitar & Stars. The font used was from Opposites Attract. The Tag inside was from Plantin Schoolbook.
Front:

Back:

Inside:
Thanks for looking. Questions & comments are always welcomed.Lori
A Proud member of The Lime Light. Click on over to see what we are doing.
Friday, May 22, 2009
Teacher Appreciation Week: Day 4 - Certificate & Day 5 - Book
I finally finished up the Teacher Appreciation gifts for my daughter's teacher. For Day 4 (Thursday), she is giving her a certificate made from the Cricut.
Details:
Cricut Cartridge: Plantin Schoolbook
I backed it with blue cardstock. I cut the certificate in yellow then cut the letters using Plantin Schoolbook to cut the words. I used Cricut Design Studio to weld the teacher's name, from, & my daughter's name.
For day 5 (Friday), she is giving her a book. I got the idea for the design of the cover from a Cardmaker's Sketch Book. They had a card with a very similar design on it.
Details:
I cut out the shape of the covers using the George & Basic Shapes Cart. For the cover pages I used 140 lb. water color paper & covered them on both sides with patterned cardstock.
I used the Bind-It-All to bind the book. I ran a brown stamp pd over the bight green cardstock to add some texture. I stamped the flowers and colored over some of the stamp parts with yellow and blue glitter pens. I also made stitch marks with the glitter pens. I finished it off with green ribbon and prima flowers in green, brown, blue & a green brad. I had some silk leaves & placed one behind the flower. I also added blue & green skittles to balance it out.
Thanks for looking. Questions & comments are always welcomed.
Lori
A Proud member of The Lime Light. Click on over to see what we are doing.
Monday, May 18, 2009
Teacher Appreciation Week: Bouquet - Day 3
This is the bouquet that I made for my daughter to give to her teacher for the 3rd day (Wednesday) of Teacher Appreciation Week.
Details:
Apple, Ribbon, & #1 Teacher was cut from the Cricut Sampler Cart. (I think)
Bag, A+, & Teacher's name was cut from the Plantin Schoolbook Cart. Also Cricut Design Studio was used to weld the letters together.
Flowers & leaves were cut from the Home Accents Cart.
I cut strips of paper & ran it though my crimper to make the grass filler in the bag.
I still have to make a tag to put on it, but that will be done before my daughter has to bring it to school.
Close up of top:
For the flowers: After I cut them, I crumpled them & rubbed a ColorBox Pigment ink pad over them. I layered them & put a yellow brad in the middle to hold them together. I attached all of the decorations to the painted skewers with Terrifically Tacky Tape.
Close up of bag:
Thanks for looking. Questions & comments are always welcomed.
Lori
A Proud member of The Lime Light. Click on over to see what we are doing.
Details:
Apple, Ribbon, & #1 Teacher was cut from the Cricut Sampler Cart. (I think)
Bag, A+, & Teacher's name was cut from the Plantin Schoolbook Cart. Also Cricut Design Studio was used to weld the letters together.
Flowers & leaves were cut from the Home Accents Cart.
I cut strips of paper & ran it though my crimper to make the grass filler in the bag.
I still have to make a tag to put on it, but that will be done before my daughter has to bring it to school.
Close up of top:For the flowers: After I cut them, I crumpled them & rubbed a ColorBox Pigment ink pad over them. I layered them & put a yellow brad in the middle to hold them together. I attached all of the decorations to the painted skewers with Terrifically Tacky Tape.
Close up of bag:
Thanks for looking. Questions & comments are always welcomed.Lori
A Proud member of The Lime Light. Click on over to see what we are doing.
Thursday, April 16, 2009
Wall Letters: B & K
I made these for my uncle & his wife. They wanted them for her grandchildren.
Bryson: I was scared of this one because I had never done one for a boy before. They told me that his room was decorated with a sports them and the colors were mostly blue & tan.
I painted the B blue, then painted tan dots all over it. I thought about stripes, but then thought that might be too busy. I had some carstock embellishments (football & basketball) that someone had sent me, so I put them behind the holes in the B. I cut out the letters using Opposites Attract in shadow (tan) & regular (blue) . I heat embossed blue tinsel embossing powder over the blue letters. I them put on some sports buttons and I had some truck, tractor, & train buttons so I added them too. I sealed it all with Mod Podge & Krylon Preserve It. After it was all done - it was the easier one I have done yet.

Kamryn: I stressed even harder over this one. All they told me was her room is decorated in ladybugs. When I asked a color scheme they just said red & black. I could not do the letter re or black (& I definitely didn't want to do it solid black), b/c the ladybugs would not show up. So, when I had done the M for my niece HERE, my son said that it looked like flowers. So I thought, ladybugs live in gardens & this K was born.
I painted the base of the K in lavender. I then sponge painted light green, yellow, pink, & light blue over the lavender. I started using some flourish stitching stencils as a guideline (I can't sew or paint) to make some dark green flourishes all over it. It ended up being easier to just free hand them. So what I painted looks like vines growing all over the K. I cut the letters out in shadow (black) & regular (red) from Plantin Schoolbook. I also cut some very small circles out of black. I layered the letters & cut some of the circles & layered them onto the red letters. They look like ladybug letters. I used the 50 States Cart. for the flowers (Missouri - I think). I cut them in light purple with pink centers & placed them randomly on the vines. I also placed some ladybug buttons randomly & facing all different directions on the vines. I sealed all of the paper cuts with Mod Podge before adhering them to the K. I them sealed the entire letter with Krylon Preserve It.
I am most proud of this letter b/c I actually painted it, I love my ladybug letters, & most of all I figured out how to use a black & red theme for a little girl's room.
Thanks for looking. Questions & comments always welcomed.
Lori
Bryson: I was scared of this one because I had never done one for a boy before. They told me that his room was decorated with a sports them and the colors were mostly blue & tan.
I painted the B blue, then painted tan dots all over it. I thought about stripes, but then thought that might be too busy. I had some carstock embellishments (football & basketball) that someone had sent me, so I put them behind the holes in the B. I cut out the letters using Opposites Attract in shadow (tan) & regular (blue) . I heat embossed blue tinsel embossing powder over the blue letters. I them put on some sports buttons and I had some truck, tractor, & train buttons so I added them too. I sealed it all with Mod Podge & Krylon Preserve It. After it was all done - it was the easier one I have done yet.

Kamryn: I stressed even harder over this one. All they told me was her room is decorated in ladybugs. When I asked a color scheme they just said red & black. I could not do the letter re or black (& I definitely didn't want to do it solid black), b/c the ladybugs would not show up. So, when I had done the M for my niece HERE, my son said that it looked like flowers. So I thought, ladybugs live in gardens & this K was born.
I painted the base of the K in lavender. I then sponge painted light green, yellow, pink, & light blue over the lavender. I started using some flourish stitching stencils as a guideline (I can't sew or paint) to make some dark green flourishes all over it. It ended up being easier to just free hand them. So what I painted looks like vines growing all over the K. I cut the letters out in shadow (black) & regular (red) from Plantin Schoolbook. I also cut some very small circles out of black. I layered the letters & cut some of the circles & layered them onto the red letters. They look like ladybug letters. I used the 50 States Cart. for the flowers (Missouri - I think). I cut them in light purple with pink centers & placed them randomly on the vines. I also placed some ladybug buttons randomly & facing all different directions on the vines. I sealed all of the paper cuts with Mod Podge before adhering them to the K. I them sealed the entire letter with Krylon Preserve It.
I am most proud of this letter b/c I actually painted it, I love my ladybug letters, & most of all I figured out how to use a black & red theme for a little girl's room.
Thanks for looking. Questions & comments always welcomed.Lori
A Proud member of The Lime Light. Click on over to see what we are doing.
Labels:
50 States,
Altered,
Heat Embossing,
Krylon Preserve It,
Ladybugs,
OA,
PSB,
Sports,
Wall Letters
Subscribe to:
Comments (Atom)


