Followers, Guestbook, & Comments

My followers are being shown in the right column. My Guestbook is at the bottom. Please follow, comment on posts, & sign my guest book. Your comments encourage me to keep sharing my work. I love hearing from you all.

When you leave a comment, I have to moderate it before it will be posted. So if you have a questions or comments, feel free to ask & if necessary note that you don't want your comment posted.
Showing posts with label HA. Show all posts

Tuesday, July 20, 2010

Dream BIG Frame

My niece & Godchild just made 2 years old.  I wanted to make something for her that I had not done before.  I had picked up a couple of frames when they were on sale & wanted to make something different.  Everything for her since she has been born has revolved around butterflies.  So I thought about a scenic picture & this is what I came up with.  It was fairly easy considering I don't really scrapbook.  Because of that, I didn't leave a place for a picture, but this can always be modified.  I just thought this would be cute hanging in her room.
Also being entered into Made By Momo's Tuesday Challenge.
Details:
I used my Gypsy and Cricut to design & create this frame.  I used lots & lots of carts on this project & lots of inking.  I use a wood grain stamp on the trunk if the tree.  I had to cut the tree out 3 times, twice in brown & once in tan.  I cut the swing seat off of the extra brown one & the ropes off of the tan one.
Cricut Carts. Used:  Just Because Cards (Sun & Tree), Everyday Paper Dolls (Clouds), Stamping (Birds & Butterfly - right), Create A Critter (grass), Gypsy Wanderings (Butterfly - lower left), Graphically Speaking (Butterfly - upper left), Walk in My Garden (Sunflowers), Home Accents (dream), A Child's Year (BIG)
Thanks for looking. Questions & comments are always welcomed. Lori

Monday, March 8, 2010

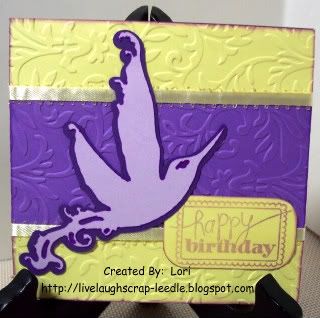
Happy Birthday Card for Stash

I have started making cards to have on hand.  I want to eventually do a craft fair & desperately need inventory.  How do you all do it?  Whenever I get time to craft, I NEED to make something for a party or some other occasion that came up.  This is a slow process for me, but it is steadily growing.
Here is a birthday card that I made.
Details:
Home Accents Cricut Cart for the bird
Cuttlebug (? - embossing folder)
Ribbon
Studio G $1 stamp (I think)

Thanks for looking. Questions & comments are always welcomed.
Lori
Friday, July 10, 2009

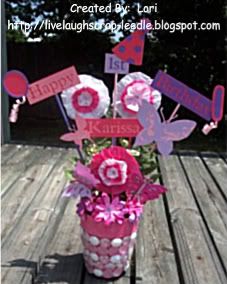
Birthday Bouquet: Revamped Newborn Bouquet

You can click HERE to see what the Newborn Bouquet looked like. This was for my God Daughter. I told my brother that I would re-do it for special occasions in her life. I took out all of the sticks & newborn cuts & gave them to them to use in her scrapbook.

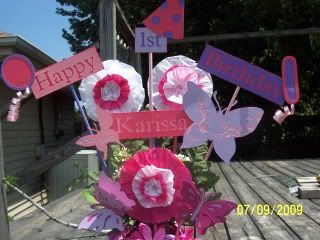
Then I turned it into a Happy 1st Birthday Bouquet:
I used Plantin Schoolbook for the signs & Doodlecharms for the Birthday hat. I can't remember which cart the balloons came from. The butterflies came from Home Accents & Indie Art.

The big pink & white flowers I made. I used crept paper streamers that I had left over from Karissa's baby shower. I ran thread down one side of the crept paper & gathered it. The I attached the 2 ends together to make a circle. To get the circled in different sized just trim the crept paper to varying widths. I layered them & added a skittle to the center. I got this wonderful idea from Johanna, so thanks Johanna. I saw her describing these on this VIDEO, please go check it out - she has other great ideas for that crept paper.


Thanks for looking. Questions & comments are always welcomed.
Lori
A Proud member of The Lime Light. Click on over to see what we are doing.

Monday, May 18, 2009

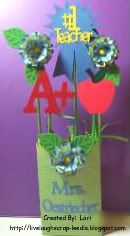
Teacher Appreciation Week: Bouquet - Day 3

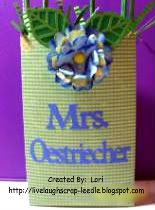
This is the bouquet that I made for my daughter to give to her teacher for the 3rd day (Wednesday) of Teacher Appreciation Week.

Details:
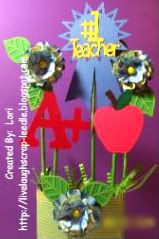
Apple, Ribbon, & #1 Teacher was cut from the Cricut Sampler Cart. (I think)
Bag, A+, & Teacher's name was cut from the Plantin Schoolbook Cart. Also Cricut Design Studio was used to weld the letters together.
Flowers & leaves were cut from the Home Accents Cart.
I cut strips of paper & ran it though my crimper to make the grass filler in the bag.
I still have to make a tag to put on it, but that will be done before my daughter has to bring it to school.
Close up of top:
For the flowers: After I cut them, I crumpled them & rubbed a ColorBox Pigment ink pad over them. I layered them & put a yellow brad in the middle to hold them together. I attached all of the decorations to the painted skewers with Terrifically Tacky Tape.
Close up of bag:
Thanks for looking. Questions & comments are always welcomed.
Lori
A Proud member of The Lime Light. Click on over to see what we are doing.

Thursday, April 16, 2009

Happy Anniversary Joann & Ernie

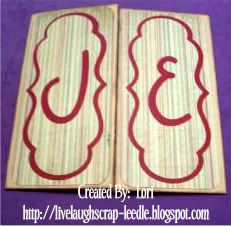
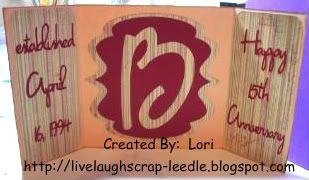
Today is my 15th wedding anniversary. But, no this card is not for my husband. I made this card for some very good friends. They were married on the same day as my husband & I. We didn't know them when we got married. Our sons started going to school together in Kindergarten (now in 7th grade). That is how we met. We knew each other for a couple of years before we realized that we shared the same exact anniversary. We will all be celebrating this milestone anniversary this year together. So, I made this card for them.
HAPPY 15TH ANNIVERSARY!! I hope the next 15 & beyond will be as good or better as the past 15.
Darren & I love you both.
Details:
Misc. solid cardstock
K & Company Printed Cardstock
Colorbox Pigment Ink (Bronze) for the edges
Cricut Cartridges used: Opposites Attract, George & Basic Shapes, & Home Accents
I also used Cricut Design Studio for sizing & hiding some elements.
I used my Ultimate Crafter's Companion for sizing & scoring the card & envelope (not pictured).
Thanks for looking. Questions and comments are always welcomed.
Lori
A Proud member of The Lime Light. Click on over to see what we are doing.