Followers, Guestbook, & Comments

My followers are being shown in the right column. My Guestbook is at the bottom. Please follow, comment on posts, & sign my guest book. Your comments encourage me to keep sharing my work. I love hearing from you all.

When you leave a comment, I have to moderate it before it will be posted. So if you have a questions or comments, feel free to ask & if necessary note that you don't want your comment posted.
Showing posts with label UCC. Show all posts

Monday, May 18, 2009

Teacher Appreciation Gift: Note Card Set (20) - Day 2

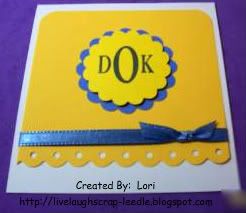
I made a set of 20 note cards and envelopes for my daughter's teacher for Teacher Appreciation week. These will be given to her on Tuesday. I am still working on projects for the rst of the week. I did them in the school colors, so she can use them for notes to parents. I also put her monogram on them so that can be used for personal reasons too.
Details:
Ultimate Crafter's Companion was used to make the cards.
Mini Monograms Cart was used to cut the scallop circles. i added pop dots between the scallops for some dimension.
I used the MS Threading Water border punch for the yellow layer & added ribbon with a faux bow for some decoration.
For the monogram, I used my 1 5/8" wooden stamper and small & large letters from Just Right. You can get them from The Stamp Castle. For the entire month of May you will get FREE SHIPPING when you use the promotional code: Lori1.
I also made a box to put the cards in.
Details:
The UCC was used to make the box.
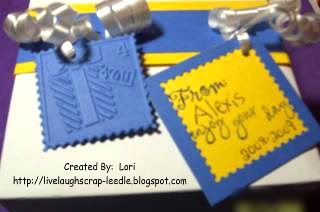
I made a belly band to wrap around the box to hold it closed.
I used the Cuttlebug for the tag with the Stamp Die & the 4 You Stamp embossing folder. With the edge of the Stamp negative, I made another tag for my daughter to sign.
I punched a hole in the tags & in the belly band with my Crop-a-dile & tied them on with some curly ribbon.
Thanks for looking. Comments & questions are always welcomed.
Lori
A Proud member of The Lime Light. Click on over to see what we are doing.

Wednesday, May 13, 2009

Flower Pot Card

I had first seen a flower pot card posted on the Cricut MB by Janet Waters. I thought the idea was so cute. Then I had seen a video on Dawn's Blog on how to make them. She had originally seen the instructions & measurements on Stephanie's Blog. To make this one, I used a combination of Dawn's & Stephanie's instructions & added a little of my own touches too.
It was made as a Thank You Card for some very good friends (honorary family), my daughter's Parran & his wife.


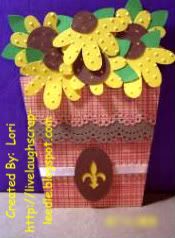
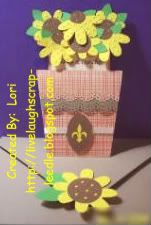
I used the instruction to cut the card & fold to make the flower pot. I also used their measurements to cut the pullout card. For the front top part of the pot I used my MS Doily Border Punch & added another bordered piece of cardstock for some contrast. I used pop-dots to have the top edge stand out a little. To hold pocket of the card, I just added a very small piece of Terrifcally Tacky Tape (red liner tape)to the top corners.
I cut the sunflowers from the Walk in my Garden Cart. in varying sizes. I used the Swiss Dots embossing folder with my Cuttlebug on the flowers to give some texture. I then added them to the top of the pull out card with pop-dots.
I decorated with a ribbon & I cut the oval from the George cart. & the fleur-de-lis from the Wild card cart.I used my Ultimate Crafter's Companion to make the envelope.
Thanks for looking. Comments and questions are always welcomed.
Lori
A Proud member of The Lime Light. Click on over to see what we are doing.
Thursday, April 16, 2009

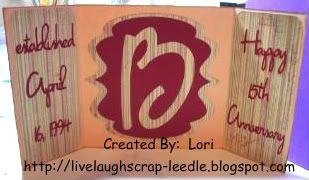
Happy Anniversary Joann & Ernie

Today is my 15th wedding anniversary. But, no this card is not for my husband. I made this card for some very good friends. They were married on the same day as my husband & I. We didn't know them when we got married. Our sons started going to school together in Kindergarten (now in 7th grade). That is how we met. We knew each other for a couple of years before we realized that we shared the same exact anniversary. We will all be celebrating this milestone anniversary this year together. So, I made this card for them.
HAPPY 15TH ANNIVERSARY!! I hope the next 15 & beyond will be as good or better as the past 15.
Darren & I love you both.
Details:
Misc. solid cardstock
K & Company Printed Cardstock
Colorbox Pigment Ink (Bronze) for the edges
Cricut Cartridges used: Opposites Attract, George & Basic Shapes, & Home Accents
I also used Cricut Design Studio for sizing & hiding some elements.
I used my Ultimate Crafter's Companion for sizing & scoring the card & envelope (not pictured).
Thanks for looking. Questions and comments are always welcomed.
Lori
A Proud member of The Lime Light. Click on over to see what we are doing.
Monday, April 13, 2009

Easter Party Baskets & Bookmarks

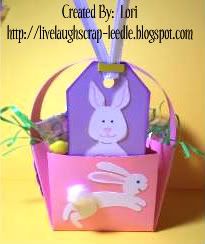
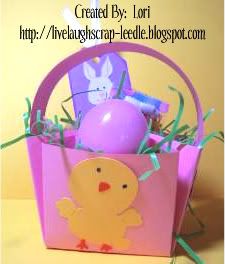
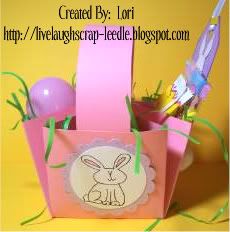
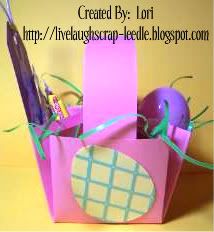
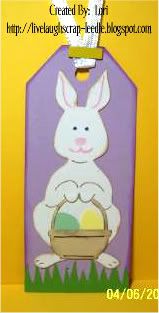
I made these Easter baskets for my daughter's class Easter Party. I made 7 pink ones & 4 blue ones. Of course, I also had to make a bookmark to put in it.
Details:
For the basket I used a 8 1/2 x 8 1/2 piece of cardstock. I used my Ultimate Crafter's Companion to score the box. I used the instructions in the DVD for the Pop Out Box and scored on the line for Tri-fold of a US Letter on all four sides then scored the corners from the intersection to the point & folded in. Instead of making a box top, I just glued the points together in the center. This gave 4 triangle pockets on the sides of the basket. I just cut a strip of cardstock for the handle & glues to the inside.
Side 1:
Hopping Bunny is cut from the Cricut Sampler Cartridge. Colored in with LePlume II markers and added a piece of cotton ball for the tail.
Side 2:
Chick is cut from the Stretch Your Imagination Cartridge.
Side 3:
Circle & scallop circle is cut from the Mini Monograms Cartridge. The stamp is Studio G $1 Stamp on a wood block. Colored in with LePlume II markers. I also used a Metallic Pink (Metallic Blue on the boys') pen to make doodle dots around the scallop (doesn't show up in the pic).
Side 4:
The egg is cut from the Doodlecharms Cartridge. The lattice is cut from the Wild Card Cartridge. Also not showing up in the pic are Metallic Yellow doodle dots at the intersection points of the lattice. On the boy's baskets the colors are reversed for the egg.
The Bookmark:
The tag and the grass is cut from the Plantin Schoolbook Cartridge. The bunny is cut from the Stretch Your Imagination Cartridge. The eggs and basket are from the Doodlecharms Cartridge. I used ColorBox Pigment Inks to ink around the edges. I used LePlume II markers for coloring in on the bunny & basket. I also used the Fastenator & colored staples to attach the ribbon on the tag. The only difference with the boy's bookmarks is that the tag is blue instead of purple.
Thanks for looking. Questions and comments are always welcomed.
Lori
A Proud member of The Lime Light. Click on over to see what we are doing.
Wednesday, March 18, 2009

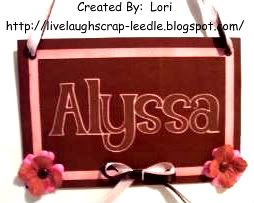
Alyssa's Doorhanger

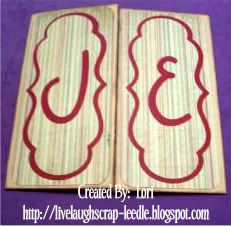
This doorhanger was made for a friend of my daughter. Her mom told me that her room is decorated in pink & brown & this is what I came up with.
Details:
Cricut Design Studio
Misc. cardstock
Misc. ribbon
Cricut Cartridges: G&BS & Alphalicious
Making Memories Eyelets
Prima Flowers & Misc. Brads.
I used my Ultimate Crafter's Companion to help make the bow along with Nilda's instructions.
ColorBox Pigment Ink Pads.
Thanks for looking. Questions and comments are always welcomed.
Lori
A Proud member of The Lime Light. Click on over to see what we are doing.