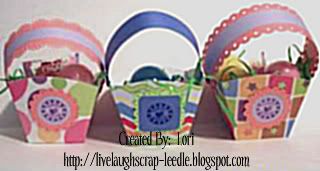
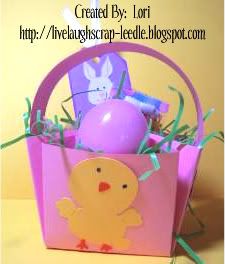
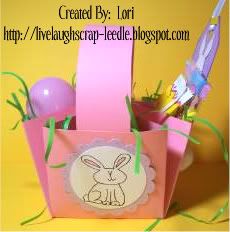
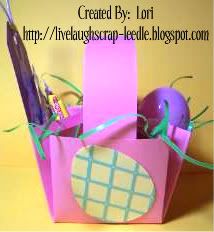
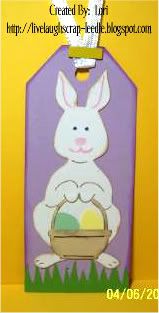
I made these Easter baskets for my daughter's class Easter Party. I made 7 pink ones & 4 blue ones. Of course, I also had to make a bookmark to put in it.
Details:
For the basket I used a 8 1/2 x 8 1/2 piece of cardstock. I used my Ultimate Crafter's Companion to score the box. I used the instructions in the DVD for the Pop Out Box and scored on the line for Tri-fold of a US Letter on all four sides then scored the corners from the intersection to the point & folded in. Instead of making a box top, I just glued the points together in the center. This gave 4 triangle pockets on the sides of the basket. I just cut a strip of cardstock for the handle & glues to the inside.
Side 1:
Hopping Bunny is cut from the Cricut Sampler Cartridge. Colored in with LePlume II markers and added a piece of cotton ball for the tail.
Side 2:
Chick is cut from the Stretch Your Imagination Cartridge.
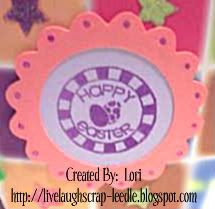
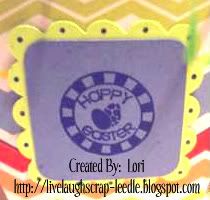
Side 3:
Circle & scallop circle is cut from the Mini Monograms Cartridge. The stamp is Studio G $1 Stamp on a wood block. Colored in with LePlume II markers. I also used a Metallic Pink (Metallic Blue on the boys') pen to make doodle dots around the scallop (doesn't show up in the pic).
Side 4:
The egg is cut from the Doodlecharms Cartridge. The lattice is cut from the Wild Card Cartridge. Also not showing up in the pic are Metallic Yellow doodle dots at the intersection points of the lattice. On the boy's baskets the colors are reversed for the egg.
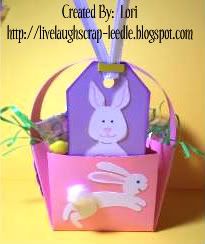
The Bookmark:
The tag and the grass is cut from the Plantin Schoolbook Cartridge. The bunny is cut from the Stretch Your Imagination Cartridge. The eggs and basket are from the Doodlecharms Cartridge. I used ColorBox Pigment Inks to ink around the edges. I used LePlume II markers for coloring in on the bunny & basket. I also used the Fastenator & colored staples to attach the ribbon on the tag. The only difference with the boy's bookmarks is that the tag is blue instead of purple.
Thanks for looking. Questions and comments are always welcomed.
Lori
A Proud member of
The Lime Light. Click on over to see what we are doing.