Followers, Guestbook, & Comments

My followers are being shown in the right column. My Guestbook is at the bottom. Please follow, comment on posts, & sign my guest book. Your comments encourage me to keep sharing my work. I love hearing from you all.

When you leave a comment, I have to moderate it before it will be posted. So if you have a questions or comments, feel free to ask & if necessary note that you don't want your comment posted.
Showing posts with label BIA. Show all posts

Thursday, December 31, 2009

Altered Dome Tin & Stationary Set

This is what kept me busy most of the time. I made 4 of these in total 1 for my daughter & 1 for each of my 3 nieces. They range in age from 8 to 12. I made them all in different color & patterned paper schemes, but all were basically the same design.
Thank you Okieladybug for the .cut file to cover these tins. I don't think I could have done it with out you.
This is the tin that I made for my daughter. She was so excited b/c she knew I was making them for my nieces, but had no idea that one of them would be for her too.
Front & Top:

Top:

I-Top Brad in Prima Flowers coated in Mod Podge.

Complete Stationary Set Contents:

Flip up notepad with very brightly colored pages:

Altered RSVP pen & Altered mini composition notebook:

Calendar made with my Bind it All

First page inside of calendar, calendar & note card for note & upcoming dates:

Thanks for looking. Questions & comments are always welcomed.
Lori

Friday, May 22, 2009

Teacher Appreciation Week: Day 4 - Certificate & Day 5 - Book

I finally finished up the Teacher Appreciation gifts for my daughter's teacher. For Day 4 (Thursday), she is giving her a certificate made from the Cricut.
Details:
Cricut Cartridge: Plantin Schoolbook
I backed it with blue cardstock. I cut the certificate in yellow then cut the letters using Plantin Schoolbook to cut the words. I used Cricut Design Studio to weld the teacher's name, from, & my daughter's name.
For day 5 (Friday), she is giving her a book. I got the idea for the design of the cover from a Cardmaker's Sketch Book. They had a card with a very similar design on it.
Details:
I cut out the shape of the covers using the George & Basic Shapes Cart. For the cover pages I used 140 lb. water color paper & covered them on both sides with patterned cardstock.
I used the Bind-It-All to bind the book. I ran a brown stamp pd over the bight green cardstock to add some texture. I stamped the flowers and colored over some of the stamp parts with yellow and blue glitter pens. I also made stitch marks with the glitter pens. I finished it off with green ribbon and prima flowers in green, brown, blue & a green brad. I had some silk leaves & placed one behind the flower. I also added blue & green skittles to balance it out.

Thanks for looking. Questions & comments are always welcomed.
Lori
A Proud member of The Lime Light. Click on over to see what we are doing.

Friday, March 20, 2009

Book for Alyssa

This is the book I made for Alyssa. Again her room is decorated in pink & brown. She just loved it.
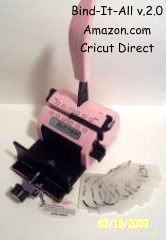
I used my BIA to punch the holes and bind the book with 1/2" o-wires (white). Oh, I just realized that I forgot to put ribbons on the wires. Oh well, she loved it anyway. I got more requests from the girl's that they want a book & door hanger for their b-days.
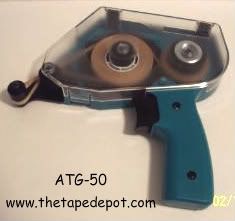
I, of course, used my ATG gun to attach all of the cardstock for the covers.
I used 140lb. watercolor paper (very strong & cuts beautifully in the cricut - I just put my blade depth on 6)
For the front cover, I cut out different size flowers from the George Cart (I think) on a strip of scrap cardstock. I used them as a template & sponged ink in the flower cut outs all over the pink part of the cover. Then I attached pink & brown prima flowers with dark pink & light pink skittles in the middle of the flowers.
Front Cover:
For the front cover, I cut out different size flowers from the George Cart (I think) on a strip of scrap cardstock. I used them as a template & sponged ink in the flower cut outs all over the pink part of the cover. Then I attached pink & brown prima flowers with dark pink & light pink skittles in the middle of the flowers.
Inside Front Cover:
 For the inside of the front cover, I just cut out the crown on the Alphalicious Cart in Shortstack Shadow in brown & Shortstack in pink. Layered them both them glittered the round tops of the crown. I then stamped a princess crown (sorry, I don't remember the name of the stamp set) on that with ColorBox Pigment Ink.


Inside Back Cover:
On the inside back cover I used the Alphalicious cart again for her name. Again cut it in shadow & regular. I used CDS to weld the name together. I used the same stamp set & ink as above for both stamps on this page.
Just like the book that I made for Gretchen, I used regular copy paper for the inside pages. I cut them the same size (5 1/2") as the covers. I also used the BIA to punch the holes.
Thanks for looking. Questions and comments are always welcomed.
Lori
A Proud member of The Lime Light. Click on over to see what we are doing.

Thursday, March 5, 2009

Gretchen's Book

Here is another book that I made with my BIA & ATG. I seem to be inseparable from them lately. This "G" book was made as a present for Gretchen, a little girl in my daughter's class.

I got a wonderful idea from someone (sorry, can't remember who posted it) on the Cricut MB about using 140 lb. watercolor paper as chipboard. I like it very much. It is thinner but very sturdy, especially after being covered with cardstock.
I used CDS - mostly for sizing, to make sure everything would fit & for the multi-cut feature.
Cartridges used: Mini Monograms, Cricut Sampler, and Walk In My Garden
Embellished with: Glitter Glue, Ribbon, Misc. Flowers, Brads, & Snaps
I inked around the edges of the covers with ColorBox Pigment Ink Pads & LePlume II markers.
I used 1/2' o wires.
For the inside pages, I just used regular copy paper (12) cut to the same size as the covers. I put each cover in the BIA separately & used the bar as a guide to make sure the pages were being placed correctly.


Thanks for looking. Questions and comments are always welcomed.
Lori
A Proud member of The Lime Light. Click on over to see what we are doing.

Friday, February 27, 2009

My First Wordbook: I Finally Did It!!!

I want to thank everyone & anyone that has ever posted pictures and/or directions on how to make a wordbook. I probably have looked at it & got inspiration to make this.
I am so glad I waited to get my ATG and BIA to do this. I don't think it would have been as easy or as fun to do. I made this with my daughter's name. It was a test run piece and there are some flaws, but that's why I made this one for us. Overall I am very proud of it. I still have to add pics, but it is fully decorated & put together.
Details:
I used CDS with George and Basic Shapes & Opposites Attract (shadow for the letters) to make the pages. I used a cereal box for one page and some cardboard from a Crayola Stamp Set box as chipboard. I covered front of each page with a dark pink cardstock and the back of each page with a light pink cardstock. I then sanded down any rough edges and inked around the edges on both sides of each page.
I punched the holes & bound the book using my new BIA and 3/4' o-wires.
I cut the letters out again not using the shadow feature and layered them onto the shadow letters of the pages.
For decorations I used:
Misc. cardstock, skittles (plastic Decorative Accents from M's), Fastenator & Staples, Ribbon, Cuttlebug Embossing Folders & Sizzix Embossing Plates, Border Punches - Leave-it-to-Weaver, Fleur-di-lis, & Threading Water, Misc. Brads, Prima Flowers, Misc. Buttons, Sanding Block for embossing, & ColorBox Pigment Inks for details & embossed papers.
Thanks for looking. Questions and comments are alwyas welcomed.
Lori
A Proud member of The Lime Light. Click on over to see what we are doing.

Thursday, February 19, 2009

Paper Bag Album: 1st Project with BIA & ATG

This is the first project that I have done with my BIA & ATG. I still don't have the wires to bind with my BIA so I just used it to punch the binding holes. This was so much easier to get it all lined up correctly & all holes were punched at the same time so all are aligned properly. I just use varying shades of blue ribbon to bind the Paper Bag Album. I inked around the pages with ColorBox Petals Pigment Ink before putting the cardstock mats on the pages. I used my Fiskars (Heritage) corner rounder on some of the pages and a Fiskars round corner rounder on other pages. My ATG was used to adhere all of the cardstock to the paper bag pages. I'm still not sure where this album will be going, so it still needs to be embellished. That will be done mostly with Cricut cuts and lots of other embellies.

I just can't say enough about my ATG. I just LOVE it.

Front Cover: It is hard to see but there are iridescent glitter glue dots on each corner of the light blue.
Pgs. 1 & 2:
Pgs. 3 & 4:
Pgs. 5 & 6:
Pgs. 7 & 8:
Pgs. 9 & 10:
Back Cover: Same as the front with the glitter glue.
Thanks for looking. Questions and comments are always welcomed.
Lori
A Proud member of The Lime Light. Click on over to see what we are doing.

Happy Dance! Happy Dance! Happy Dance! Bind-It-All & ATG

Well here are my newest and favorite tools, Bind-It-All v. 2.0 and ATG (Automatic Tape Gun). Newest & favorite next to my Cricut that is! These are really belated Christmas gifts and I am so glad to have them.
My BIA: My SIL & BIL gave me a gift certificate for Amazon.com so this is what it went towards. I have played with it a little (project in future post). I say a little, b/c I still don't have any binding wires. I have them on order from a gift certificate from Hobby Lobby from my other BIL & SIL - with that I am also getting the tool kit (blue) and the Round-It-All (pink 1/2") for the corners of my books & projects.
My ATG: My grandmother always gives us money for Christmas. I try ( doesn't always happen) to use it for something that I really want. This year I did. Well this is the one I have been waiting for ever since I found the Cricut MB. Those people over there really do enable. This has been a topic of many debates on which one to get. I chose the ATG 50, b/c it was much more cost effective. The Tape Depot offers free shipping and I have heard so many great reviews on this gun and the company. Their tape is cheaper than I have found anywhere else & so far I don't have any problems with it.
Tip on loading the ATG: The tape has to pushed down completely onto the front wheel. There is little tab on the base of the front wheel. This has to be lined up with one of the holes in the core of the tape and push it on all the way. There are also 2 notches on the back wheel. I threaded the tip of the tape into it to hold it securely. If you do these 2 things, you will not have any problem with your tape rolling firmly onto the back wheel.
I just found a great video on youtube from CCCamigos that explains it perfectly how to load & use the ATG-50. Click HERE to see it.
Thanks for looking. Questions and comments are always welcomed.
Lori
A Proud member of The Lime Light. Click on over to see what we are doing.