Followers, Guestbook, & Comments

My followers are being shown in the right column. My Guestbook is at the bottom. Please follow, comment on posts, & sign my guest book. Your comments encourage me to keep sharing my work. I love hearing from you all.

When you leave a comment, I have to moderate it before it will be posted. So if you have a questions or comments, feel free to ask & if necessary note that you don't want your comment posted.
Showing posts with label Heat Embossing. Show all posts

Monday, July 12, 2010

Camera Photo Album & Fleur De Lis Candle Bowl

A very good friend of ours was having some visitors in from out of town.  It was their first visit to see them & to our city.  She had asked me to make something for them as a memento.  For the mother she wanted to give her one of my candle dishes that I etched with fleur-de-lis.  I used the fleur-de-lis on the Wild Card Cricut Cartridge.
The daughter likes to take a lot of pictures.  So I figured I would make a photo album.  It had 10 pages (front & back) that I made out of water color paper and painted with acrylic paints.  I then painted cardstock and adhered it to the pages, so that it added room for at least 3 pics per page.  The front & back covers were made from corrugated cardboard that I cut up from a box.  I painted each of these with white Gesso & then acrylic paints.
The pages & covers are 5x7.  The cardstock is 4.5 x 12 & folded so that each part of the cardstock can fit a 4x6 picture or journaling if she wishes.
I cut the camera pieces & painted them with acrylic paint as well.  I added her initials & a fleur de lis as a symbol of our city.  I used heat embossing with UTEE on the fleur de lis to make it glossy & to add dimension.
 
Cartridges Used:  Create A Critter (Camera), Accent Essentials (Fleur de lis), Cuttin' Up (Initials), George & Basic Shapes (Background Rectangle for the initials)
All pieces of the camera were cut from water color paper & painted with acrylic paint.  After assembling the camera, I sealed it with Krylon Preserve It.  I then added the fleur de lis that was heat embossed with UTEE to add dimension & shine.
Thanks for looking. Questions & comments are always welcomed. Lori

Thursday, July 1, 2010

Embossed Flowers Sketch Card

I made this card for 2 Sketches 4 You Challenge #55.  It was super fun to do.  I had not heat embossed stamps in a while so it was fun to get back to that.  I distressed all of the edges using my Cricut Spatula ( a technique that I learned from Momo.) Thanks
Details:
I used my Gypsy & Cricut to design & create this card.  I used my G to layout & size all of the pieces.  So them it was just quicker to have my Cricut cut all of the pieces than to do it by hand.
I used a stamp set by Studio G, Versamark, & Stampendous Embossing Powder.

Thanks for looking. Questions & comments are always welcomed. Lori

Monday, June 28, 2010

Embossed Tag

I made this tag for the Embossed Tags Challenge at the Cuttlebug Spot.
Details:
Cartridges Used:  Tags, Bags, Boxes & More (Tag), Celebrations (Gift), George & Basic Shapes & Accent Essentials (Mini Faux Prima Roses)
Cuttlebug using Fiskars Texture Plates (Lace)
Heat embossed the gift using UTEE.
Thanks for looking. Questions & comments are always welcomed. Lori

Tuesday, May 18, 2010

Terrier Card: Paper Cutz Challenge #41

I made this card for Challenge # 41 over at Paper Cutz. We had a little Yorkshire Terrier for just over 15 years. She passed away this past January. When I came across this challenge & saw this little terrier on the Create A Critter Cart. I just knew this was the image I was going to use.
Details:
Create A critter cart for the terrier & Ruff
Pop dotted the dog to the front
Cuttlebug w/ Herringbone Embossing Folder on the words
Heat Embossed the words with UTEE.
Inked & doodled on the edges of the card.
Added ribbon with a knot
Thanks for looking. Questions & comments are always welcomed. Lori

Wednesday, March 17, 2010

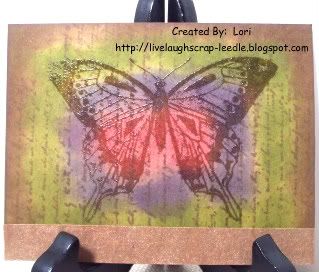
Clear Embossed Butterfly Card

This was a very simple card that evolved as I went along. Well, actually all of my cards evolve. None of them actually end up looking like what I pictured when I begin making them. This one though, I just started playing & this is what came of it.
Details:
Craft cardstock for card base
Large Script Stamp in brown ink for background
Distress Ink on front of card: Vintage Photo, Peeled Paint, (?) Concord, Worn Lipstick
Large Butterfly Stamp in Versamark then heat embossed w/ clear embossing powder
Strip of Craft cardstock spritzed with Super Bronze & Macro Pearl homemade glimmer mist.

Thanks for looking. Questions & comments are always welcomed.
Lori
Thursday, March 4, 2010

A Couple of Simple Cricut Cards

Here a a couple of cards that I've made in an attempt to have them on hand or for inventory. I found these packs of 8 cards & envies (5x5) for $1. I thought they would make great bases for some note cards. Just have to remember - these need to be handed out or pay extra postage for square cards.

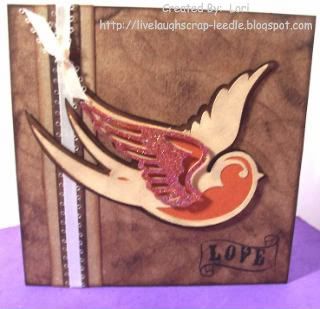
Indie Art Bird:

Details:
5x5 base cardstock inked and texture given with inkpad all over the surface, same done for the cardstock strips.
Cheater method for the ribbon.
Stamp: Recollections - Mark My Heart Set
Bird: Indie Art Cricut Cart.
Lighter layer was sanded, lightly inked & sanded again to give texture. Adhered to the orange layer. Pop dotted to the darker base layer.
Wing - Used Versamark & transparent kaleidoscope (iridescent) embossing powder & heat embossed twice. Pop dotted on top of the bird.

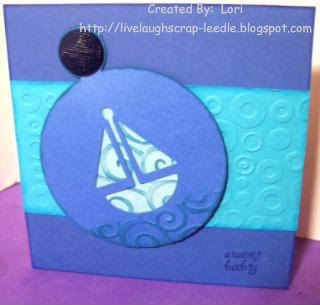
New Arrival Boat:

Details:
5x5 base inked around edges
Strip - Cuttlebug using Spots & Dots Embossing Folder.
Using Cricut Design Studio and the New Arrivals Cart., I placed the circle with the boat cut out over the tag. I did "hide contour" for the circle so that the boar would cut out of the tag. Then, used the circle w/ boat again hiding the boat so that only the circle would cut.
Cuttlebug using the Devine Swirls Embossing Folder on the bottom of the tag (water) and on the circle. Inked over the embossing. Layered these pieces.
Adhered to card base & added a misc. button.
Stamp: My Pink Stamper Stamps - Everyday Occasions

Thanks for looking. Questions & comments are always welcomed.
Lori
Tuesday, March 2, 2010

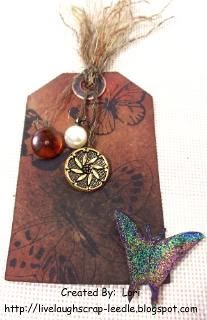
Vintage Buttons & Butterflies Tag

This is the first decorative tag that I have made. I love the way it came out.
I have to thank so many people for the inspiration they have give me. Here are some of them - I am giving their YouTube links. I hope you find them as inspiring as I do.
yoliebean, LiveLoveScrap, mybutterflykisses12, roxyfur, timholtz, there are so many more and I know I will find many more in the future.
Details:
Plantin Schoolbook Cricut Cart. for the Tag
Tsukineko Walnut Stains (Spray)
Martha Stewart Butterfly Stamps
Staz-On Ink
Twine and Hemp Cording
Tim Holtz Distress Inks (Worn Lipstick & Weathered Wood)
Heat Embossed a mixture of UTEE and Iridescent glitter to the 3D Butterfly
Misc. grommet & old buttons from a can my mom gave me.

Thanks for looking. Questions & comments are always welcomed.
Lori
Wednesday, November 11, 2009

Christmas Ornaments

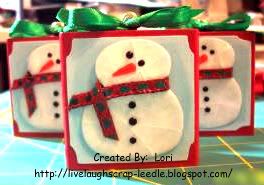
I made 10 of these ornaments for Christmas presents this year. I can see myself making many more in different designs. I had so much fun with these, I just want to keep going.

For the base I used wooden blocks that rubber stamps had been unmounted from. Thanks Kelly Scott from the Cricut MB for all of the blocks that yo did not want. Anyone else that wants to get rid of any of them, please let me know!!

I painted the blocks with acrylic paint. I screwed in the eye screws to the top of the block.
The front & back panels were cut from the Stretch Your Imagination Cart. I inked the light blue paper with white pigment ink to soften it a bit.
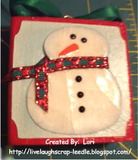
The snowmen were cut from the Doodle Charms Cart in blackout. I gave the snowmen a little dimension by edging them with light blue and white chalk. I attached the carrot noses. Using a Versamark pad, UTEE, and my heat gun I embossed the snowmen. This gave them a glass-like appearance. I then bent them to make them look like cracked ice. After all of this was set, I used black Liquid Embossing to dot on the eyes and buttons. The Liquid Embossing is shiny and raised giving even more dimension. I attached a ribbon "scarf" around each of the snowmen's necks. Thanks Tracy (Craft Junkie Too) for that idea.
I lightly painted Mod Podge onto the face of the block and the back of the blue panel & attached. When all of them were set, I added another light coat of Mod Podge and to the back of the snowmen and attached.


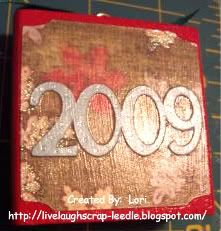
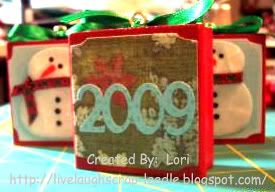
The 2009 is cut from the Alphalicious Cart. I used CDS to weld the numbers together. I attached the 2009 to the panel. Then used the same process as above to attach the panels to the blocks.
I then just tied a ribbon bow the the top of the block around the eye screw. I added a little drop of Glossy dimensions under the knot of the bow to make sure it stayed in place. (I am not the best decorative bow tying person .- LOL)

Here is a closer up view of the snowmen to show the crackled ice look. Not sure if it is showing up to good though.

And this is a close up of the back side. After the last layer of Mod Podge dried, I added some dots on the 2009 with a blue glitter pen. Again not sure if this is showing up to good in the pic.

Thanks for looking. Questions & comments are always welcomed.
Lori
Friday, July 10, 2009

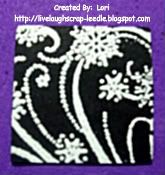
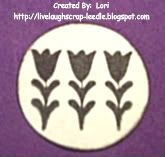
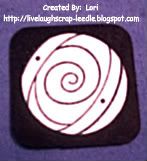
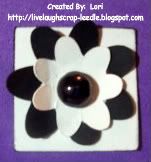
Black & White Inchie Swap (Due Sept. 15)

These are the inchies for the Black & White Inchie Swap on the Cricut MB.  These are so addicting.  I just love making these.

Thanks for looking. Questions & comments are always welcomed.
Lori
A Proud member of The Lime Light. Click on over to see what we are doing.

Monday, May 11, 2009

Trinchies August 2009

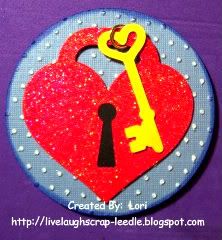
Well, these are for another swap on the Cricut MB hosted by KellyScott. I have to say she is a wonderful Swap Hostess. These are Trinchies, 3"x3" base decorated anyway you like as long as it fits on the base.
For this one, I chose the Heart Lock & Key from the Indie Art Cartridge. I titled this one "Key To My Heart".
For the base a used a 3" circle cut from the George Cartridge. I embossed it with the Swiss Dots folder in my Cuttlebug. I inked the edges with a ColorBox Pigment ink pad. I also sanded the embossed dots to have the stand out a little more.
I cut the heart lock @ 2.5" in blackout & the top layer. I used Cricut Design Studio to get the right size fro the key & cut it out in shadow. I used iridescent embossing powder & heat embossed the red layer of the heart lock to add a little shimmer.
I attached the key to the lock with a jump ring and added a glue dot under the key for added stability.
I then added it all to the base.
Thanks for looking. Comments & questions are always welcomed.
Lori
A Proud member of The Lime Light. Click on over to see what we are doing.

Thursday, April 16, 2009

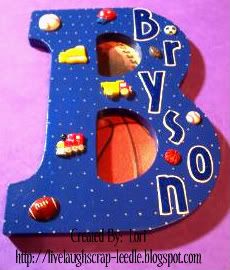
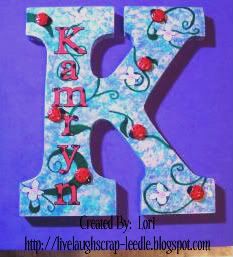
Wall Letters: B & K

I made these for my uncle & his wife. They wanted them for her grandchildren.

Bryson: I was scared of this one because I had never done one for a boy before. They told me that his room was decorated with a sports them and the colors were mostly blue & tan.
I painted the B blue, then painted tan dots all over it. I thought about stripes, but then thought that might be too busy. I had some carstock embellishments (football & basketball) that someone had sent me, so I put them behind the holes in the B. I cut out the letters using Opposites Attract in shadow (tan) & regular (blue) . I heat embossed blue tinsel embossing powder over the blue letters. I them put on some sports buttons and I had some truck, tractor, & train buttons so I added them too. I sealed it all with Mod Podge & Krylon Preserve It. After it was all done - it was the easier one I have done yet.


Kamryn: I stressed even harder over this one. All they told me was her room is decorated in ladybugs. When I asked a color scheme they just said red & black. I could not do the letter re or black (& I definitely didn't want to do it solid black), b/c the ladybugs would not show up. So, when I had done the M for my niece HERE, my son said that it looked like flowers. So I thought, ladybugs live in gardens & this K was born.
I painted the base of the K in lavender. I then sponge painted light green, yellow, pink, & light blue over the lavender. I started using some flourish stitching stencils as a guideline (I can't sew or paint) to make some dark green flourishes all over it. It ended up being easier to just free hand them. So what I painted looks like vines growing all over the K. I cut the letters out in shadow (black) & regular (red) from Plantin Schoolbook. I also cut some very small circles out of black. I layered the letters & cut some of the circles & layered them onto the red letters. They look like ladybug letters. I used the 50 States Cart. for the flowers (Missouri - I think). I cut them in light purple with pink centers & placed them randomly on the vines. I also placed some ladybug buttons randomly & facing all different directions on the vines. I sealed all of the paper cuts with Mod Podge before adhering them to the K. I them sealed the entire letter with Krylon Preserve It.
I am most proud of this letter b/c I actually painted it, I love my ladybug letters, & most of all I figured out how to use a black & red theme for a little girl's room.
Thanks for looking. Questions & comments always welcomed.
Lori
A Proud member of The Lime Light. Click on over to see what we are doing.

Friday, March 20, 2009

Book for Alyssa

This is the book I made for Alyssa. Again her room is decorated in pink & brown. She just loved it.
I used my BIA to punch the holes and bind the book with 1/2" o-wires (white). Oh, I just realized that I forgot to put ribbons on the wires. Oh well, she loved it anyway. I got more requests from the girl's that they want a book & door hanger for their b-days.
I, of course, used my ATG gun to attach all of the cardstock for the covers.
I used 140lb. watercolor paper (very strong & cuts beautifully in the cricut - I just put my blade depth on 6)
For the front cover, I cut out different size flowers from the George Cart (I think) on a strip of scrap cardstock. I used them as a template & sponged ink in the flower cut outs all over the pink part of the cover. Then I attached pink & brown prima flowers with dark pink & light pink skittles in the middle of the flowers.
Front Cover:
For the front cover, I cut out different size flowers from the George Cart (I think) on a strip of scrap cardstock. I used them as a template & sponged ink in the flower cut outs all over the pink part of the cover. Then I attached pink & brown prima flowers with dark pink & light pink skittles in the middle of the flowers.
Inside Front Cover:
 For the inside of the front cover, I just cut out the crown on the Alphalicious Cart in Shortstack Shadow in brown & Shortstack in pink. Layered them both them glittered the round tops of the crown. I then stamped a princess crown (sorry, I don't remember the name of the stamp set) on that with ColorBox Pigment Ink.


Inside Back Cover:
On the inside back cover I used the Alphalicious cart again for her name. Again cut it in shadow & regular. I used CDS to weld the name together. I used the same stamp set & ink as above for both stamps on this page.
Just like the book that I made for Gretchen, I used regular copy paper for the inside pages. I cut them the same size (5 1/2") as the covers. I also used the BIA to punch the holes.
Thanks for looking. Questions and comments are always welcomed.
Lori
A Proud member of The Lime Light. Click on over to see what we are doing.

Friday, January 30, 2009

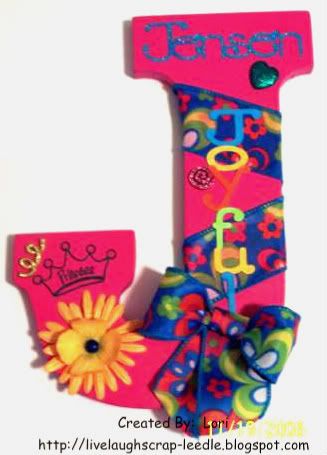
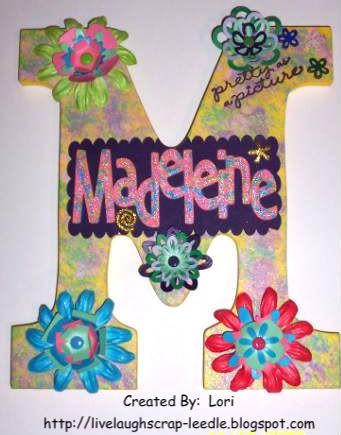
Christmas Gifts - Wall Letters

Well, I am playing catch up from Christmas. Here are the wall letters that I made for my nieces. They would also make great presents for any occasion too.
I used the white wooden letters from Michael's. I painted and decorated them for each of the girl's personalities.

Brooklyne is 11 years old and her favorite colors are green & purple. (This is the niece that I made the get well bouquet for earlier.) I used CDS for her name & "beautiful". I made my own printed paper with a stamp them cut out the words. I hear embossed the Angel Face. I used misc. buttons & prima flowers. I put purple & green ribbon on the outside edge. I sealed the entire letter after being decorated with a spray (Preserve It) sealer.

Jensen is my bright eyed 7 year old niece. Her room is decorated in bright colors, so what little girl doesn't like bright pink? I found the perfect ribbon (M's dollar bin) to incorporate all of the colors into this letter. I used CDS to cut her name & the word "joyful". I heat embossed her name & the princess crown. I used misc. buttons, prima flowers with a skittle in the middle. Sealed the same as the letter above.

Maddie is 11 too. She is the quiet one in the bunch. I used CDS to cut out her name & make sure the purple scallop would fit. I ciated her name with irridescent glitter glue. I used misc. buttons, lots of prima flowers * cricut cut flowers. I put brads in the middle of all of the flowers to hold them all together. I also heat embossed the "pretty as a picture". Seales the same as above.
Thanks for looking. All questions & comments are welcomed.
Lori
A Proud member of The Lime Light. Click on over to see what we are doing.

Wednesday, December 10, 2008

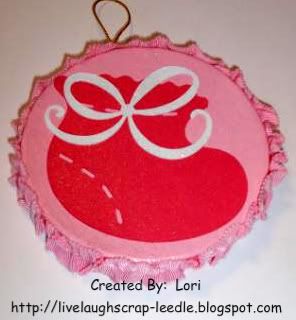
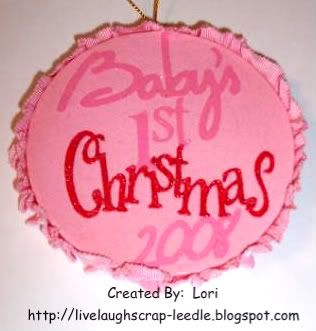
Karissa's 1st Christmas Ornament

I can finally post some of the projects I have been working on. I gave this ornament to my brother for my Godchild's 1st Christmas. I wanted them to be able to have it on the tree this year.

Front:

Back:

I made her shower invites & favors using the baby bootie from the New Arrivals cart. So, I thought it would be fitting to use it for her 1st Christmas ornament as well. I heat embosses the word Christmas with Red Tinsle Embossing Powder. I used CDS to make sure that all of the cuts would fit on the ornament form. The form is just a paper mache form that I painted pink. I cannot remember off hand which carts I used for all of the words, I will post back later with the info.

Thanks for looking. Questions & comments always welcomed.
Lori
Proud member of The Lime Light Design Team. Please click on over to see what we are doing.

Monday, October 27, 2008

Jason is 6 Years Old!!!!


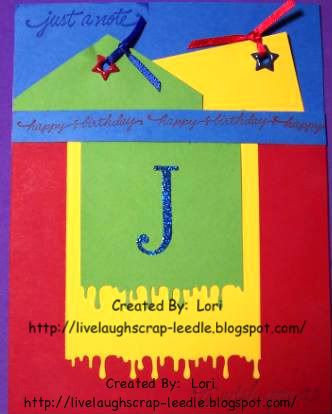
This card was made for my nephew, Jason. He just turned 6 & was so excited about it.
I used a sketch from Card Maker's Sketch Book for this card. It was so much fun to make & really quick. I cut 2 tags freehand. added 2 star eyelets using my Crop-A-Dile, & misc. ribbon. I used the MS Drippy Goo punch for the layered base for his intitial. Sentiments stamps set is from Stampendous, on the bottom (it isn't showing too well) says, "to wish you a" & on the inside it says "happy birthday". I can't remember the stamp set for the "J". I used heat embossing on the initial.
Thanks for looking. Questions & comments are always welcomed.
Lori
A proud member of The Lime Light. Click on over to see what we are doing.