Followers, Guestbook, & Comments

My followers are being shown in the right column. My Guestbook is at the bottom. Please follow, comment on posts, & sign my guest book. Your comments encourage me to keep sharing my work. I love hearing from you all.

When you leave a comment, I have to moderate it before it will be posted. So if you have a questions or comments, feel free to ask & if necessary note that you don't want your comment posted.
Showing posts with label Valentines. Show all posts

Monday, January 11, 2010

Valentines & Valentine's Party Favors

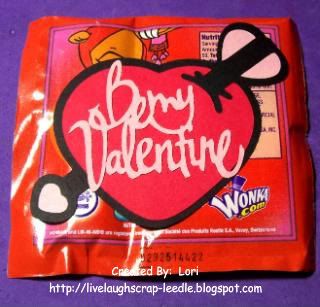
I made these for my daughter to give out for Valentine's Day. The heart and arrow were cut from the Hello Kitty Greeting Cricut Cart.
The Be My Valentine was cut from the Wild Card Cricut Cart.
Then I just adhered them to individual Valentine Lik-N-Dip Packs and wrote her name in the From space on the other side.

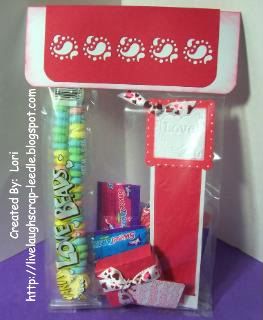
This pic is of the Valentine's Party favor bags that I made for my daughter's class.
For the topper I just cut white cardstock & scored down the middle, rounded the corners & inked with Tim Holtz's Distress Ink Pad (Worn Lipstick). I cut the red cardstock a little smaller, scored down the middle & rounded the corners. Then I used my Tonic Border Punch System with the Paisley II Punch to make the design across the front. (Info about the Tonic Border punch System is at the bottom of this post.) I have the Heats Punch on its way to me, but I was impatient & wanted to get these done over the weekend. I still think it is cute & the boys will like it too. I filled with Misc. Candy, Candy Love Beads, Bookmark, and Decorated Mini Nerds. I then stapled the white part of the topper to the bag. I layered the red part of the topper over the white (adhered with ATG), this hid the staple. From is stamped on the back of the topper & my daughter wrote in her name.
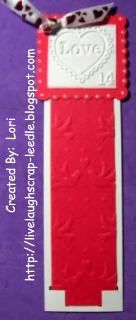
This is the bookmark that I made.
I cut red & white rectangles, just using my paper trimmer. I cut the red ones a little smaller for layering.
I used my Marvy 2 1/2" Scallop Square Punch (red - 2 for each bookmark) and the 2" Square Punch for the white. I ran the white squares through my Cuttlebug using the Love Stamp Embossing Folder. Then I used the Tonic 2-in-1 Arrowhead Corner Punch on the bottom of the white rectangles. The red rectangles were run through my Cuttlebug using the Doves & Hearts (Christmas Set) Sizzix Embossing Plates. I adhered the red rectangles the the white ones tucking the corners into the punched corners. I adhered the red squares on the top, white on top of that. I white doodle dots around the scallop square. I used a 2 slot hole punch on the top left corner & threaded ribbon & tied a knot bow. I then adhered the other red square to the back for a finished off look.
This is the covered Mini Nerds that I decorated.
The inspiration for this came from Angie @ Chic'n Scratch Live. You can see her video for her Valentine Nerds HERE. I'm sure her instructions were clear, but I was doing these in the middle of the night & was confused for some reason (not unusual for me in the middle of the night or not when it comes to measurements - LOL). So this is how I did them.
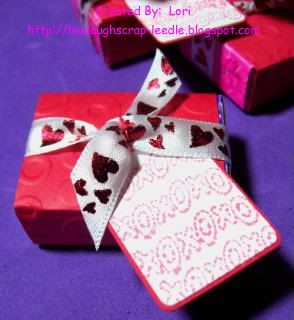
Red cardstock 4 5/16" x 1 5/8" - Scored @ 5 /16" on both ends then on one end @ 1 13/16" & 2 7/16". I ran it through my Cuttlebug using the Spots & Dots Embossing Folder
I cut the scallop tag from the Plantin School Book Cricut Cart. @ 1 1/2" in white & 1 1/2" shadow in red. I stamped in Worn Lipstick Distressed Inkpad the xoxoxo Studio G $1 Clear Stamps (Feb. Set) on the white tags. layered the white & red tags.
Tied a ribbon knot bow around the box. Using red thread attached the tags to the ribbon.
Tonic Border Punch System Information:
To see videos about it:
Tonic Border Punch System Videos parts 1 & 2
Tonic Boot Punch Videos parts 1 & 2
Tonic Border Punch System Information: Click HERE
To order or for more info, contact Cheryl Horton / Inspire Me HERE
Cheryl is a dear to work with and will answer any questions that you have.
Thanks for looking. Questions & comments are always welcomed.
Lori

Friday, February 13, 2009

Valentine's Party Favors

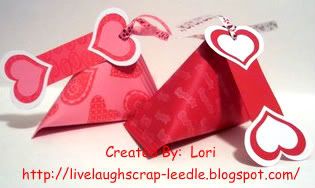
Well, these are the party favors for my daughter's second grade class. I was having a hard time with how to make favors for boys for Valentines day that were not too "girly". Well, they will like the candy inside anyway.
I made 4 red ones for the boys. I stamped the red cardstock with white ink. I used the XOXOXO stamp in the Studio G Feb. set. Then I made bookmarks (using CDS to weld hearts & a rectangle) stamped with red on red hearts & layered silhouette ans solid hearts on the ends of the bookmark. I used white ribbon with red hearts on the end of the bookmarks and to attach them to the sour cream containers. Click HERE for instructions. I also used my crimper & Terrifically Tacky Tape to seal the edges. To make the containers I used 8 x 5 1/2 cardstock. I wanted these to be a little bigger. They are filled with a mini fruit roll up, a fruit by the foot, and a plastic heart maze.
I made 7 pink ones for the girls. The girl's containers are pink with red hearts stamped (misc. stamp that I picked up somewhere). For the bookmarks I used a deeper pink & stamped love on them from the Feb. Studio G set. I made the ends of these with white & lighter pink hearts. The ribbon on these where pink with red hearts.
Thanks for looking. Questions and comments are always welcomed.
Lori
A Proud member of The Lime Light. Click on over to see what we are doing.

Monday, February 9, 2009

Valentines

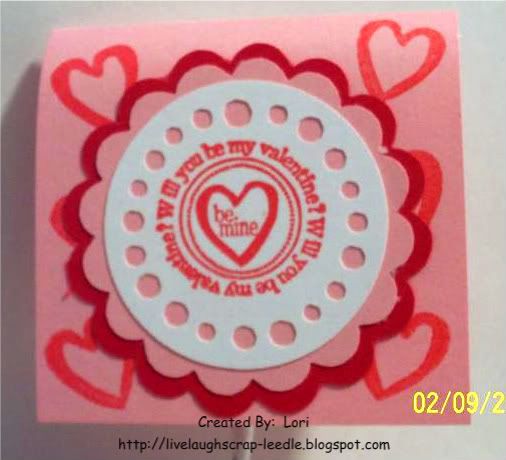
Well here are the Valentines that I made for my daughter to give out in her class.  I am also in charge of the favors (Yea!!, I'm so happy to do this.  It gives me another reason to play with my Cricut stuff.).  So, the Valentine's Party Favors will be posted as soon as I get them finished.  BTW, sorry for the blurry pics.
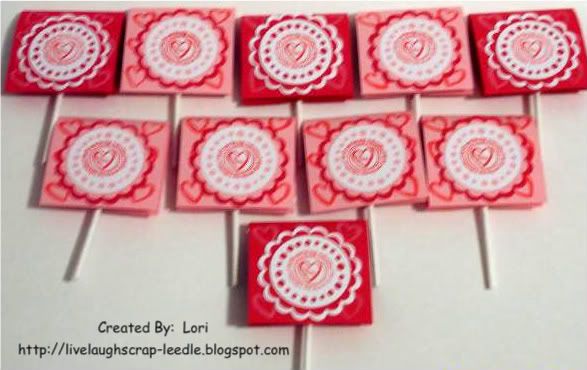
This is a pic of the entire bunch.  There are only 11 children in her class.  I used Jolly Rancher heart shaped suckers.  I cut Cardstock approx. 3x6.  I stamped the cut cardstock with hearts from the Feb. set of  Studio G Stamps.  The pink I stamped with red ink and the red I stamped with white ink.  I put a glue dot on both sides of the sucker & attached the folded cardstock.  I used red and white for the boys (I didn't want them to be too girly) and pink, white, and red for the girls.  Very Simple.
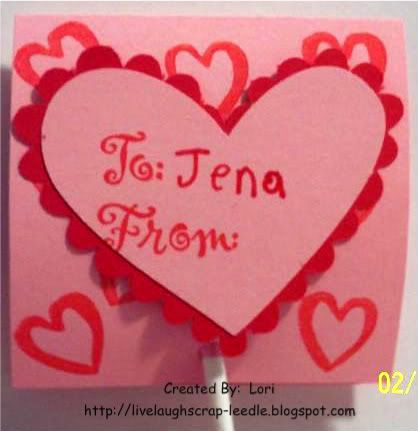
This is the back.  I used Doodle Charms for  the hearts & layered.  I used a To: From: stamp from a Stampin Up set that I had gotten from a garage sale at my son's school a while back. and my daughter signed them.  I attached them with glue dots.  (She forgot to put her name on this one b-4 I took the pic.  Good thing I chose this one for the pic.)
And, this is the front.  I used Mini Monograms for the scallops and the holey circle.  I used another stamp from the Feb. Studio G stamp set.  I attached them all with clue dots.
Thanks for looking.  All questions and comments are always welcomed.
Lori
A Proud member of The Lime Light. Click on over to see what we are doing.