OK, so this month our challenge is to do a scrapbook page. This is truly a challenge for me. You all can look through my blog to see how many lay outs I have previously done. NONE!!! I have made a 12x12 frame once, but that was it. Then to add stamps to a lay out!!?
Robyn makes everything look so easy!!
So I made this layout using a picture of my kids that my mom had. I loved the black & white photo set on the brown tone card stock. This pic is about 6yrs old (4 & 8 - now 10 & 14). When I saw this pic & was going through my MPS Stamps, I found the perfect sentiment stamp for this pic in the
More Faithful Sayings Set. (It's hard to get pics of my kids actually looking like they love each other - LOL)
Since I don't scrapbook I painted & distressed a 12x12 canvas & adhered my lay out to the canvas. It was funny b/c my mom didn't want me to take her photo. She wanted to keep it in the frame that she had it in. When I showed her the finished project she asked if she could keep it. LOL - that was my plan all along!!!
Closeup of pic & stamp:
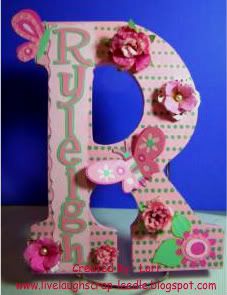
The following pics are closeups of the flowers with a characteristic that we want to instill in our children. All of these characteristics also came from the More Faithful Sayings Stamp Set.
True: We want to instill truth & always want our children to be true.

Knowledge: We want to instill the knowledge of right & wrong & of course for them to embrace the opportunities for education that they have.
Grateful: We always want them to grateful & appreciative for everything that they have.
Integrity: We want them to have all of the moral & ethical principles that they should have to be honest & sincere.
Humble: We always want our kids to be humble in everything they do.
Details:
The polka dotted scalloped oval in the background is from the Imagine stock images & colored with the Imagine More Cart.
Flowers are from the Accent Essential Cart.
I tore & distressed all of the edges. I used distress inks & gold paint.
For the canvas, I painted it with brown paint. I used Crackle medium then painted with antique white paint. I then used several colors of distress ink, walnut stains, brown paint, antique white paint, & gold paint.
Thanks for looking. Questions & comments are always welcomed. Lori


 Thanks for looking. Questions & comments are always welcomed.Lori