Click HERE to see the projects that we all made for this task and what this task was all about.
Thanks for looking. Questions & comments are always welcomed.
Lori
A Proud member of The Lime Light. Click on over to see what we are doing.
Wednesday, June 24, 2009

Monday, June 22, 2009
Open Call For Design Team Members
If you are on my blog you have heard of The Lime Light. We are a group of very talented cardmakers and scrapbookers. The Lime Light is a very special design team in that we help organizations and sometimes individuals by making handmade cards, scrapbook pages, and other projects. We send these items to them to raise money or to raise spirits. Please check out The Lime Light to see all other good things that we do. While you are there please check out the post for the Open Call. Gracie is a wonderful team leader & explains everything there.
Thanks for looking. Questions & comments are always welcomed.
Lori
A Proud member of The Lime Light. Click on over to see what we are doing.
Thanks for looking. Questions & comments are always welcomed.
Lori
A Proud member of The Lime Light. Click on over to see what we are doing.
Monday, May 25, 2009
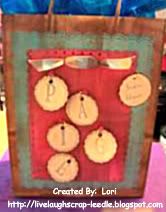
Happy Birthday Paige (Gift Bag)
I made this gift bag for one of my daughter's best friend's birthday. They don't go to school together anymore & don't get to see each other as much as they would like. So, I wanted her bag to be a little special. I'm sorry the pics don't really do it justice.
Details:
I ran a brown ink pad over the craft paper brown bag & pink & aqua cardstock.
On the aqua cardstock, I used that MS Doily Border Punch (all 4 sides)
On the pink cardstock, I used the Fiskar's Threading Water Border Punch (all 4 sides)
I used the faux bow technique on the top of the pink cardstock.
I cut out scallop circles using the Mini Monograms Cart.
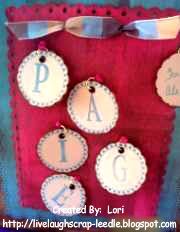
I spelled out her name with the scallop circles using my 1 5/8" Stamp Rite wooden stamper and the large letters & the dotted border from The Stamp Castle.
I used my CAD II to kind of randomly punch 5 holes in the pink cardstock. I knotted pink ribbon in the holes and taped in on the back.
I then used a jump ring to attach the letters to the ribbon.
We used an extra scallop circle to have a from tag & attached it to the edge of the top layer.
I layered them all together & attached it to the front of the bag.
Close up:
Lori
A Proud member of The Lime Light. Click on over to see what we are doing.
T-Shirts (Freezer Paper Technique)
I made these T-Shirts for my daughter & son using the Freezer Paper Technique and my Cricut. I want to thank Kut-n-Print from the Cricut MB and her daughter for the video tutorial that they made. Kut-n-Print's BLOG and VIDEO.
Details:
T-Shirts are from Michael's (Jerzee) $2 a piece
Tulip soft fabric paint
Reynold's Freezer Paper
Indie Art Cart for both designs
Choose your design & cit it out shiny side up. If you are cutting out letters or words you have to use the flip function on CDS or on the Expression.
Iron the freezer paper to the shirt shiny side down. It will seal to the shirt.
Paint with sponge brushes. Let it dry. Add another coat of paint if needed. Let it dry. Remove freezer paper & the shirt is ready to wear.
It really takes no time to do. The hardest part is waiting for the paint to dry. You can use a hair dryer to speed it up, but I do recommend waiting several hours before removing the freezer paper. I just helps the edges of the design to be a little sharper.
This is my daughter's shirt (she will be 9 in July).
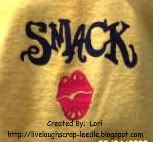 This is my son's shirt (he will be 13 Thursday).
 Thanks for looking. Questions & comments are always welcomed.
Lori
A Proud member of The Lime Light. Click on over to see what we are doing.
Details:
T-Shirts are from Michael's (Jerzee) $2 a piece
Tulip soft fabric paint
Reynold's Freezer Paper
Indie Art Cart for both designs
Choose your design & cit it out shiny side up. If you are cutting out letters or words you have to use the flip function on CDS or on the Expression.
Iron the freezer paper to the shirt shiny side down. It will seal to the shirt.
Paint with sponge brushes. Let it dry. Add another coat of paint if needed. Let it dry. Remove freezer paper & the shirt is ready to wear.
It really takes no time to do. The hardest part is waiting for the paint to dry. You can use a hair dryer to speed it up, but I do recommend waiting several hours before removing the freezer paper. I just helps the edges of the design to be a little sharper.
This is my daughter's shirt (she will be 9 in July).
This is my son's shirt (he will be 13 Thursday).Thanks for looking. Questions & comments are always welcomed.Lori
A Proud member of The Lime Light. Click on over to see what we are doing.
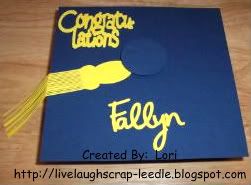
Graduation Cap Box
Some great friends of ours has a daughter that is graduating from Kindergarten on Tuesday.
Congratulations Fallyn!!!!!
I thought they would really like this box, even though they don't wear cap 7 gowns for the graduation.
I want to thank MeFlick from the Cricut MB for sharing her .cut file for this box. Click HERE to go to her blog.
Side view to show dimension:
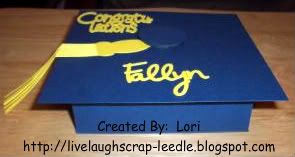 Top View:
 Thanks for looking. Questions & comments are always welcomed.
Lori
A Proud member of The Lime Light. Click on over to see what we are doing.
Congratulations Fallyn!!!!!
I thought they would really like this box, even though they don't wear cap 7 gowns for the graduation.
I want to thank MeFlick from the Cricut MB for sharing her .cut file for this box. Click HERE to go to her blog.
Side view to show dimension:
Top View:Thanks for looking. Questions & comments are always welcomed.Lori
A Proud member of The Lime Light. Click on over to see what we are doing.
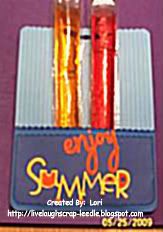
Kick Off To Summer Treats
I want to thank AprilDawn on the Cricut MB for posting this idea. Hers is so cute. I made these for my daughter's class for a "Kick Off Summer" treat.
Details:
I cut a 12x12 sheet of double sided cardstock in half. Scored it at 3 1/2 & folded to make a pocket. I used my Fiskars trimmer with the scallop blade to make the edges look like waves & layered a couple of layers in different colors of blue. I inked around the edges of the pocket.
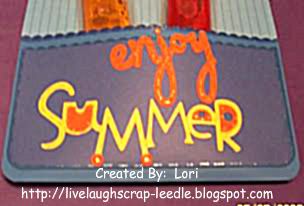
I cut enjoy out with the Wildcard Cart.
I cut Summer out with the Stretch Your Imagination Cart.
I used blue, orange, & yellow glitter pens to decorate.
I also did the faux bow technique on the top. (hidden by the freezie pops)
Close up of pocket:
Thanks for looking. Questions & comments are always welcomed.
Lori
A Proud member of The Lime Light. Click on over to see what we are doing.
Friday, May 22, 2009
Teacher Appreciation Week: Day 4 - Certificate & Day 5 - Book
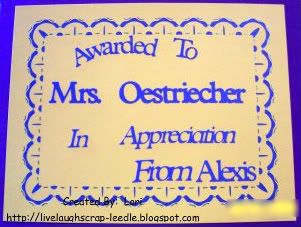
I finally finished up the Teacher Appreciation gifts for my daughter's teacher. For Day 4 (Thursday), she is giving her a certificate made from the Cricut.
Details:
Cricut Cartridge: Plantin Schoolbook
I backed it with blue cardstock. I cut the certificate in yellow then cut the letters using Plantin Schoolbook to cut the words. I used Cricut Design Studio to weld the teacher's name, from, & my daughter's name.
For day 5 (Friday), she is giving her a book. I got the idea for the design of the cover from a Cardmaker's Sketch Book. They had a card with a very similar design on it.
Details:
I cut out the shape of the covers using the George & Basic Shapes Cart. For the cover pages I used 140 lb. water color paper & covered them on both sides with patterned cardstock.
I used the Bind-It-All to bind the book. I ran a brown stamp pd over the bight green cardstock to add some texture. I stamped the flowers and colored over some of the stamp parts with yellow and blue glitter pens. I also made stitch marks with the glitter pens. I finished it off with green ribbon and prima flowers in green, brown, blue & a green brad. I had some silk leaves & placed one behind the flower. I also added blue & green skittles to balance it out.

Thanks for looking. Questions & comments are always welcomed.
Lori
A Proud member of The Lime Light. Click on over to see what we are doing.
Tuesday, May 19, 2009
A New Challenge Blog Is On The Horizon
The Next Level is launching on Monday June, 1, 2009. They are also giving away some Blog Candy on launch day. It seems like is it going to be so much more than just a challenge blog though.
"The Next Level is the exciting new concept of Dawn (All Pink Girl) and Ann (Madgesty - Love to Create) probably better known as blog name Madge. Our aim in designing this new informative style of blog is not only to produce really creative Weekly Challenges that are not tied to any specific brand, but also to explore new avenues, ideas and techniques with a completely fresh approach.", The Next Level".
Click on over to see what they will be doing & to see how you can be entered for the blog candy. You might even want to enter to be a guest design team member.
Thanks for looking. Questions & comments are always welcomed.
Lori
A Proud member of The Lime Light. Click on over to see what we are doing.
"The Next Level is the exciting new concept of Dawn (All Pink Girl) and Ann (Madgesty - Love to Create) probably better known as blog name Madge. Our aim in designing this new informative style of blog is not only to produce really creative Weekly Challenges that are not tied to any specific brand, but also to explore new avenues, ideas and techniques with a completely fresh approach.", The Next Level".
Click on over to see what they will be doing & to see how you can be entered for the blog candy. You might even want to enter to be a guest design team member.
Thanks for looking. Questions & comments are always welcomed.
Lori
A Proud member of The Lime Light. Click on over to see what we are doing.
Monday, May 18, 2009
Teacher Appreciation Week: Bouquet - Day 3
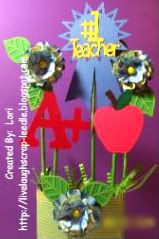
This is the bouquet that I made for my daughter to give to her teacher for the 3rd day (Wednesday) of Teacher Appreciation Week.
Details:
Apple, Ribbon, & #1 Teacher was cut from the Cricut Sampler Cart. (I think)
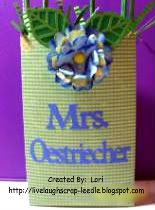
Bag, A+, & Teacher's name was cut from the Plantin Schoolbook Cart. Also Cricut Design Studio was used to weld the letters together.
Flowers & leaves were cut from the Home Accents Cart.
I cut strips of paper & ran it though my crimper to make the grass filler in the bag.
I still have to make a tag to put on it, but that will be done before my daughter has to bring it to school.
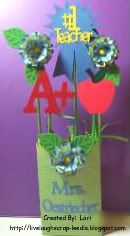 Close up of top:
For the flowers: After I cut them, I crumpled them & rubbed a ColorBox Pigment ink pad over them. I layered them & put a yellow brad in the middle to hold them together. I attached all of the decorations to the painted skewers with Terrifically Tacky Tape.
 Close up of bag:
  Thanks for looking. Questions & comments are always welcomed.
Lori
A Proud member of The Lime Light. Click on over to see what we are doing.
Details:
Apple, Ribbon, & #1 Teacher was cut from the Cricut Sampler Cart. (I think)
Bag, A+, & Teacher's name was cut from the Plantin Schoolbook Cart. Also Cricut Design Studio was used to weld the letters together.
Flowers & leaves were cut from the Home Accents Cart.
I cut strips of paper & ran it though my crimper to make the grass filler in the bag.
I still have to make a tag to put on it, but that will be done before my daughter has to bring it to school.
Close up of top:For the flowers: After I cut them, I crumpled them & rubbed a ColorBox Pigment ink pad over them. I layered them & put a yellow brad in the middle to hold them together. I attached all of the decorations to the painted skewers with Terrifically Tacky Tape.
Close up of bag: Thanks for looking. Questions & comments are always welcomed.Lori
A Proud member of The Lime Light. Click on over to see what we are doing.
Teacher Appreciation Gift: Note Card Set (20) - Day 2
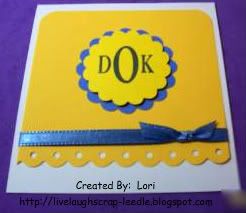
I made a set of 20 note cards and envelopes for my daughter's teacher for Teacher Appreciation week. These will be given to her on Tuesday. I am still working on projects for the rst of the week. I did them in the school colors, so she can use them for notes to parents. I also put her monogram on them so that can be used for personal reasons too.
Details:
Ultimate Crafter's Companion was used to make the cards.
Mini Monograms Cart was used to cut the scallop circles. i added pop dots between the scallops for some dimension.
I used the MS Threading Water border punch for the yellow layer & added ribbon with a faux bow for some decoration.
For the monogram, I used my 1 5/8" wooden stamper and small & large letters from Just Right. You can get them from The Stamp Castle. For the entire month of May you will get FREE SHIPPING when you use the promotional code: Lori1.
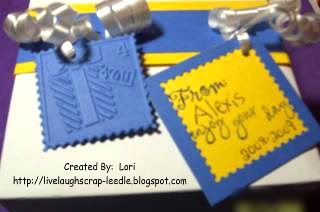
I also made a box to put the cards in.
Details:
The UCC was used to make the box.
I made a belly band to wrap around the box to hold it closed.
I used the Cuttlebug for the tag with the Stamp Die & the 4 You Stamp embossing folder. With the edge of the Stamp negative, I made another tag for my daughter to sign.
I punched a hole in the tags & in the belly band with my Crop-a-dile & tied them on with some curly ribbon.
Lori
A Proud member of The Lime Light. Click on over to see what we are doing.
Teacher Appreciation Week: Card - Day 1
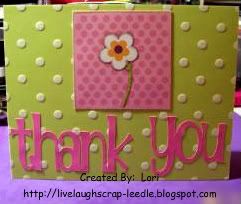
This is the card that my daughter will give to her teacher on Monday for Teacher Appreciation Week.
Details:
I used a pre-made card & envelope.
I used DCWV paper for the flower & the background. It was from the Nana's Kids stack.
I used the Beyond Birthdays cart for the Thank You.
The inside is stamped with the sentiment "For all that you do".
Thanks for looking. Questions & Comments are always welcomed.
Lori
A Proud member of The Lime Light. Click on over to see what we are doing.
Wednesday, May 13, 2009
Flower Pot Card
I had first seen a flower pot card posted on the Cricut MB by Janet Waters. I thought the idea was so cute. Then I had seen a video on Dawn's Blog on how to make them. She had originally seen the instructions & measurements on Stephanie's Blog. To make this one, I used a combination of Dawn's & Stephanie's instructions & added a little of my own touches too.
It was made as a Thank You Card for some very good friends (honorary family), my daughter's Parran & his wife.
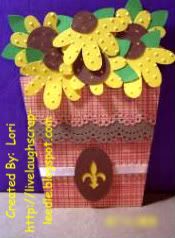 I used the instruction to cut the card & fold to make the flower pot. I also used their measurements to cut the pullout card. For the front top part of the pot I used my MS Doily Border Punch & added another bordered piece of cardstock for some contrast. I used pop-dots to have the top edge stand out a little. To hold pocket of the card, I just added a very small piece of Terrifcally Tacky Tape (red liner tape)to the top corners.
I cut the sunflowers from the Walk in my Garden Cart. in varying sizes. I used the Swiss Dots embossing folder with my Cuttlebug on the flowers to give some texture. I then added them to the top of the pull out card with pop-dots.
I decorated with a ribbon & I cut the oval from the George cart. & the fleur-de-lis from the Wild card cart.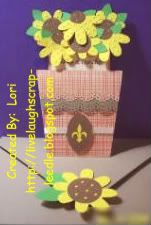 I used my Ultimate Crafter's Companion to make the envelope.
Thanks for looking. Comments and questions are always welcomed.
Lori
It was made as a Thank You Card for some very good friends (honorary family), my daughter's Parran & his wife.
I used the instruction to cut the card & fold to make the flower pot. I also used their measurements to cut the pullout card. For the front top part of the pot I used my MS Doily Border Punch & added another bordered piece of cardstock for some contrast. I used pop-dots to have the top edge stand out a little. To hold pocket of the card, I just added a very small piece of Terrifcally Tacky Tape (red liner tape)to the top corners.I cut the sunflowers from the Walk in my Garden Cart. in varying sizes. I used the Swiss Dots embossing folder with my Cuttlebug on the flowers to give some texture. I then added them to the top of the pull out card with pop-dots.
I decorated with a ribbon & I cut the oval from the George cart. & the fleur-de-lis from the Wild card cart.
I used my Ultimate Crafter's Companion to make the envelope.Thanks for looking. Comments and questions are always welcomed.
Lori
A Proud member of The Lime Light. Click on over to see what we are doing.
Monday, May 11, 2009
Trinchies August 2009
Well, these are for another swap on the Cricut MB hosted by KellyScott. I have to say she is a wonderful Swap Hostess. These are Trinchies, 3"x3" base decorated anyway you like as long as it fits on the base.
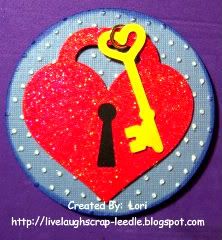
For this one, I chose the Heart Lock & Key from the Indie Art Cartridge. I titled this one "Key To My Heart".
For the base a used a 3" circle cut from the George Cartridge. I embossed it with the Swiss Dots folder in my Cuttlebug. I inked the edges with a ColorBox Pigment ink pad. I also sanded the embossed dots to have the stand out a little more.
I cut the heart lock @ 2.5" in blackout & the top layer. I used Cricut Design Studio to get the right size fro the key & cut it out in shadow. I used iridescent embossing powder & heat embossed the red layer of the heart lock to add a little shimmer.
I attached the key to the lock with a jump ring and added a glue dot under the key for added stability.
I then added it all to the base.
Lori
A Proud member of The Lime Light. Click on over to see what we are doing.
Thursday, May 7, 2009
Shout Out to Sheetload

Ok, so why is Sheetload of Cards so great? Well first off it is a wealth of information. You get sketches, tips, and even diagrams on how to cut your papers to get the most out of them. this e-zine was such a wonderful creation & it has so many talented sketch artists and sample artists. You will get so much inspiration from it.
The May 2009 Issue (follow this link then click on the icon to see the e-zine) explains how you can make many or just one card with this one sketch. It also explains what a Scrapling is, this is just great you have to go check it out. Join in the fun & pass on the word to be in the drawing for some really great prizes.
Thanks for looking. Questions and comments are always welcomed.
Lori
A Proud member of The Lime Light. Click on over to see what we are doing.
Tuesday, May 5, 2009
Twinchies Swap June 2009
I made these twinchies for a swap on the Cricut MB that is hosted by KellyScott. Twinchies are handmade embellishments that are 2"x2". i enjoyed making the inchies (1"x1"), but the twinchies give a little more options to be able to work with them & decorate. We also decided that they did not just have to be square. The base could be any shape as long as it was 2"x2".
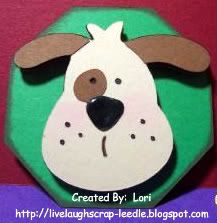
The first one I did was the dog.
My base was an octagon from the George & Basic Shapes Cart. I inked around the edges with a brown Colorbox ink pad.
I cut the dog from the Doodlecharms Cart. I cut 3 layers of the blackout shape, 2 in brown & 1 in black.
The black black out shape is the base for the top layer (tan) with a black nose (I used black Liquid Embossing over the black cardstock) & brown ears & eye spot.
I also inked around the ears on the top dog with a brown Le-Plume II marker.
I used pink chalks to blush the cheeks.
I layered all of the dog pieced with a pop-dot between them & a pop-dot between them & the base.
So this one is very dimensional.
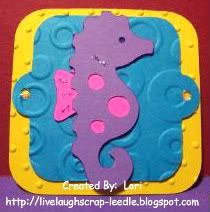
The next one is the seahorse.
My base for this one is just a square with rounded corners cut from the Mini Monograms cart. I embossed this layer in my Cuttle Bug with the Swiss Dots Folder.
The next layer is the square tag also cut from the Mini Monograms Cart. I embossed this layer in the Cuttlebug with the Spots & Dots Folder.
I thought these 2 together made it look like bubbles & was cute with the seahorse.
I cut the seahorse out of the Doodlecharms Cart. Layered them & attached to the base layers.
I inked around the seahorse & the markings with a purple LePlume II marker. I went over the marking & in the center of the tag holes with iridescent glitter glue.
I liked this one b/c it is so bright & cheery. I think it would be great for a b-day card or a vacation card or layout.
Thanks for looking. Questions & comments are always welcomed.
Lori
A Proud member of The Lime Light. Click on over to see what we are doing.
Mamie's Mother's Day Card 2009
This is the card that I made for my grandmother for Mother's day. This card was so much fun to make. I used printed cardstock, I inked, I made the vase dimensional, & the roses are paper pieced & dimensional. This card is so different than what I usually do. It is fun to step out of your comfort zone sometimes.
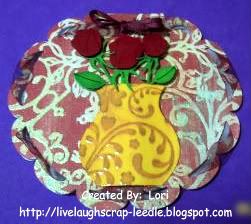
Close up pic of the vase & flowers.
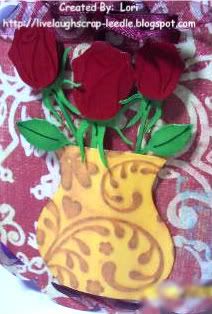
Details:
I used the Wild Card Cricut Cartridge for the Doily Card & the roses.
On the inside I cut Happy Mother's Day & You are so Special from the Wild card cart.
I cut the vase from the Walk in My Garden Cart & played with the size & shape in Design Studio.
I cut the roses out 4 times, twice in red & twice in green. I cut all of the red flowers from the stems & did the same to one set of the green flowers. I used one full green rose for the base. I layered a red flower on top of the green base. I Inked the green stems that were cut from the flower & inked the red flowers. I layered the inked stems onto the base. I then layered the inked flowers to roses.
I used my Cuttle Bug & Floral Fantasy Embossing folder on the vase & inked with Gold ColorBox Pigment Ink. I also coated the vase & the roses with Mod Podge to give them a glossy or glassy look.
To give the vase dimension, I used pop-dots down the center of the vase. I used my ATG gun for the edges of the vase & adhered it to the card front.
I them arranged the flowers in the vase & attached them with a pop-dot to give them dimension too.
Updated 10/23/09:
I also entered this card into the Paper Blooms Circle Card Challenge. I had made it so much earlier, but figured I would show it anyway.
Thanks for looking. Questions & comments are always welcomed.
Lori
A Proud member of The Lime Light. Click on over to see what we are doing.
Mom's Mother's Day Card 2009
This the the Mother's Day Card that I made for my mom. I just loved this making this card. I just can't figure out how to do the envie with the green grass. Anyone with tips please help!!
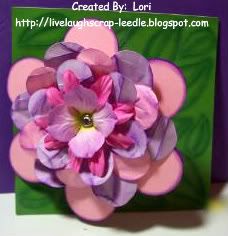
Details:
The card was cut out using the Wild Card Cricut Cartridge.
I cut out the green icon with the leaves craved into it. I used chalks to darken the leaves. I think it added some depth to the image. I sprayed this with Krylon Preserve It to protect the chalk.
I also just out a flower to cover the front & inside for a finishing touch.
I inked the edges of the flower with ColorBox Pigment ink.
I then cut out 3 more flowers in varying smaller sizes, crumpled them up then used the ColorBox Pigment ink pad on them.
I topped it all off with 2 prima flowers & a clear rhinestone brad in the center.
The inside has Happy Mother's Day cut from the Wild Card Cart.
Thanks for looking. Questions & comments are always welcomed.
Lori
A Proud member of The Lime Light. Click on over to see what we are doing.
Friday, April 24, 2009
The Pink Stamper - Surprise
I don't want to give away her surprise, but you have to see her 100th video. Not only is the video awesome as always, but she has a very good surprise at the end. You won't want to miss this one.
Just click HERE to see this video & see what the surprise is. Make sure to see it before April 29, 2009 - you don't want it to be too late.
Glad to share,
Lori
A Proud member of The Lime Light. Click on over to see what we are doing.
Just click HERE to see this video & see what the surprise is. Make sure to see it before April 29, 2009 - you don't want it to be too late.
Glad to share,
Lori
A Proud member of The Lime Light. Click on over to see what we are doing.
Tuesday, April 21, 2009
My Grandmother's B-Day Card
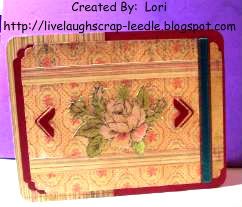
Today is my grandmother's birthday. I always seem to make the cutesy cards, but I wanted something a little fancier & more elegant. Not sure if I got there, but I am happy with that way it turned out. I must say that I was determined to use patterned cardstock. I am really afraid of it so this card was a stretch. I don't know why - I see so many cards made with printed paper & cardstock that are so beautiful. Then I see the printed cardstock in the stores & they are gorgeous. But, when it comes down to making a card with them I generally freeze up & have no creativity with them. I think I am afraid of them being too busy.
Details:
I used 3 patterned cardstocks from K & Company. The flow is cut out of one of them. I Mod Podged the flower & the photo corners and Pop-Dotted them on the front of the card. I used the Fiskars punch for the photo corners & a Fiskars decorative corner rounder on the layers. I used my Round-It-All for the corners of the card. I edged the card with a dark maroon inkpad from ColorBox. I used a sheer maroon ribbon & layered a teal ribbon over it & attached that to the layers.
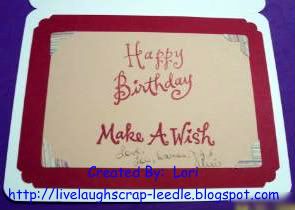
Inside:
Thanks for looking. Questions and comments are always welcomed.
Lori
A Proud member of The Lime Light. Click on over to see what we are doing.
Thursday, April 16, 2009
Wall Letters: B & K
I made these for my uncle & his wife. They wanted them for her grandchildren.
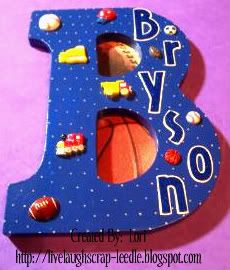
Bryson: I was scared of this one because I had never done one for a boy before. They told me that his room was decorated with a sports them and the colors were mostly blue & tan.
I painted the B blue, then painted tan dots all over it. I thought about stripes, but then thought that might be too busy. I had some carstock embellishments (football & basketball) that someone had sent me, so I put them behind the holes in the B. I cut out the letters using Opposites Attract in shadow (tan) & regular (blue) . I heat embossed blue tinsel embossing powder over the blue letters. I them put on some sports buttons and I had some truck, tractor, & train buttons so I added them too. I sealed it all with Mod Podge & Krylon Preserve It. After it was all done - it was the easier one I have done yet.
Kamryn: I stressed even harder over this one. All they told me was her room is decorated in ladybugs. When I asked a color scheme they just said red & black. I could not do the letter re or black (& I definitely didn't want to do it solid black), b/c the ladybugs would not show up. So, when I had done the M for my niece HERE, my son said that it looked like flowers. So I thought, ladybugs live in gardens & this K was born.
I painted the base of the K in lavender. I then sponge painted light green, yellow, pink, & light blue over the lavender. I started using some flourish stitching stencils as a guideline (I can't sew or paint) to make some dark green flourishes all over it. It ended up being easier to just free hand them. So what I painted looks like vines growing all over the K. I cut the letters out in shadow (black) & regular (red) from Plantin Schoolbook. I also cut some very small circles out of black. I layered the letters & cut some of the circles & layered them onto the red letters. They look like ladybug letters. I used the 50 States Cart. for the flowers (Missouri - I think). I cut them in light purple with pink centers & placed them randomly on the vines. I also placed some ladybug buttons randomly & facing all different directions on the vines. I sealed all of the paper cuts with Mod Podge before adhering them to the K. I them sealed the entire letter with Krylon Preserve It.
I am most proud of this letter b/c I actually painted it, I love my ladybug letters, & most of all I figured out how to use a black & red theme for a little girl's room.
 Thanks for looking. Questions & comments always welcomed.
Lori
Bryson: I was scared of this one because I had never done one for a boy before. They told me that his room was decorated with a sports them and the colors were mostly blue & tan.
I painted the B blue, then painted tan dots all over it. I thought about stripes, but then thought that might be too busy. I had some carstock embellishments (football & basketball) that someone had sent me, so I put them behind the holes in the B. I cut out the letters using Opposites Attract in shadow (tan) & regular (blue) . I heat embossed blue tinsel embossing powder over the blue letters. I them put on some sports buttons and I had some truck, tractor, & train buttons so I added them too. I sealed it all with Mod Podge & Krylon Preserve It. After it was all done - it was the easier one I have done yet.
Kamryn: I stressed even harder over this one. All they told me was her room is decorated in ladybugs. When I asked a color scheme they just said red & black. I could not do the letter re or black (& I definitely didn't want to do it solid black), b/c the ladybugs would not show up. So, when I had done the M for my niece HERE, my son said that it looked like flowers. So I thought, ladybugs live in gardens & this K was born.
I painted the base of the K in lavender. I then sponge painted light green, yellow, pink, & light blue over the lavender. I started using some flourish stitching stencils as a guideline (I can't sew or paint) to make some dark green flourishes all over it. It ended up being easier to just free hand them. So what I painted looks like vines growing all over the K. I cut the letters out in shadow (black) & regular (red) from Plantin Schoolbook. I also cut some very small circles out of black. I layered the letters & cut some of the circles & layered them onto the red letters. They look like ladybug letters. I used the 50 States Cart. for the flowers (Missouri - I think). I cut them in light purple with pink centers & placed them randomly on the vines. I also placed some ladybug buttons randomly & facing all different directions on the vines. I sealed all of the paper cuts with Mod Podge before adhering them to the K. I them sealed the entire letter with Krylon Preserve It.
I am most proud of this letter b/c I actually painted it, I love my ladybug letters, & most of all I figured out how to use a black & red theme for a little girl's room.
Thanks for looking. Questions & comments always welcomed.Lori
A Proud member of The Lime Light. Click on over to see what we are doing.
Subscribe to:
Posts (Atom)