Followers, Guestbook, & Comments

My followers are being shown in the right column. My Guestbook is at the bottom. Please follow, comment on posts, & sign my guest book. Your comments encourage me to keep sharing my work. I love hearing from you all.

When you leave a comment, I have to moderate it before it will be posted. So if you have a questions or comments, feel free to ask & if necessary note that you don't want your comment posted.

Wednesday, March 17, 2010

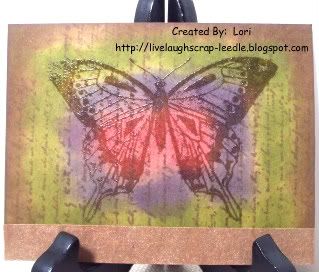
Clear Embossed Butterfly Card

This was a very simple card that evolved as I went along. Well, actually all of my cards evolve. None of them actually end up looking like what I pictured when I begin making them. This one though, I just started playing & this is what came of it.
Details:
Craft cardstock for card base
Large Script Stamp in brown ink for background
Distress Ink on front of card: Vintage Photo, Peeled Paint, (?) Concord, Worn Lipstick
Large Butterfly Stamp in Versamark then heat embossed w/ clear embossing powder
Strip of Craft cardstock spritzed with Super Bronze & Macro Pearl homemade glimmer mist.

Thanks for looking. Questions & comments are always welcomed.
Lori

Tuesday, March 16, 2010

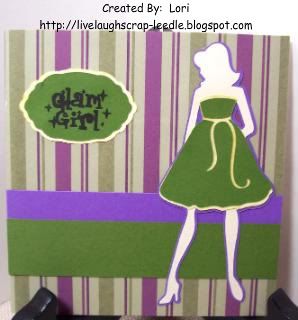
Two Forever Young Cards

More cards made to have on hand. This is the first time I had a chance to play with this cart. I am just loving it!!!
I just love the dress on this cut. I think it could be perfect for a sweet sixteen or even for a wedding party. I just love the ribbon on the dress.
I spritzed the under layer of the dress & the sign with home made glimmer mist (pearl-ex bright yellow). It shows through the cut out & around the green layer beautifully with shimmer.
Glam Girl stamp is one them my daughter had is some of her stamps to play with. She has some really cute stamps that I think I may be borrowing. LOL

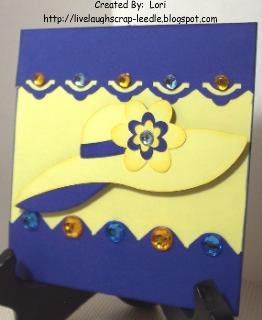
I used the Tonic Border Punch System w/ the Rounded Corner Punch & Smile Corner Punch (both used as a border & not a corner).
Rhinestones
Hat from the Forever Young Cricut Cart.
Pop dotted the hat.
This card could be used for any occasion.

Thanks for looking. Questions & comments are always welcomed.
Lori

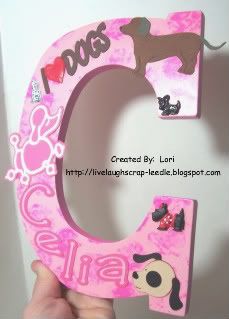
Celia's "C" Wall Letter

A friend of mine (one of Alexis' classmates' mom) asked me to make a wall letter for her daughter. She wanted pink and she loves dogs. So this is what it ended up like. I am happy to say that they both loved it!!
Details:
I painted the entire letter light pink. Then I painted the edges a darker shade of pink. I painted some large bubble bubble wrap with the darker pink paint, & stamped it on the front of the letter. I thought it just gave some texture & broke up all of that lighter pink. But, some people told me that the spots looked like flowers & Liz (the mom) said that some of them looked like paw prints - so that technique was a hit.
I added some dog buttons that I had in my stash.
The name & I{heart}Dogs was from SCAL. I used Triple Thick over the heart to make it dimensional and shiny.
Cricut Carts:
Animal Kingdom - Dachshund & "Spot" dog head
The dachshund was given some texture by using Dawn's Faux Suede Technique. I colored the body w/ distress ink (Vintage Photo) & brown pigment ink. The card & tail were colored w/ distress ink (Weathered Wood)
Cricut Sampler (Paper Pups) - Poodle
The poodle was spritzed w/ homemade glimmer mist (pearl-ex macropearl)
All paper embellishment pieces & the letter was sprayed (front & back) with Krylon Preserve It.

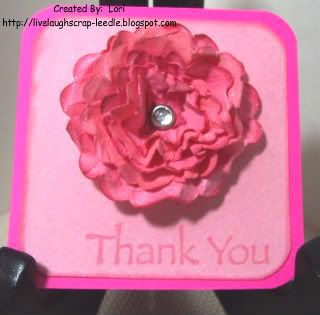
This is just a little 3x3 Thank You card that I made for them for ordering one of my letters.
Details:
3x6 cardstock folded at 3"
2 1/4 x 2x1/4 cardstock spritzed w. homemade glimmer mist (pearl-ex flamingo pink)
Mini Monograms Cricut Cart:
I cut 5 scallop circles @ real dial size 2 1/4, 2, 1 3/4, 1 1/2, & 1 1/4
I colored them with varying shades of pink with chalk ink.
I spritzed them with home made glimmer mist (pearl-ex flamingo pink & Duo Red-Blue)
Scrunched up, unfolded, added a brad to the center & formed with my fingers to my liking.
Spritzed again w/ homemade glimmer mist (pearl-ex macropearl)
Then I dried it with my heat gun.
Again - I can't remember the stamp set that the Thank You came from.

I just wish the glimmer showed up in the pics. It is really pretty in person.

Thanks for looking. Questions & comments are always welcomed.
Lori
Friday, March 12, 2010

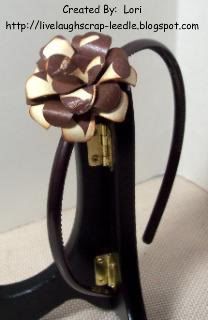
My First Flower Headband Using Cricut

OK, so I have had this idea since I started making my phone book page flowers. Well this is not using one of them, but it is the same idea.
A friend of mine - Hi Nicole!, asked if I could make her a headband with one of my flowers. She liked this flower so I attached it & Waalaa!!!


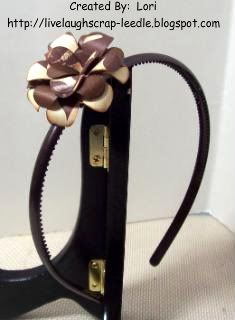
A little different view point.


Details:
Nicole supplied the headband
Grunge Style Flower cut flower from the Sweet Treats Cricut Cart
I cut, inked, and assembled the flower.
The one thing I did, so that hopefully it will be a little more protected was: I sprayed the flower pieces on both sides (after cutting & inking) with Krylon Preserve It. I used glossy, but they also have a matte finish one. (There are so many tutorials on blogs & YouTube as to how to make these flowers.)

To attach the flower to the headband:
I cut a small piece of felt and wrapped it around the headband - attaching it with E6000 glue. Let that sit to get secure. Then I attached the flower to the felt (making sure that there is no felt showing from around the flower) with the E6000. You may have to hold it for a bit until it takes, then just let it sit to get secure. This morning - that flower is not going anywhere.

Thanks for looking. Questions & comments are always welcomed.
Lori

Wednesday, March 10, 2010

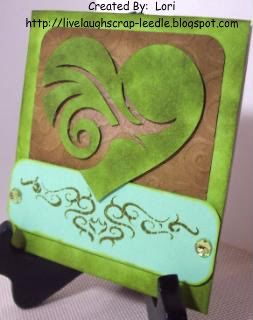
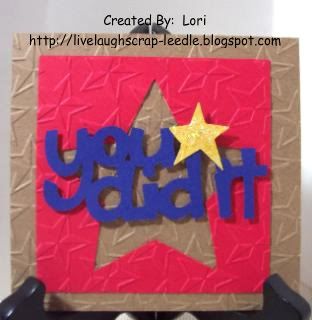
Indie Art Heart & You Did It Cards

This making cards just to have on hand is getting a little easier. It's still taking me a while, but I'm getting the hang of it. I am so used to making cards for a particular reason & person. I usually personalize my cards & projects to fit the person that will be receiving them. So making cards just to make them is somewhat difficult for me
But here are 2 more:
Details:
Indie Art Cricut Cart for the heart
Cuttlebug w/ Swirls Embossing Folder
Distress Inks in Pealed Paint & Vintage Photo
Stamp (?) at this time Sorry - I am horrible about remembering the names of my stamps (unless I am purposefully using a particular set).
Popped up the stamped band & the heart
Rhinestones
George & Basic Shapes Cricut Cart. for the large cut out star.
Cuttlebug w/ Stars Embossing Folder
Beyond Birthdays Cricut Cart. for the You Did It
Iridescent Glitter Glue on the yellow star
Popped up the You Did It
Thanks for looking. Questions & comments are always welcomed.
Lori

Tuesday, March 9, 2010

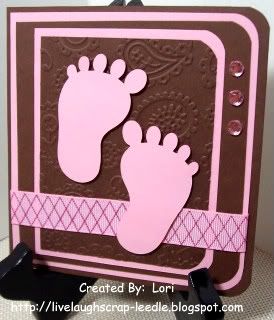
Baby Girl Feet

The pink & brown must be growing on me. I really do like it, but actually I was using what was in my scraps piles.
Details:
Really it is just layers, all 1/4" smaller than the previous one.
I used the Cuttlebug w/ the Paisley Embossing Folder on the top brown layer.
Added ribbon from my stash.
The baby feet are from the New Arrivals Cricut Cart.
3 pink rhinestones for accent.
Thanks for looking. Questions & comments are always welcomed.
Lori

Alyssa'a Giftbag & Tag

Here is the brown & pink giftbag & tag for Alyssa's "A". You can see that project in the previous post.
Details:
Tag:
The tag was cut from the Mini Monograms Cricut Cart.
I also cut the circle lowercase "a" from the Mini Monograms Cricut Cart. and fit it over the tag.
I inked around the edges and added pink curling ribbon to attach it to the bag.
Bag:
Craft giftbag
Happy Birthday was cut from the Sweet Treats Cricut Cart. Inked with distress inks.
Tonic Border Punch System with the flower punch
It's hard to see in the pic, but i used my score board and scored (embossed up) lines 1" apart horizontally & vertically on the base cardstock covering the bag. I just did this to add a little texture. Here is where a 12x12 embosser would come in handy.

Thanks for looking. Questions & comments are always welcomed.
Lori

Monday, March 8, 2010

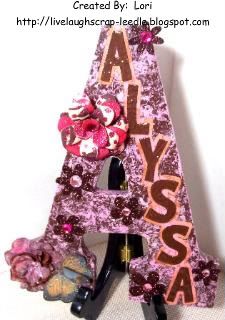
A for Alyssa

This wall letter is for my daughter's friend. Her birthday party is next weekend and this is what my daughter wanted me to make for her. Alexis loved it, so let's hope Alyssa will feel the same way. I'm seriously not too worried about that though. Click HERE and HERE to see what I made for her last year. Her favorite colors are pink & brown and her room is done is those colors too.

White wooden wall letter. (Letter & all embellishments were coated with Krylon Preserve It - Glossy before adhering to make sure they will last.)
Acrylic paint: base color is brown. 2 shades of pink was dabbed all over the brown using a crumpled up plastic grocery bag dipped in the paint.
Name was cut out using SCAL and my Cricut. I Cuttlebugged w/ Floral Fantasy Embossing Folder the top layer of letters & coated with Triple Thick Glaze - thanks to Yoliebean.
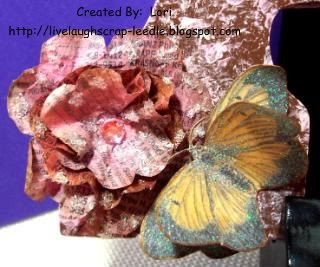
The little brown flowers were cut from the George & Basic Shapes Cricut Cart. I glittered them with Martha Stewart Brownstone glitter and added different sized & shades of pink rhinestones in the centers. This is one of my phone book page flowers with a rhinestone center. It's a little hard to tell in the pic, but I added some Diamond Dust randomly to the flower to give the impression of dew. You can check out Scrapsofmine's Video on how to do this. The only thing I do differently is after it is all dry, I add a coat of Glossy Mod Podge over the top to make sure none of the Diamond Dust falls off. These things are like very tiny shards of glass & hurt if stepped on. Ask me how I know!!!!
The butterfly is from the Amanda Blu Summer Solstice paper stack. I cut out 2 matching butterflies, layered them 0 attaching in the center. I curled the wings a bit & attached near the flower.
This flower was made using the grunge flower technique. The flower that I used was cut from the Sweet Treats Cricut Cart. I used 2 different printed cardstocks, inked the edges & the back sides of the flowers. I added Martha Stewart Tourmaline glitter for some sparkle.
Thanks for looking. Questions & comments are always welcomed.
Lori

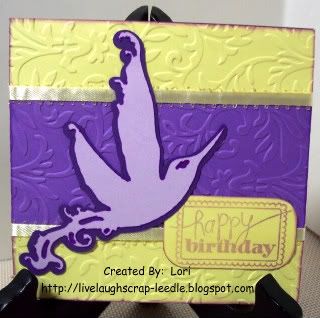
Happy Birthday Card for Stash

I have started making cards to have on hand.  I want to eventually do a craft fair & desperately need inventory.  How do you all do it?  Whenever I get time to craft, I NEED to make something for a party or some other occasion that came up.  This is a slow process for me, but it is steadily growing.
Here is a birthday card that I made.
Details:
Home Accents Cricut Cart for the bird
Cuttlebug (? - embossing folder)
Ribbon
Studio G $1 stamp (I think)

Thanks for looking. Questions & comments are always welcomed.
Lori

Friday, March 5, 2010

Gift Card Holder & Pocket Envie

Gift Card Holder
Cuttlebug w/ Spots & Dots Embossing Folder
Stamps: My Pink Stamper
Pocket Envelope
Cuttlebug w/ Moroccan Screen Embossing Folder
Stamp: Flowers (?) at the moment
Stamp: {HUGS} My Pink Stamper
Thanks for looking. Questions & comments are always welcomed.
Lori

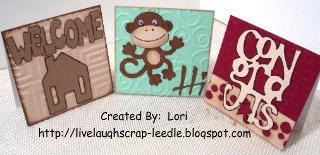
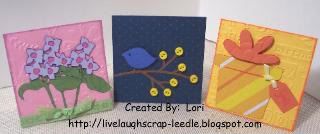
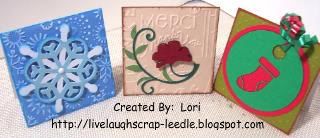
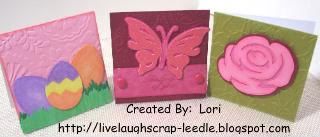
3x3 Assorted Card Set w/ Box

This is a set of 12 3x3 note cards, envelopes, and a 4x4 box that I made to have on hand for a gift or inventory.
I used my Cuttlebug on every card and several embossing folders and Cricut cartridges. I can't remember exactly which ones, but if anyone has questions - don't hesitate to ask.
All cards are blank on the inside.


Thanks for looking. Questions & comments are always welcomed.
Lori

More Cards To Have On Hand

Some of these have Cricut used on them & some don't. Some of these I think still aren't complete. I keep looking at them & saying, " It still needs something." Well, maybe when I decide who each card will go to, I'll figure it out.
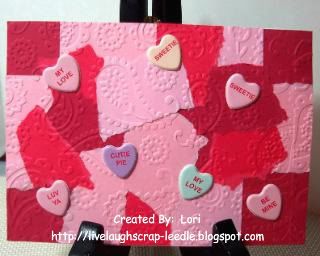
Conversation Hearts
Serendipity Technique
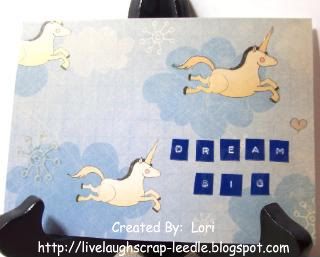
Dream Big
Dymo Embossing Labeler
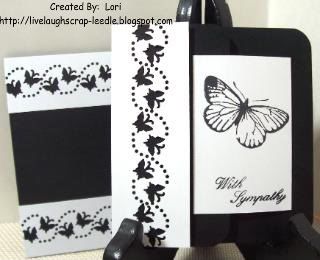
With Sympathy
Joy Fold Card
Stamp: Butterfly Martha Stewart
Stamp: With Sympathy My Pink Stamper
Tonic Border Punch: Butterflies Punch
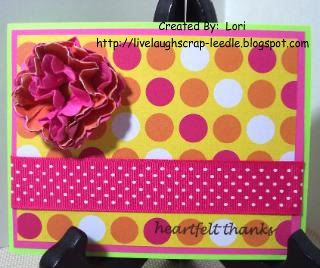
Heartfelt Thanks
Stamp: My Pink Stamper
Flower inspired by Christina's video.
Live a little, Laugh a little, Love a lot!
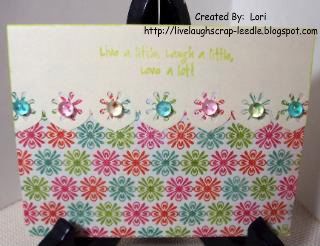
Stamp: (?) at the moment
Tonic Border Punch System: Pinwheels Punch
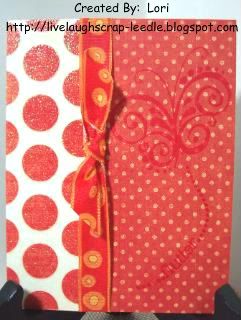
Flutter
Stamps: Inkadinkado
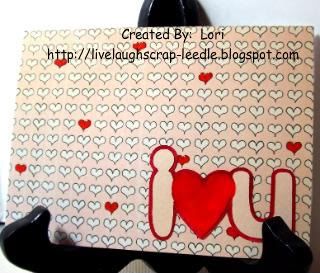
I {heart} You
Cricut: Cart (?) at this momentThanks for looking. Questions & comments are always welcomed.
Lori

Thursday, March 4, 2010

A Couple of Simple Cricut Cards

Here a a couple of cards that I've made in an attempt to have them on hand or for inventory. I found these packs of 8 cards & envies (5x5) for $1. I thought they would make great bases for some note cards. Just have to remember - these need to be handed out or pay extra postage for square cards.

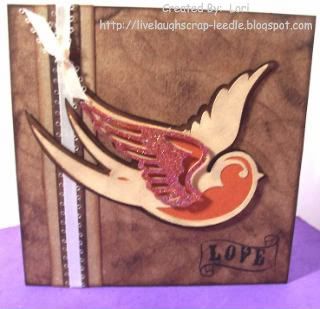
Indie Art Bird:

Details:
5x5 base cardstock inked and texture given with inkpad all over the surface, same done for the cardstock strips.
Cheater method for the ribbon.
Stamp: Recollections - Mark My Heart Set
Bird: Indie Art Cricut Cart.
Lighter layer was sanded, lightly inked & sanded again to give texture. Adhered to the orange layer. Pop dotted to the darker base layer.
Wing - Used Versamark & transparent kaleidoscope (iridescent) embossing powder & heat embossed twice. Pop dotted on top of the bird.

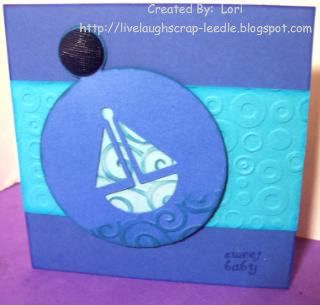
New Arrival Boat:

Details:
5x5 base inked around edges
Strip - Cuttlebug using Spots & Dots Embossing Folder.
Using Cricut Design Studio and the New Arrivals Cart., I placed the circle with the boat cut out over the tag. I did "hide contour" for the circle so that the boar would cut out of the tag. Then, used the circle w/ boat again hiding the boat so that only the circle would cut.
Cuttlebug using the Devine Swirls Embossing Folder on the bottom of the tag (water) and on the circle. Inked over the embossing. Layered these pieces.
Adhered to card base & added a misc. button.
Stamp: My Pink Stamper Stamps - Everyday Occasions

Thanks for looking. Questions & comments are always welcomed.
Lori

Tuesday, March 2, 2010

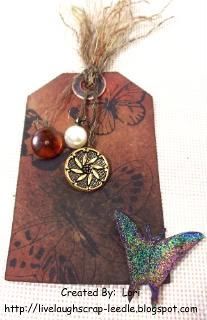
Vintage Buttons & Butterflies Tag

This is the first decorative tag that I have made. I love the way it came out.
I have to thank so many people for the inspiration they have give me. Here are some of them - I am giving their YouTube links. I hope you find them as inspiring as I do.
yoliebean, LiveLoveScrap, mybutterflykisses12, roxyfur, timholtz, there are so many more and I know I will find many more in the future.
Details:
Plantin Schoolbook Cricut Cart. for the Tag
Tsukineko Walnut Stains (Spray)
Martha Stewart Butterfly Stamps
Staz-On Ink
Twine and Hemp Cording
Tim Holtz Distress Inks (Worn Lipstick & Weathered Wood)
Heat Embossed a mixture of UTEE and Iridescent glitter to the 3D Butterfly
Misc. grommet & old buttons from a can my mom gave me.

Thanks for looking. Questions & comments are always welcomed.
Lori