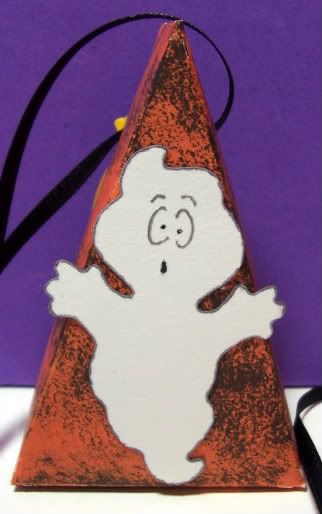
Followers, Guestbook, & Comments

My followers are being shown in the right column. My Guestbook is at the bottom. Please follow, comment on posts, & sign my guest book. Your comments encourage me to keep sharing my work. I love hearing from you all.

When you leave a comment, I have to moderate it before it will be posted. So if you have a questions or comments, feel free to ask & if necessary note that you don't want your comment posted.
Showing posts with label SYI. Show all posts

Monday, June 14, 2010

Wall Letters - Meagan & Natalie

I made these letters quite a while back.  A friend of mine wanted them for her daughters birthdays.  I had to wait until they received them to be able to post.  Then time got away from me, but there they are.
I used my Gypsy, SCAL, & Cricut to design and create these letters.

Natalie likes swimming, acting, music, & loves writing stories.  Her room is a dark aqua color.  So this is the letter that represents her.
The cartridges that I used for Natalie's letter are:  Tear Drop (Name), Sports Mania (Swimmer), Locker Talk (Paper, Comedy/Tragedy Masks, & Music Plaque), & Stretch Your Imagination (Music Notes)

Meagan is all about high school right now.  She is going to be a freshman this coming school year.  Therefore we have the school mascot (Go Yellow Jackets!!!! - My son is in school with Meagan- LOL) & the "H".  She is on the dance team and softball team.  Her room is a very dark purple.  This is why we have the purple letter with all of the black & gold school themed cuts.
The mascot was done using SCAL.  I want to throw out a HUGE THANK YOU to Aymee @ A Southernbelle's SVG's.  I was having the hardest time making a file for the mascot & she did it and did it quick.  So Thank You Aymee!!!!!  You can visit her blog to get that file if you need it for anything.
The cartridges that I used on this letter are:  Gypsy Font (Name), Beyond Birthdays (Girl - that I converted to a dancer), Locker Talk (Dance Sign), Plantin Schoolbook (H), & Sports Mania (Softball).
Oh, BTW - They Loved Them!!!!
Thanks for looking. Questions & comments are always welcomed. Lori

Friday, January 15, 2010

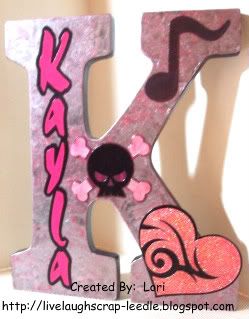
Wall Letter K - Kayla

I can finally show this post. I had to wait until I could give this to my niece.
Ok so this is about the 5th Wall Letter that I have done. I love doing them, but I stress myself out trying to make them fit the person that they are for. Last time I got the first boy one out of the way. Now this one is for my niece, but she is 20 years old. I tried to capture her personality & her interests in this. I hope I did good. She is a very good artist, so I am just praying that she will like it. What was I thinking, trying to give a craft gift to someone that is so talented herself? I can't wait for her to get this to finally stop stressing.

Details:
White wooden letter from Michael's.
SCAL for the letters.
Indie Art Cricut Cart. for the heart and the skull.
Stretch Your Imagination Cricut Cart. for the music symbol.
I painted the letter with black acrylic paint.
I used Tim Holtz Distress Paint (Brushed Pewter) on the top of the letter. I used my fingers to give it some texture. When that dried I brushed over it with Tim Holtz Distress Ink pad (Worn Lipstick). My niece's favorite colors are pink & black. I did the same to the cross bones of the skull.
I used UTEE mixed with glitter and heat embossed that to the top layer of the heart.
After everything was adhered to the letter, I put a layer of Mod Podge over it. Then I sprayed it with Krylon Preserve It for extra protection.
Now for the reaction:
I think she really liked it. I felt really good when she opened it and said "Wow, how did you do that?" Her brother gave me a very good compliment on it too. He said that if he could capture Kayla and put her on a letter, this would be exactly it.
Glad that is over. I think I need to have more confidence in my work. I stress over it too much. I just want the people that I am making things for to really like them.
Thanks for looking. Questions & comments are always welcomed.
Lori
Tuesday, November 24, 2009

Completed Christmas Party Favors

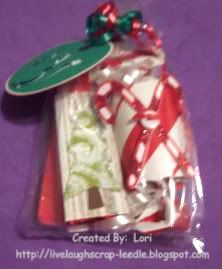
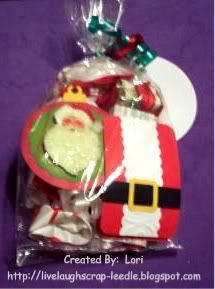
These are the Christmas Party Favors all packaged up for my daughter's school party. You can see the details on all of the individual pieces here: Part 1 Wrapped Candy, Part 2 Santa Peppermint Patties, Part 3 Nugget Presents, Part 4 Kit Kat Wrapper, and Part 5 Ornaments.

This is what I consider the front side: Showing the Kit Kat Wrapper & the Wrapped Candy along with the tag (not showing to well.

For the tag I used Stretch Your Imagination for the snowman and the circle tags (I think). I made a shadow and regular cut of the circle tag. I used CDS to cut the snowman our of the green layer. I them used Pop Dots to adhere the positive snowman over the negative cut out. My daughter signed the back of the tags.


This is a pic of the backside: Showing the Ornament, Santa Suit Patties, and the Nugget Presents.

Thanks for looking. Questions & comments are always welcomed.
Lori
Monday, November 16, 2009

Thanksgiving Napkin Rings

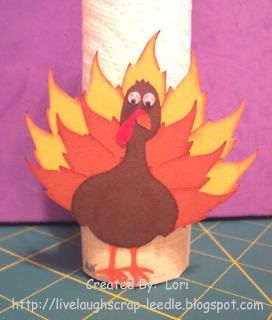
I made these napkin rings for my daughter's Thanksgiving Feast at school. I got the idea from Brigit on the Cricut MB. HERE is the link to her turkey. Mine is made differently - but the idea is the same.

This 1st pic is showing the napkin ring standing up. (the colors are better in the 2nd pic. The orange feathers are not really so orange (more like a burnt orangey brown).

Details: (It seems like a lot - but was really easy.)
TP Roll cut in half for the ring.
Cardstock 4 x 5 3/4 (I think) to cover the TP Roll
Slit the edges & adhere to the inside of the TP Toll. They are long enough to pretty much cover the inside of the roll too. It gives it a more finished look.
Printed Paper 1 3/4 x 5 7/8 to wrap around the holder. (Optional)
Stretch Your Imagination Cart - Leaves (Feathers) (shift & black out) cut at 2" (about 13 per turkey)
Cut 1/2 of what you need flipped
Animal Kingdom Cart - Turkey orange (so the feet would show)
I cut off the feathers from this turkey. I also cut all of the layers in the appropriate colors & layers them.
Googly Eyes
I inked around the turkey body (also added shading between the body & wings) and all of the feathers with brown Color Box Pigment Ink.
I adhered the feathers to the back of the turkey in a pleasing pattern. They are all a little different. I made 14 of them.

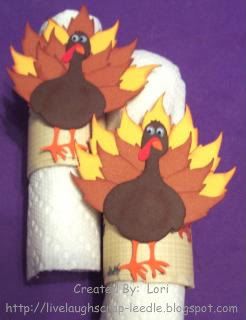
In this pic they are laying down. I had to place 2 of them together b/c they rolled the the side.

Thanks for looking. Questions & comments are always welcomed.
Lori
Wednesday, November 11, 2009

Christmas Ornaments

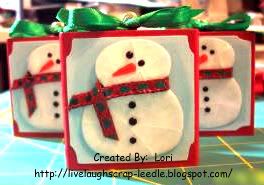
I made 10 of these ornaments for Christmas presents this year. I can see myself making many more in different designs. I had so much fun with these, I just want to keep going.

For the base I used wooden blocks that rubber stamps had been unmounted from. Thanks Kelly Scott from the Cricut MB for all of the blocks that yo did not want. Anyone else that wants to get rid of any of them, please let me know!!

I painted the blocks with acrylic paint. I screwed in the eye screws to the top of the block.
The front & back panels were cut from the Stretch Your Imagination Cart. I inked the light blue paper with white pigment ink to soften it a bit.
The snowmen were cut from the Doodle Charms Cart in blackout. I gave the snowmen a little dimension by edging them with light blue and white chalk. I attached the carrot noses. Using a Versamark pad, UTEE, and my heat gun I embossed the snowmen. This gave them a glass-like appearance. I then bent them to make them look like cracked ice. After all of this was set, I used black Liquid Embossing to dot on the eyes and buttons. The Liquid Embossing is shiny and raised giving even more dimension. I attached a ribbon "scarf" around each of the snowmen's necks. Thanks Tracy (Craft Junkie Too) for that idea.
I lightly painted Mod Podge onto the face of the block and the back of the blue panel & attached. When all of them were set, I added another light coat of Mod Podge and to the back of the snowmen and attached.


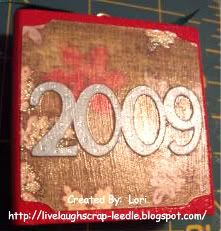
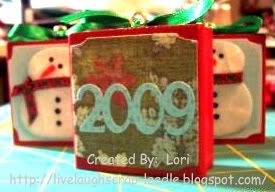
The 2009 is cut from the Alphalicious Cart. I used CDS to weld the numbers together. I attached the 2009 to the panel. Then used the same process as above to attach the panels to the blocks.
I then just tied a ribbon bow the the top of the block around the eye screw. I added a little drop of Glossy dimensions under the knot of the bow to make sure it stayed in place. (I am not the best decorative bow tying person .- LOL)

Here is a closer up view of the snowmen to show the crackled ice look. Not sure if it is showing up to good though.

And this is a close up of the back side. After the last layer of Mod Podge dried, I added some dots on the 2009 with a blue glitter pen. Again not sure if this is showing up to good in the pic.

Thanks for looking. Questions & comments are always welcomed.
Lori
Monday, October 19, 2009

Halloween Party Favors

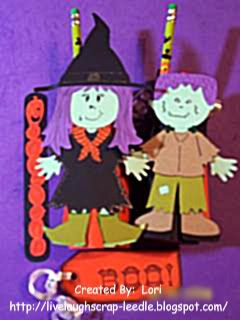
These are the Halloween Party Favors that I made for my daughter's class. I covered toilet paper rolls with either orange or black cardstock. The I attached the Paper Doll Witches & Frankensteins to them. I cut out circles and attached them to the bottoms of the rolls with Zip Dry Glue (This stuff made an excellent bottom - holds great even when filled.)

I filled them with Skittles, Starbursts, Halloween Kaleidoscopes, Halloween Pencils, and Halloween Bookmarks.

Details:
Dolls are all Paper Doll Dress Up Cart.
Faces are Peachy Keen Stamps & hand doodled.
I used markers & gel pens to hand embellish the dolls & clothing.
Bookmarks: Base is from the Tags Bags Boxes & More Cart. The stacked pumpkins are from the Stretch Your Imagination Cart. I cut off the feet, arms, & scarf.
Tag is from the Plantin Schoolbook Cart. "BOO" is stamped from a Martha Stewart Halloween stamp set that I got on clearance at M's last year. I also edged with a black stamp pad


Standing & wrapped in Cello bags.
Thanks for looking. Questions & comments are always welcomed.
Lori
Monday, May 25, 2009

Kick Off To Summer Treats

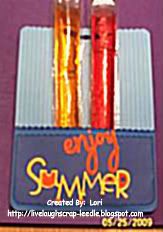
I want to thank AprilDawn on the Cricut MB for posting this idea. Hers is so cute. I made these for my daughter's class for a "Kick Off Summer" treat.
Details:
I cut a 12x12 sheet of double sided cardstock in half. Scored it at 3 1/2 & folded to make a pocket. I used my Fiskars trimmer with the scallop blade to make the edges look like waves & layered a couple of layers in different colors of blue. I inked around the edges of the pocket.
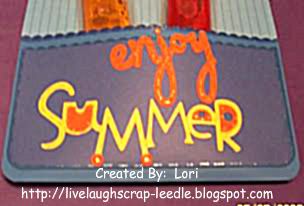
I cut enjoy out with the Wildcard Cart.
I cut Summer out with the Stretch Your Imagination Cart.
I used blue, orange, & yellow glitter pens to decorate.
I also did the faux bow technique on the top. (hidden by the freezie pops)
Close up of pocket:

Thanks for looking. Questions & comments are always welcomed.
Lori
A Proud member of The Lime Light. Click on over to see what we are doing.

Monday, April 13, 2009

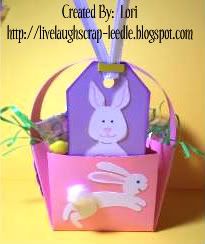
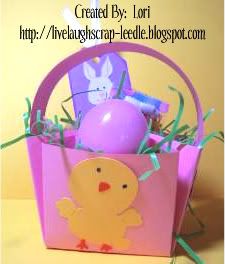
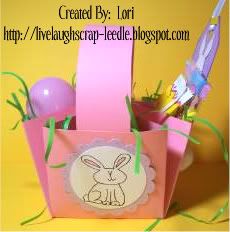
Easter Party Baskets & Bookmarks

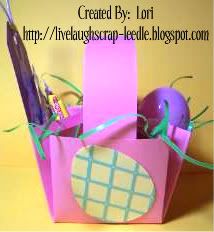
I made these Easter baskets for my daughter's class Easter Party. I made 7 pink ones & 4 blue ones. Of course, I also had to make a bookmark to put in it.
Details:
For the basket I used a 8 1/2 x 8 1/2 piece of cardstock. I used my Ultimate Crafter's Companion to score the box. I used the instructions in the DVD for the Pop Out Box and scored on the line for Tri-fold of a US Letter on all four sides then scored the corners from the intersection to the point & folded in. Instead of making a box top, I just glued the points together in the center. This gave 4 triangle pockets on the sides of the basket. I just cut a strip of cardstock for the handle & glues to the inside.
Side 1:
Hopping Bunny is cut from the Cricut Sampler Cartridge. Colored in with LePlume II markers and added a piece of cotton ball for the tail.
Side 2:
Chick is cut from the Stretch Your Imagination Cartridge.
Side 3:
Circle & scallop circle is cut from the Mini Monograms Cartridge. The stamp is Studio G $1 Stamp on a wood block. Colored in with LePlume II markers. I also used a Metallic Pink (Metallic Blue on the boys') pen to make doodle dots around the scallop (doesn't show up in the pic).
Side 4:
The egg is cut from the Doodlecharms Cartridge. The lattice is cut from the Wild Card Cartridge. Also not showing up in the pic are Metallic Yellow doodle dots at the intersection points of the lattice. On the boy's baskets the colors are reversed for the egg.
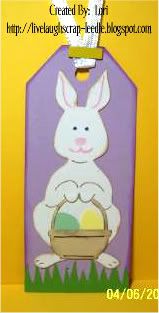
The Bookmark:
The tag and the grass is cut from the Plantin Schoolbook Cartridge. The bunny is cut from the Stretch Your Imagination Cartridge. The eggs and basket are from the Doodlecharms Cartridge. I used ColorBox Pigment Inks to ink around the edges. I used LePlume II markers for coloring in on the bunny & basket. I also used the Fastenator & colored staples to attach the ribbon on the tag. The only difference with the boy's bookmarks is that the tag is blue instead of purple.
Thanks for looking. Questions and comments are always welcomed.
Lori
A Proud member of The Lime Light. Click on over to see what we are doing.

Thursday, March 5, 2009

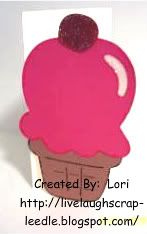
Ice Cream Card & Door Hanger

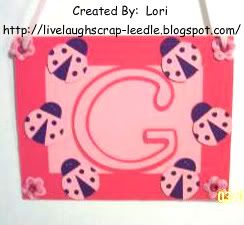
This is the card that I made for Gretchen. I used CDS to weld the ice cream cone to a rectangle to fold & make a card. I cut the layers & adhered them to the front of the card. I used glitter glue in the glare spot & on the cherry. I inked around the cherry with ColorBox ink. I also inked around the ice cream cone & ice cream top with LePlume II Markers.  Click HERE for the .cut file. The door hanger was another gift for Gretchen. I used Stretch Your Imagination for the frame & backing, Tear Drop for the G, and Doodlecharms for the ladybugs. Other embellishments are: ribbon for hanging, misc. flowers & Making Memories flower eyelets.
Thanks for looking. Questions and comments are always welcomed.
Lori
A Proud member of The Lime Light. Click on over to see what we are doing.

Wednesday, December 10, 2008

A Few More Ornaments

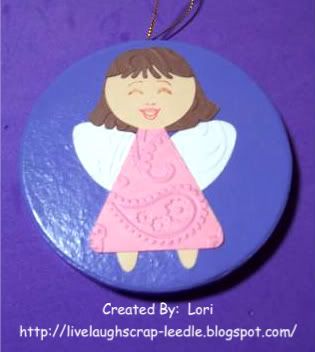
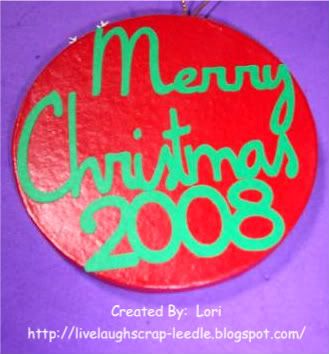
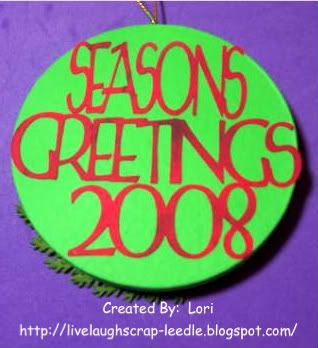
Ok, so here are a few more ornaments. A friend that I had grown up with had seen my Godchild's ornament. He wanted me to make some for his daughter. They give her six new ornaments every year & he wanted me to make four of them for her.

Angel: I made this one using CDS, George & Basic Shapes, and Paper Doll Dress Up. Click HERE for Angel .cut file. When you cut it, you will not use the head on the 2nd body. This angel is very simple, but I really don't design much with CDS. I mostly use it to size things correctly & weld letters to make words, so this was an accomplishment. I think she came out cute. I also used Peachy Keen Face Stamps (Blushing Brides). I also used the Cuttlebug for her dress, wings, & hair.
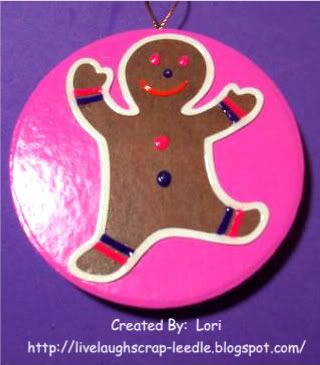
Gingerbread Man: He came from the Stretch Your Imagination cart. I used Markers to color in the colored parts of the "icing", then I used Liquid Embossing to give it a little dimension.
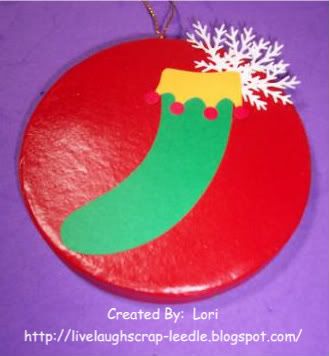
Christmas Stocking: I can't remember which cart this one came from. I used the MS Branch punch for the branches at the top.
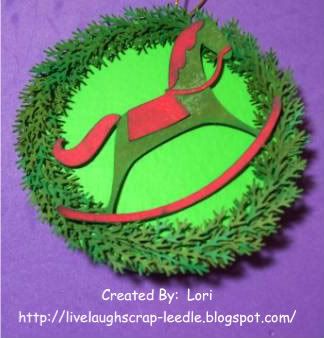
Rocking Horse Wreath: I think this one is my favorite. (I have to check on this one too about the cart.) I appologize - I have been working on so much lately that I don't remember all of supplies used. I used the MS Branch punch to make the wreath. I rubbed a dark green ink pad across the horse & the wreath. I like the way it turned out. It kind of made it look antique-ish.
Thanks for looking. Questions & comments always welcomed.
Lori
A proud member of The Lime Light Design Team. Please click on over to see what we are doing.

Monday, October 13, 2008

Kids' Birthday Cards

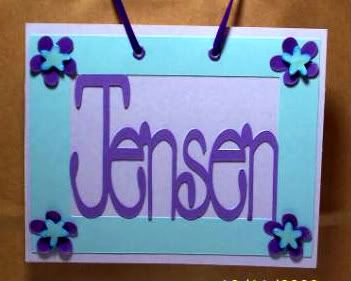
I made this card for my niece's 7th Birthday. I made a flat card & put her birthday message on the back. I made it into a doorhanger & hung it on the handle of her gift bag. She absolutely loved it & so did the rest of the girls at the party.
Details:
The name & frame were cut out as one piece. Then I cut the name in purple & layered it.
Cricut Design Studio to size & weld the name & the frame
Tear Drop for the name
Stetch Your Imagination for the frame - blue flowers were cut from the corners of the frame
George & Basic Shapes for the purple flowers
Ultra Thick Embossing Enamel with a heat gun was used on the flowers then layered
Crop-A-Dile for setting the Making Memories Eyelets
Misc. Ribbon was used for the hanger

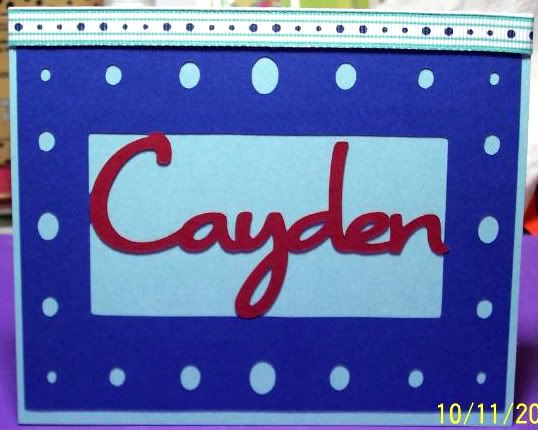
This card was made for the son of some very good friend's. It was for his 5th birthday.

Details:

The name & frame again was ust all in one piece. Then I cut the name in red & layered it.

Cricut Design Studio to size & weld the name & frame

Opposites Attract for the name

Stretch Your Imagination for the frame

Misc. Ribbon

Thanks for looking. Comments & questions always welcomed.

Lori
Proud member of The Lime Light design team.

Thursday, October 9, 2008

Halloween Treats


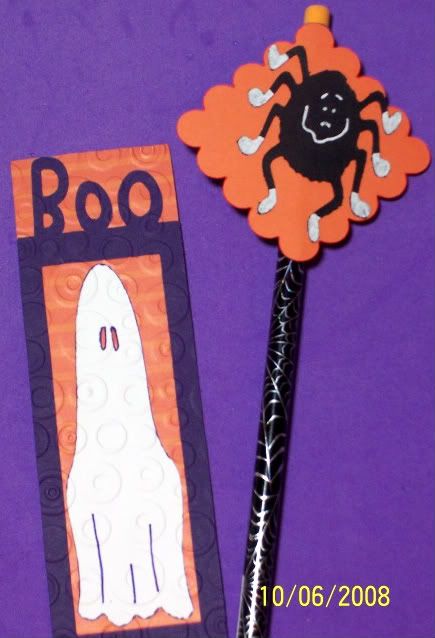
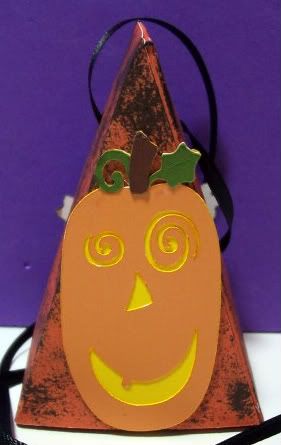
I made these treats for my daughter's Halloween party at school. Each child (11) will get a spider pencil, a boo/ghost bookmark, & a pumpkin/ghost cakebox necklace filled with a halloween marshmallow (pre-wrapped) candy. Each cakebox was sponged with a cottonball & black Staz On ink. They all have a ghost on one side & a pumkin on the other. On the bookmarks, I used the Cuttlebug with the Spots & Dots folder. I wanted to do that on just the base, but I forgot to. I did one after the entire thing was made & my DD loved it, so I did them all.
I have to look up all of the details & will post later.
Thanks for looking. All comments & questions welcomed.
Lori
A Proud member of The Lime Light. Click on over to see what we are doing.


Friday, August 22, 2008

Birthday Card

This is the card that I made for my mom to give. It is for my cousin's 40th Birthday. I wanted to do something a little more sophisticated for this one. I hope I accomplished that. I used SYI for everything on this & welded them all together in DS. Then I cut the bows & layered them on the presents. I also cut an extra (center) flourish & layered that too. I used glitter glue on the bows & Liquid Embossing on the small flourishes.
Thanks for looking. Comments & questions welcomed.

Sunday, August 17, 2008

40th Birthday Cards

Well, I found out this week that we will have two 40th Surprise Birthday parties to attend. Neither of them know about my blog yer, so this won't blow it - LOL.
I also sent this in for Daily Scrapper's http://abusyplace.blogspot.com/ weekend challenge #3
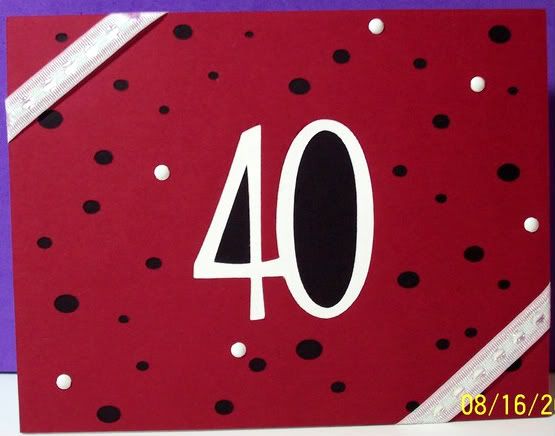
This first one is for my cousin:
Details:
CDS, Ribbon from M's, frame is from SYI, 40 is from G & BS, & white mini brads
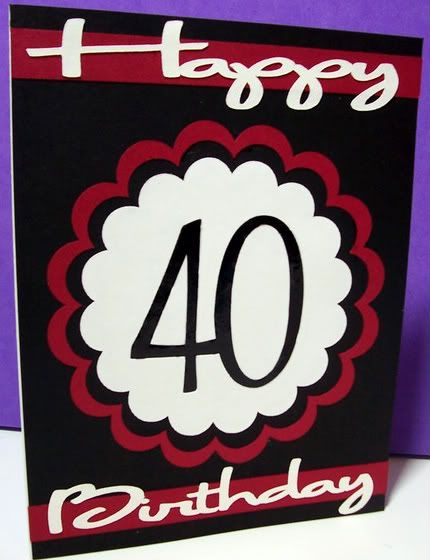
This one is for my sister in law:
Details:
CDS, Scallop circles 5" & 4 1/2" (placed inside the 5' to make a frame) from MM, 40 from G & BS (placed inside 4" circle)
Happy & Birthday from OA each word cut at 4 1/2" wide x 1" height.
Liquid Embossing inside the 40.
Thanks for looking. Questions & comments welcomed.

Saturday, August 16, 2008

Thank You (Shoe)

I made this card for a very good friend. She gave my daughter a gift certificate to get some school shoes. I entered this card in a challenge on DailyScrapper's blog http://abusyplace.blogspot.com/. The challange was to use any Cricut cut, colors were to be black & white, & you had to use ribbon in some way. you might want to check it out. She has 2 more challenges this weekend.
Details:
I used CDS, PDDU, OA, & SYI. In CDS, I skooched one shoe off of the mat so that it would only cut one. The ribbon is from Michael's. I used a white Gelly Roll pen for the scored marks on the shoe. I also used the CAD to punch the holes to lace the ribbon. I also used Liquid Embossing on the "Thank You", it just doesn't show well in the pic.
Thanks for looking. Questions & comments are welcomed.