Followers, Guestbook, & Comments

My followers are being shown in the right column. My Guestbook is at the bottom. Please follow, comment on posts, & sign my guest book. Your comments encourage me to keep sharing my work. I love hearing from you all.

When you leave a comment, I have to moderate it before it will be posted. So if you have a questions or comments, feel free to ask & if necessary note that you don't want your comment posted.
Showing posts with label WC. Show all posts

Monday, July 12, 2010

Camera Photo Album & Fleur De Lis Candle Bowl

A very good friend of ours was having some visitors in from out of town.  It was their first visit to see them & to our city.  She had asked me to make something for them as a memento.  For the mother she wanted to give her one of my candle dishes that I etched with fleur-de-lis.  I used the fleur-de-lis on the Wild Card Cricut Cartridge.
The daughter likes to take a lot of pictures.  So I figured I would make a photo album.  It had 10 pages (front & back) that I made out of water color paper and painted with acrylic paints.  I then painted cardstock and adhered it to the pages, so that it added room for at least 3 pics per page.  The front & back covers were made from corrugated cardboard that I cut up from a box.  I painted each of these with white Gesso & then acrylic paints.
The pages & covers are 5x7.  The cardstock is 4.5 x 12 & folded so that each part of the cardstock can fit a 4x6 picture or journaling if she wishes.
I cut the camera pieces & painted them with acrylic paint as well.  I added her initials & a fleur de lis as a symbol of our city.  I used heat embossing with UTEE on the fleur de lis to make it glossy & to add dimension.
 
Cartridges Used:  Create A Critter (Camera), Accent Essentials (Fleur de lis), Cuttin' Up (Initials), George & Basic Shapes (Background Rectangle for the initials)
All pieces of the camera were cut from water color paper & painted with acrylic paint.  After assembling the camera, I sealed it with Krylon Preserve It.  I then added the fleur de lis that was heat embossed with UTEE to add dimension & shine.
Thanks for looking. Questions & comments are always welcomed. Lori

Thursday, May 6, 2010

Locker Talk - 8th Gr. Graduation Card

I made this card for one of my son's best friends. They went to school together from Kindergarten through 5th grade when my son moved on to another school. If my son had stayed at this school, this would be his graduating class. This will be an emotional night, seeing most of the kids that we have known since they were 5, graduating 8th grade.
Details:
Cartridges Used: Locker Talk, Pooh Font, & Wild Card
Thanks for looking. Questions & comments are always welcomed. Lori

Thursday, February 18, 2010

A Smile for Haili

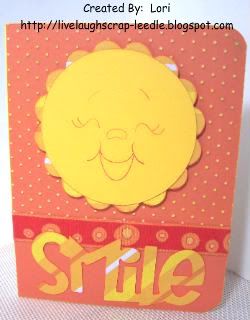
I made this card for a beautiful young lady. She is not only a beautiful girl, but a very lovely person. I have known her since she was in Kindergarten and now she is in high school, whew - hard to believe how fast time flies!!! She got braces yesterday, and just wanted to let her know that we were thinking about her and wishing her well.
I am also entering this into the BBTB2 contest.
Details:
Circle - George & Basic Shapes Cricut Cart.
Scallop Circle - Mini Monograms Cricut Cart.
Smile - Wild Cards Cricut Cart.
Cuttlebug - Swiss Dots Embossing Folder
Ribbon
Peachy Keen Face Stamp
Thanks for looking. Questions & comments are always welcomed.
Lori

Monday, January 11, 2010

Valentines & Valentine's Party Favors

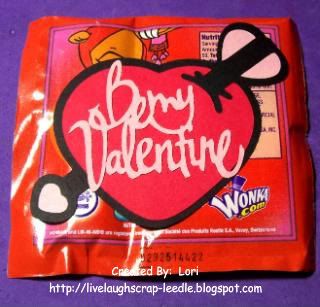
I made these for my daughter to give out for Valentine's Day. The heart and arrow were cut from the Hello Kitty Greeting Cricut Cart.
The Be My Valentine was cut from the Wild Card Cricut Cart.
Then I just adhered them to individual Valentine Lik-N-Dip Packs and wrote her name in the From space on the other side.


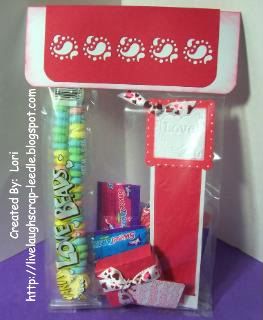
This pic is of the Valentine's Party favor bags that I made for my daughter's class.
For the topper I just cut white cardstock & scored down the middle, rounded the corners & inked with Tim Holtz's Distress Ink Pad (Worn Lipstick). I cut the red cardstock a little smaller, scored down the middle & rounded the corners. Then I used my Tonic Border Punch System with the Paisley II Punch to make the design across the front. (Info about the Tonic Border punch System is at the bottom of this post.) I have the Heats Punch on its way to me, but I was impatient & wanted to get these done over the weekend. I still think it is cute & the boys will like it too. I filled with Misc. Candy, Candy Love Beads, Bookmark, and Decorated Mini Nerds. I then stapled the white part of the topper to the bag. I layered the red part of the topper over the white (adhered with ATG), this hid the staple. From is stamped on the back of the topper & my daughter wrote in her name.

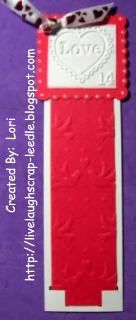
This is the bookmark that I made.
I cut red & white rectangles, just using my paper trimmer. I cut the red ones a little smaller for layering.
I used my Marvy 2 1/2" Scallop Square Punch (red - 2 for each bookmark) and the 2" Square Punch for the white. I ran the white squares through my Cuttlebug using the Love Stamp Embossing Folder. Then I used the Tonic 2-in-1 Arrowhead Corner Punch on the bottom of the white rectangles. The red rectangles were run through my Cuttlebug using the Doves & Hearts (Christmas Set) Sizzix Embossing Plates. I adhered the red rectangles the the white ones tucking the corners into the punched corners. I adhered the red squares on the top, white on top of that. I white doodle dots around the scallop square. I used a 2 slot hole punch on the top left corner & threaded ribbon & tied a knot bow. I then adhered the other red square to the back for a finished off look.

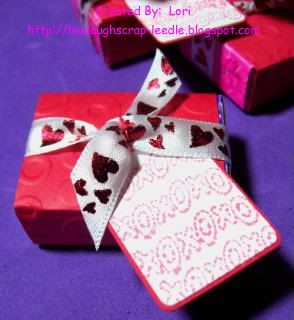
This is the covered Mini Nerds that I decorated.
The inspiration for this came from Angie @ Chic'n Scratch Live. You can see her video for her Valentine Nerds HERE. I'm sure her instructions were clear, but I was doing these in the middle of the night & was confused for some reason (not unusual for me in the middle of the night or not when it comes to measurements - LOL). So this is how I did them.
Red cardstock 4 5/16" x 1 5/8" - Scored @ 5 /16" on both ends then on one end @ 1 13/16" & 2 7/16". I ran it through my Cuttlebug using the Spots & Dots Embossing Folder
I cut the scallop tag from the Plantin School Book Cricut Cart. @ 1 1/2" in white & 1 1/2" shadow in red. I stamped in Worn Lipstick Distressed Inkpad the xoxoxo Studio G $1 Clear Stamps (Feb. Set) on the white tags. layered the white & red tags.
Tied a ribbon knot bow around the box. Using red thread attached the tags to the ribbon.

Tonic Border Punch System Information:
To see videos about it:
Tonic Border Punch System Videos parts 1 & 2
Tonic Boot Punch Videos parts 1 & 2
Tonic Border Punch System Information: Click HERE
To order or for more info, contact Cheryl Horton / Inspire Me HERE
Cheryl is a dear to work with and will answer any questions that you have.
Thanks for looking. Questions & comments are always welcomed.
Lori

Thursday, December 31, 2009

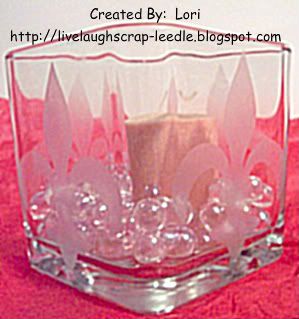
Fleur-Di-Lis Glass Etched Candle Bowl

I made these for a couple of very good friends this Christmas. For those of you that don't know, I am from the New Orleans area. With the way the Saints are going this year, I think I have to get more etching cream. I already have people that have said that they want some of these without even seeing them. I think I will be making them in different sizes too.

Thanks for looking. Questions & comments are always welcomed.
Lori

Giftcard & Money Holders

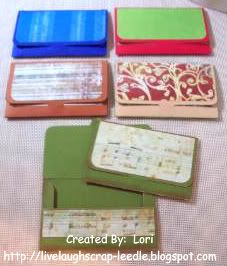
I want to thank Christina from Creations With Christina for making all of her Wild Card Series Videos and for all of the measurements. I made these giftcard holders and envies and Money holders using the Wild card Cartridge. It would have taken me so much longer to get them done if Christina would not have had all of the measurements all figured out already.
Giftcard Holders & Envies:

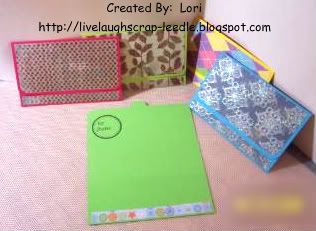
Money Envelopes:

Thanks for looking. Questions & comments are always welcomed.
Lori

Tuesday, November 3, 2009

Fleur-di-lis Pins/Necklaces

Well, we live in the New Orleans area. So right now, everyone is having Black & Gold Fever. Go Saints 7-0!!!!! My daughter's school was having a Black & Gold Day yesterday before the Saints vs. Falcons game. Her teacher is a huge Saints fan & already gives not HW on Monday if the Saints win. So this week it is Tuesday, Woo Hoo!!

But anyway, I made these pins for my daughter's class & her teacher. Not sure if the boys (3rd grade) would wear the pins, I added yard so they would have a choice to wear them around their neck.


I sized the fleur-di-lis from the Wild Card Cricut Cart. in CDS. The larger one was 4x4 and the smaller one was 3x3. They are cut out of Shrinky Dink shrink plastic. I cut them using my Cricut w/ the deep cut blade set on 6 & on multi cut 4 (twice) and I still had to finish cutting them out with an exacto knife.

After they were cut out, I placed them in the oven to shrink (follow package instructions). I used acrylic paint to color them. The gold paint that I got was metallic & actually looked better on the wrong side of the piece, so that's how I put them together. I used E-6000 glue (recommended) to adhere the fleur-di-lis together and to attach the pin to the back.

The teacher & all of the kids really loved them.
Thanks for looking. Questions & comments are always welcomed.
Lori

Christmas Rectangular Album

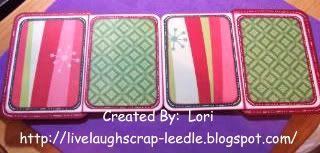
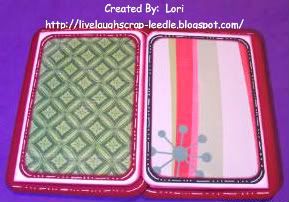
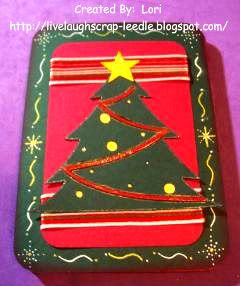
Again the inspiration for this album came from Angie's video for her Rectangular Coaster Album. Instead of using coasters I used 140 lb. watercolor paper & cut everything on my Cricut.

Front:

Front Inside (4 sides):

Back Inside (2 sides): Oops - I forgot some of my doodling on the sides of these pages. I will have to fix that later.

Back:

Thanks for looking. Questions & comments are always welcomed.
Lori

Monday, October 19, 2009

Inchie Swaps: Due Jan 15, Jan, 30, & Feb. 15 2010

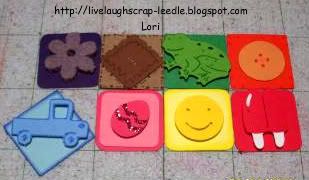
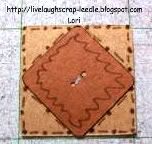
For those of you that may need a reminder as to what inchies are: They are 1 inch shapes uses as a base. They can be any shape as long as they are 1"x 1". There are also Twinchies 2"x 2" & and Trinchies 3"x 3". These were all made for swaps hosted by KellyScott on the Cricut MB. You can see more of my inchies, twinchies, & trinchies by clicking on those words.

Birthday Theme Swap:
Details: Base was cut from George & Basic Shapes Cart. Present was the icon from the Wild Cards Cart. I added a dot of opal glitter glue at the center of the bow (doesn't show well in pic).

Kid Theme Swap:
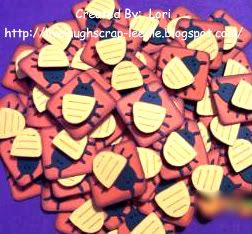
Details: Base was cut from the George & Basic Shapes Cart. Bug was cut from the Doodlecharms Cart. I used pop dots to add dimension to the back of the bug.

School Theme Swap:
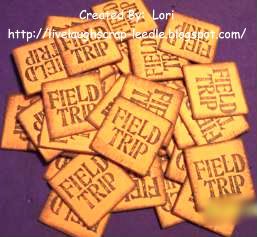
Details: Base was cut from the George & Basic Shapes Cart. Stamp is Studio G $1 stamps from the September set. I also edges around the base with brown pigment ink for a little distressed look.
Thanks for looking. Questions & comments are always welcomed.
Lori
Friday, July 24, 2009

Rainbow inchie Swap (Due: September 30)

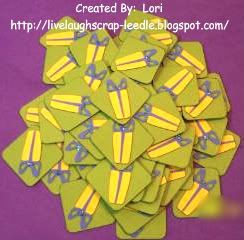
These are the inchies that I made for the Rainbow Inchie Swap on the Cricut MB. We had to make 20 of each color & we could decorate them any way we wanted to. The only stipulation was that they could only include the one color of that group. We could use white minimally as an accent color if needed & black for stamping if needed. The only one that I needed to use whit on was the popsicle (for the sticks - blackout layer). On all of the others I just used different shades of the same color. These are so much fun to do.
Here are the individual pics to show more detail:

Thanks for looking. Questions & comments are always welcomed.
Lori
A Proud member of The Lime Light. Click on over to see what we are doing.

Thursday, July 2, 2009

More Trinchies and Inchies Swaps (Due Aug 31)

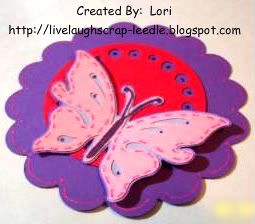
Well, someone in our Trinchies Swap could not fulfill their commitment. So I took 2 extra spots. Not a problem b/c I have become so addicted to making these Inchies, Twinchies, and Trinchies and am having a ball.
I used Mini Monograms for the Scallop & the center circle. i used the indie Art cart for the butterfly.
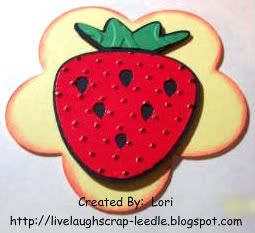
I think i used the Mini Monograms Cart for the shadow flower base. I used Indie Art for the strawberry & ran the red & green parts through the Cuttlebug with embossing folders.
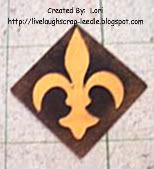
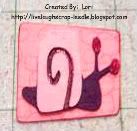
Now onto the inchies. The bee, turtle, & snail are all from the Walk In My Garden Cart. The Fleur di lis is from the Wild Card Cart. I like trying to do the bases a little different shape as long as they fit the size requirement. I used the cylinder (bee) and the (Shift H) (snail) on the George & Basic Shaped Cart.
Thanks for looking. Questions & comments are always welcomed.
Lori
A Proud member of The Lime Light. Click on over to see what we are doing.

Father's Day T-Shirts & a Card

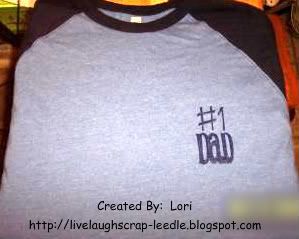
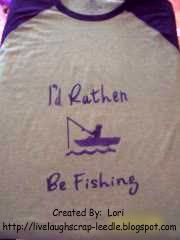
I haven't posted in a while, so the next few posts will be things that I have made recently. I don't remember all of the details of everything i used or did. But I will try to put as much information as I can. I used the Freezer Paper Technique (See This Post for a video link) for both T-shirts. This technique is so easy & fun.
This is the T-shirt that I made for my husband for Father's Day. I'm pretty sure that the DaD is from Beyond Birthdays & I think the #1 came from George.
Here is the one that i made for my dad. I can't remember which cart I got the font from on this shirt, but the image is from Cricut Sampler.
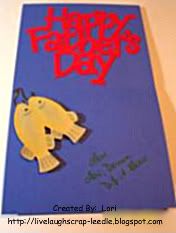
I made this card for my dad for Father's Day. My son's b-day was in May. The boat image was the front of a card that he received. I thought it fit perfectly with my dad's fishing shirt & would do a fishing card too. So I cut the front of the card off & pulled colors from it to make the card front of my card.
Here is the inside. The Fish & the sentiment came from the Wild Card Cart. I used markers & chalks to shade & give detail to the fish. I them gave the fish a coat of Mod Podge to give it a little shine, pop dotted the fish & done.
Thanks for looking. Questions & comments are always welcomed.
Lori
A Proud member of The Lime Light. Click on over to see what we are doing.

Monday, May 25, 2009

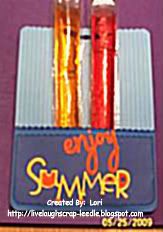
Kick Off To Summer Treats

I want to thank AprilDawn on the Cricut MB for posting this idea. Hers is so cute. I made these for my daughter's class for a "Kick Off Summer" treat.
Details:
I cut a 12x12 sheet of double sided cardstock in half. Scored it at 3 1/2 & folded to make a pocket. I used my Fiskars trimmer with the scallop blade to make the edges look like waves & layered a couple of layers in different colors of blue. I inked around the edges of the pocket.
I cut enjoy out with the Wildcard Cart.
I cut Summer out with the Stretch Your Imagination Cart.
I used blue, orange, & yellow glitter pens to decorate.
I also did the faux bow technique on the top. (hidden by the freezie pops)
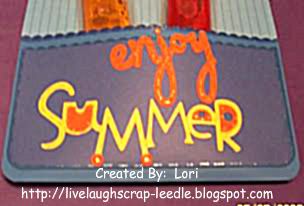
Close up of pocket:

Thanks for looking. Questions & comments are always welcomed.
Lori
A Proud member of The Lime Light. Click on over to see what we are doing.

Wednesday, May 13, 2009

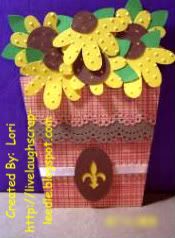
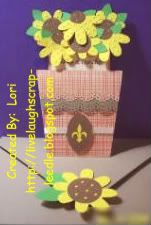
Flower Pot Card

I had first seen a flower pot card posted on the Cricut MB by Janet Waters. I thought the idea was so cute. Then I had seen a video on Dawn's Blog on how to make them. She had originally seen the instructions & measurements on Stephanie's Blog. To make this one, I used a combination of Dawn's & Stephanie's instructions & added a little of my own touches too.
It was made as a Thank You Card for some very good friends (honorary family), my daughter's Parran & his wife.


I used the instruction to cut the card & fold to make the flower pot. I also used their measurements to cut the pullout card. For the front top part of the pot I used my MS Doily Border Punch & added another bordered piece of cardstock for some contrast. I used pop-dots to have the top edge stand out a little. To hold pocket of the card, I just added a very small piece of Terrifcally Tacky Tape (red liner tape)to the top corners.
I cut the sunflowers from the Walk in my Garden Cart. in varying sizes. I used the Swiss Dots embossing folder with my Cuttlebug on the flowers to give some texture. I then added them to the top of the pull out card with pop-dots.
I decorated with a ribbon & I cut the oval from the George cart. & the fleur-de-lis from the Wild card cart.I used my Ultimate Crafter's Companion to make the envelope.
Thanks for looking. Comments and questions are always welcomed.
Lori
A Proud member of The Lime Light. Click on over to see what we are doing.

Tuesday, May 5, 2009

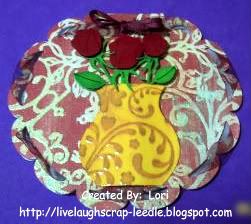
Mamie's Mother's Day Card 2009

This is the card that I made for my grandmother for Mother's day. This card was so much fun to make. I used printed cardstock, I inked, I made the vase dimensional, & the roses are paper pieced & dimensional. This card is so different than what I usually do. It is fun to step out of your comfort zone sometimes.
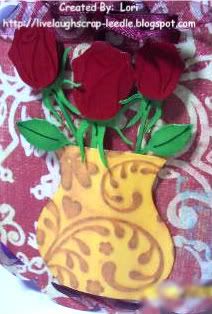
Close up pic of the vase & flowers.

Details:
I used the Wild Card Cricut Cartridge for the Doily Card & the roses.
On the inside I cut Happy Mother's Day & You are so Special from the Wild card cart.
I cut the vase from the Walk in My Garden Cart & played with the size & shape in Design Studio.
I cut the roses out 4 times, twice in red & twice in green. I cut all of the red flowers from the stems & did the same to one set of the green flowers. I used one full green rose for the base. I layered a red flower on top of the green base. I Inked the green stems that were cut from the flower & inked the red flowers. I layered the inked stems onto the base. I then layered the inked flowers to roses.
I used my Cuttle Bug & Floral Fantasy Embossing folder on the vase & inked with Gold ColorBox Pigment Ink. I also coated the vase & the roses with Mod Podge to give them a glossy or glassy look.
To give the vase dimension, I used pop-dots down the center of the vase. I used my ATG gun for the edges of the vase & adhered it to the card front.
I them arranged the flowers in the vase & attached them with a pop-dot to give them dimension too.

Updated 10/23/09:

I also entered this card into the Paper Blooms Circle Card Challenge. I had made it so much earlier, but figured I would show it anyway.

Thanks for looking. Questions & comments are always welcomed.

Lori
A Proud member of The Lime Light. Click on over to see what we are doing.

Mom's Mother's Day Card 2009

This the the Mother's Day Card that I made for my mom. I just loved this making this card. I just can't figure out how to do the envie with the green grass. Anyone with tips please help!!
Details:
The card was cut out using the Wild Card Cricut Cartridge.
I cut out the green icon with the leaves craved into it. I used chalks to darken the leaves. I think it added some depth to the image. I sprayed this with Krylon Preserve It to protect the chalk.
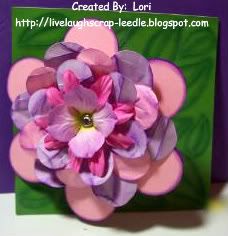
I also just out a flower to cover the front & inside for a finishing touch.
I inked the edges of the flower with ColorBox Pigment ink.
I then cut out 3 more flowers in varying smaller sizes, crumpled them up then used the ColorBox Pigment ink pad on them.
I topped it all off with 2 prima flowers & a clear rhinestone brad in the center.
The inside has Happy Mother's Day cut from the Wild Card Cart.
Thanks for looking. Questions & comments are always welcomed.
Lori
A Proud member of The Lime Light. Click on over to see what we are doing.

Monday, April 13, 2009

Easter Party Baskets & Bookmarks

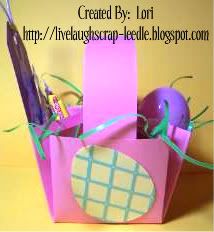
I made these Easter baskets for my daughter's class Easter Party. I made 7 pink ones & 4 blue ones. Of course, I also had to make a bookmark to put in it.
Details:
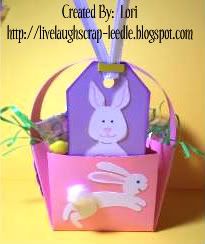
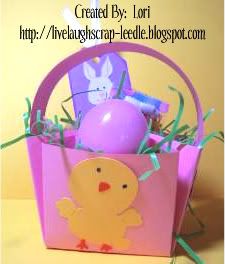
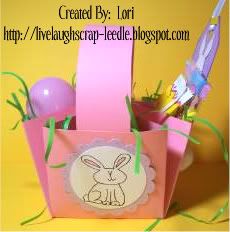
For the basket I used a 8 1/2 x 8 1/2 piece of cardstock. I used my Ultimate Crafter's Companion to score the box. I used the instructions in the DVD for the Pop Out Box and scored on the line for Tri-fold of a US Letter on all four sides then scored the corners from the intersection to the point & folded in. Instead of making a box top, I just glued the points together in the center. This gave 4 triangle pockets on the sides of the basket. I just cut a strip of cardstock for the handle & glues to the inside.
Side 1:
Hopping Bunny is cut from the Cricut Sampler Cartridge. Colored in with LePlume II markers and added a piece of cotton ball for the tail.
Side 2:
Chick is cut from the Stretch Your Imagination Cartridge.
Side 3:
Circle & scallop circle is cut from the Mini Monograms Cartridge. The stamp is Studio G $1 Stamp on a wood block. Colored in with LePlume II markers. I also used a Metallic Pink (Metallic Blue on the boys') pen to make doodle dots around the scallop (doesn't show up in the pic).
Side 4:
The egg is cut from the Doodlecharms Cartridge. The lattice is cut from the Wild Card Cartridge. Also not showing up in the pic are Metallic Yellow doodle dots at the intersection points of the lattice. On the boy's baskets the colors are reversed for the egg.
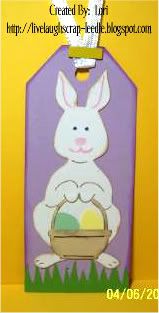
The Bookmark:
The tag and the grass is cut from the Plantin Schoolbook Cartridge. The bunny is cut from the Stretch Your Imagination Cartridge. The eggs and basket are from the Doodlecharms Cartridge. I used ColorBox Pigment Inks to ink around the edges. I used LePlume II markers for coloring in on the bunny & basket. I also used the Fastenator & colored staples to attach the ribbon on the tag. The only difference with the boy's bookmarks is that the tag is blue instead of purple.
Thanks for looking. Questions and comments are always welcomed.
Lori
A Proud member of The Lime Light. Click on over to see what we are doing.