Followers, Guestbook, & Comments

My followers are being shown in the right column. My Guestbook is at the bottom. Please follow, comment on posts, & sign my guest book. Your comments encourage me to keep sharing my work. I love hearing from you all.

When you leave a comment, I have to moderate it before it will be posted. So if you have a questions or comments, feel free to ask & if necessary note that you don't want your comment posted.
Showing posts with label E-6000 Glue. Show all posts

Tuesday, November 3, 2009

Fleur-di-lis Pins/Necklaces

Well, we live in the New Orleans area. So right now, everyone is having Black & Gold Fever. Go Saints 7-0!!!!! My daughter's school was having a Black & Gold Day yesterday before the Saints vs. Falcons game. Her teacher is a huge Saints fan & already gives not HW on Monday if the Saints win. So this week it is Tuesday, Woo Hoo!!

But anyway, I made these pins for my daughter's class & her teacher. Not sure if the boys (3rd grade) would wear the pins, I added yard so they would have a choice to wear them around their neck.


I sized the fleur-di-lis from the Wild Card Cricut Cart. in CDS. The larger one was 4x4 and the smaller one was 3x3. They are cut out of Shrinky Dink shrink plastic. I cut them using my Cricut w/ the deep cut blade set on 6 & on multi cut 4 (twice) and I still had to finish cutting them out with an exacto knife.

After they were cut out, I placed them in the oven to shrink (follow package instructions). I used acrylic paint to color them. The gold paint that I got was metallic & actually looked better on the wrong side of the piece, so that's how I put them together. I used E-6000 glue (recommended) to adhere the fleur-di-lis together and to attach the pin to the back.

The teacher & all of the kids really loved them.
Thanks for looking. Questions & comments are always welcomed.
Lori

Paper Flowers

Update: After I posted this, I noticed that they have a New Video for Donna's Layered Flowers. I could not go without adding it to this post. It is wonderful and Donna is so excited about them.

I just love these flowers. The inspiration came from This Video from Leah's Scrapbook Room Videos. I call them Donna's Flowers. I just love her style. She makes hers from old dictionary pages and the Accucut Die System. I used an old phone book and cut a 6 inch scallop circle with my Cricut, then just basically followed her instruction. I don't have glimmer mist or anything like that. So I just ran a pigment ink pad over my crumpled flower until it looked the way I wanted it to. Then I just lightly spritzed it with water to make it a little more pliable.
This is a single layer flower with an embellishment (adhesive backed) from a pack that I found at the Dollar Tree.

I sprayed them with Krylon Preserve It, just to help them keep. I also brushed them with some Mod Podge. This gave them a little shine & gave them a little more stability.


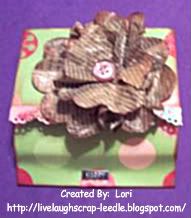
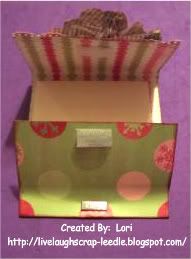
The next one is a double layered flower with a button in the center. I used it to embellish a sticky note holder that I made (see previous post).
Thanks for looking. Questions & comments are always welcomed.
Lori