Thanks to
Okieladybug for this great idea. She has been making these gift bags for a little while now & I have been admiring them. Then she went & got picked to be a guest designer for
Christmas With The Cricut and made a
video on how to do them.
I had used the paper lunch bags before for favor bags, see
HERE, but nothing like this.
The only problem I had was that I had to go buy some punches. I really don't get punches b/c of my Cricut. However, I wanted to make the handle. *Note* This project can be done just as nicely w/o making a handle, but I had to blame Okie for me having to buy them. *LOL*
Details:
Paper Lunch Bag
Misc. Papers & Ribbon
Marvy Uchida 2 1/2" Square Scallop Punch
Marchy Uchida 2" Square Punch
Studio G December Stamp Set
Glitter Gel Pen
Cuttlebug w/ Fiskars Texture Plate
Color Box Pigment Ink
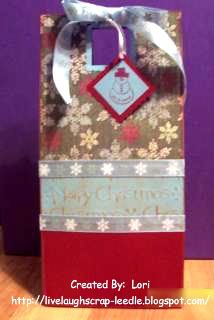
After decorating both sides of the bag, I punched a 2" square hole at the center top of the bag (all the way through. Then with the light blue paper I did the same twice. I then used the 2 1/2" scallop square punch, centering it around the 2" hole in the blue paper (twice). This gave me the scallop square frame. I adhered one to each side of the bag.
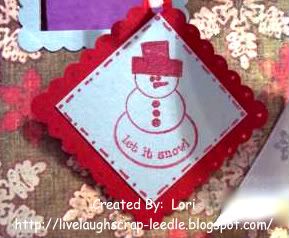
For the tag I just used one of the blue squares & stamped it w/ the Studio G stamp. I layered it onto a red 2 1/2" scallop square. I then used a dark red glitter gel pen to put dots around the scallop edge (hard to see). I also used it for the faux stitching on the blue layer, around the edge of the hat, & on the eyes, nose, & buttons (again hard to see in the pic). But it added so much to the tag in person.
Okie, I hope I did your project justice.
Thanks for looking. Questions & comments are always welcomed.
Lori
 I will post again when I get it all decorated. I still have to figure out what will fill it & who will get it.