Followers, Guestbook, & Comments

My followers are being shown in the right column. My Guestbook is at the bottom. Please follow, comment on posts, & sign my guest book. Your comments encourage me to keep sharing my work. I love hearing from you all.

When you leave a comment, I have to moderate it before it will be posted. So if you have a questions or comments, feel free to ask & if necessary note that you don't want your comment posted.
Showing posts with label I-Top. Show all posts

Monday, May 10, 2010

FRIENDS Wordbook - A Work In Progress

This project is a work in progress. I don't usually post about unfinished work. But Cute and Some is having its Contributors Showcase #6 this week. The guidelines for the projects are: It can be any type of project. It just has to have the colors green, or purple, or both and include a flower. When I read this, I knew I had to enter this project even if unfinished.
I am making this for my niece that is turning 13 at the end of this month. Her favorite colors are green & purple.
Cover:


Pg. 1:


Pg. 2:


I will post again about this when I have the entire book finished with details (well the details that I can remember anyway).
.gypsy File (pages only not embelishments)
Thanks for looking. Questions & comments are always welcomed. Lori

Friday, March 5, 2010

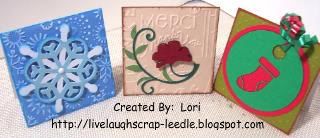
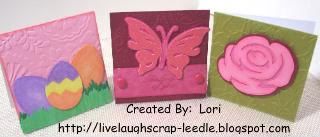
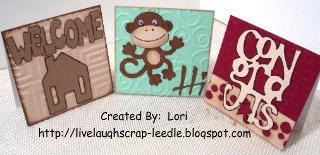
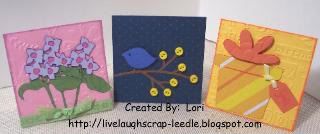
3x3 Assorted Card Set w/ Box

This is a set of 12 3x3 note cards, envelopes, and a 4x4 box that I made to have on hand for a gift or inventory.
I used my Cuttlebug on every card and several embossing folders and Cricut cartridges. I can't remember exactly which ones, but if anyone has questions - don't hesitate to ask.
All cards are blank on the inside.


Thanks for looking. Questions & comments are always welcomed.
Lori

Friday, January 29, 2010

I-Top Circles Made with Cricut

When I got my I-Top, I had asked on the Cricut MB if anyone had a .cut file for the different size circles to make the I-Top brads. I got no answer, not sure if no had one or if everyone that has the I-Top just bought all of the I-Top Punches. Well, I could only find 1 size punch & figured that somehow I could make or someone would have a cheaper way to make this, rather than buying all 3 punches.

So then I got the Sweet Treats Cricut Cartridge. I thought the Flower4 (Pg. 52 in the Sweet Treats Handbook) would be perfect. I could make it the right size and the way the petals were split it would work. And it did - PERFECTLY!

So this is not so much a .cut file, but a little cheat sheet in .cut file format. It's nice to have this on hand to cut 1 or as many as you need to have on hand. My file has a page for each size. I have all of the score marks hidden and each page is set up for 4 flowers. You can hide some if you want to only cut 1 or copy more to add more. If you copy them though - you will have to save, close, & re-open the file in order to hide the other score marks.

HERE is the .cut file and it will also be on the left side of my blog under My .cut Files.

And for those of you that don't have CDS, I'll list the size of the flowers that you can cut straight from your Cricut. Again, use Flower4 on pg. 52 of the Sweet Treats handbook, the blackout cut.
Small - 1 1/4
Medium - 1 3/4
Large - 2 /14
I hope this helps.
Thanks for looking. Questions & comments are always welcomed.
Lori

Tuesday, January 26, 2010

Giftcard Bag & Mini Card

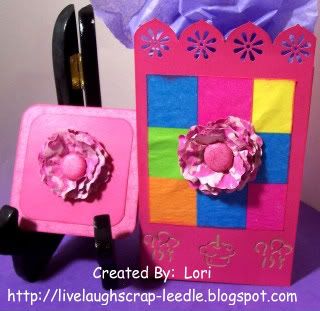
My son had a birthday party to go to for a 14 yo girl. I didn't know too much about her, so just went with pink, flowers, & bright colors. I found theses packs of mini giftbags at Michael's during Christmas & found that they come in great for making giftbags for small presents & they are wonderful for giftcards.
Details:
I-Top for brad in center of flower. I found that one of the flowers on the Sweet Treats Cricut Cart. is perfect for making the circles for the I-Top. I have a file that I will make a post on later. I have one for each size I-top brad.
My phone book page painted flowers.
Tonic Border Punch System for the balloons & cupcakes (at the bottom of the bag) & pinwheels punch for the border at the top
Yoliebean has a great video tutorial on how to fuse napkins to freezer paper to make your own patterned paper. This is what I used for the bright colored squares on the bag. Mine looks a little bubbly, but you can watch her video & how to do it perfectly.

Thanks for looking. Questions & comments are always welcomed.
Lori

Tuesday, January 19, 2010

More Paper Flowers & A Question

Please tell me what you think about selling hand made embellishments at craft shows. Do you think they would sell? Is it a good idea?

I am just loving making these flowers. I have been flattening out the back so that I can use them on cards & such. But, I think I have to try to make some 3-D Bouquets too. I also started making leaves for them. I painted the phone book pages the same way, then I just cut the leaves freehand with deco edge scissors.
These were done with orange (mixed yellow & red) and lightly went over them with yellow. Two of them have yellow skittles in the center. The other has an orange button threaded with natural hemp twine in the center. Some of these, the top layer was put together with torn pieces of the painted paper. Others, I tore the petals of the flower & arranged freehand & glued.

The bottom flower was made with light & dark blue. The top is one of the orange & yellow flowers. The orange one is one of the torn flowers. I covered an I-Top brad with some similarly colored cardstock for the center. The phone book pages, I find are too thin to use in the I-Top, they tend to tear. I have also found that thick cardstock is sometimes too think for the I-Top. I crinkle or rumple it up to soften it a bit. Once it goes through the I-Top it is smoothed out & looks great.
Thanks for looking. Questions & comments are always welcomed.
Lori
Birthday Giftbag

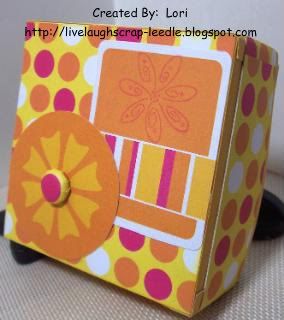
Happy Birthday Laici!! I made this giftbag for a very special little girl that just made 6. I made her card with the Cupcake theme, so went with that for the bag too. It is a little different, but still cupcakes. HERE is her card.
So now for the bag. Details:
I used my I-Top to make the brad in the center of the flower.
Cupcake, Flowers, & Happy Birthday were all cut from the Sweet Treats Cricut Cart.
White Gel Pen to make doodle dots around the Happy Birthday.
Iridescent Glitter Glue on the dot for the "i" in birthday and on the gleam on the brad.

Thanks for looking. Questions & comments are always welcomed.
Lori
Birthday Card - Jean

I made this birthday card for my husband's step mom for her birthday. Happy Birthday Jean. We Love You!!!!
Details:
Tonic Border Punch System with the Cupcake & Balloon Punches.
Fiskars Paper Crimper
Prima Flowers
I made the brad in the center of the flower using my I-Top.
Stamps ( I can't remember the stamp sets at the moment) Front: It's a Celebration, Inside: Happy Birthday
Corner Rounder
Thanks for looking. Questions & comments are always welcomed.
Lori
Thursday, December 31, 2009

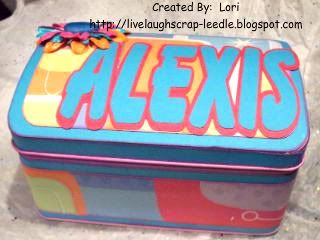
Altered Dome Tin & Stationary Set

This is what kept me busy most of the time. I made 4 of these in total 1 for my daughter & 1 for each of my 3 nieces. They range in age from 8 to 12. I made them all in different color & patterned paper schemes, but all were basically the same design.
Thank you Okieladybug for the .cut file to cover these tins. I don't think I could have done it with out you.
This is the tin that I made for my daughter. She was so excited b/c she knew I was making them for my nieces, but had no idea that one of them would be for her too.
Front & Top:

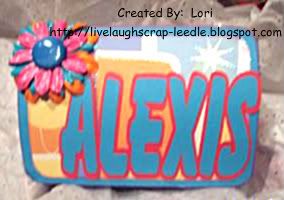
Top:

I-Top Brad in Prima Flowers coated in Mod Podge.

Complete Stationary Set Contents:

Flip up notepad with very brightly colored pages:

Altered RSVP pen & Altered mini composition notebook:

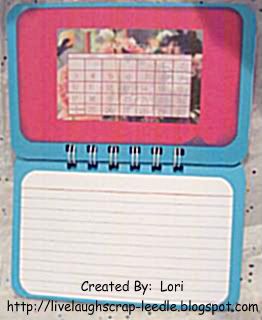
Calendar made with my Bind it All

First page inside of calendar, calendar & note card for note & upcoming dates:

Thanks for looking. Questions & comments are always welcomed.
Lori