Followers, Guestbook, & Comments

My followers are being shown in the right column. My Guestbook is at the bottom. Please follow, comment on posts, & sign my guest book. Your comments encourage me to keep sharing my work. I love hearing from you all.

When you leave a comment, I have to moderate it before it will be posted. So if you have a questions or comments, feel free to ask & if necessary note that you don't want your comment posted.
Showing posts with label Animal Kingdom. Show all posts

Monday, June 14, 2010

Wall Letters - Jenna & Alyssa

My best friend from high school had seen some of my wall letters & called to see if I could make some for her. She wanted to give them to her nieces for their birthdays.
I used my Gypsy and Cricut to design & create these letters.
Jenna is 5 years old, likes animals and the color blue. This is the letter that I designed for her.
The cartridges I used to make Jenna's letter are: Cuttin' Up (Name), Create A Critter (Poodle, Bird, & Monkey w/ Vine), & Animal Kingdom (Cat). I pop-dotted the wing on the bird & the head on the cat to give some dimension. As always I inked the cuts for some dimension & design.
Alyssa is 4years old and likes pink and butterflies.
I used my Gypsy and Cricut to design & create these letters.
The cartridges I used to make Alyssa's letter are: Ashlyn's Alphabet (Name), A Child's Year (Fairy), Designer's Calendar (Butterfly - I cut it out 4 times, cut the pieces apart, colored them all, & pieced them all together with their different layers.), George & Basic Shapes and Accent Essentials (Paper Roses - HERE is my post about them.) I made a template for the flourishes on the base of the letter, but I can't remember which cart they came from. I used it as a stencil, drew on the flourishes, made my own glitter glue and painted over my markings with the glitter glue.

Thanks for looking. Questions & comments are always welcomed. Lori

Tuesday, March 16, 2010

Celia's "C" Wall Letter

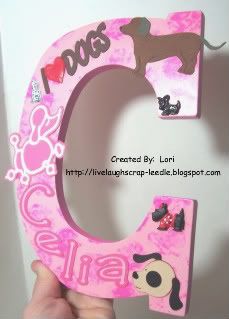
A friend of mine (one of Alexis' classmates' mom) asked me to make a wall letter for her daughter. She wanted pink and she loves dogs. So this is what it ended up like. I am happy to say that they both loved it!!
Details:
I painted the entire letter light pink. Then I painted the edges a darker shade of pink. I painted some large bubble bubble wrap with the darker pink paint, & stamped it on the front of the letter. I thought it just gave some texture & broke up all of that lighter pink. But, some people told me that the spots looked like flowers & Liz (the mom) said that some of them looked like paw prints - so that technique was a hit.
I added some dog buttons that I had in my stash.
The name & I{heart}Dogs was from SCAL. I used Triple Thick over the heart to make it dimensional and shiny.
Cricut Carts:
Animal Kingdom - Dachshund & "Spot" dog head
The dachshund was given some texture by using Dawn's Faux Suede Technique. I colored the body w/ distress ink (Vintage Photo) & brown pigment ink. The card & tail were colored w/ distress ink (Weathered Wood)
Cricut Sampler (Paper Pups) - Poodle
The poodle was spritzed w/ homemade glimmer mist (pearl-ex macropearl)
All paper embellishment pieces & the letter was sprayed (front & back) with Krylon Preserve It.

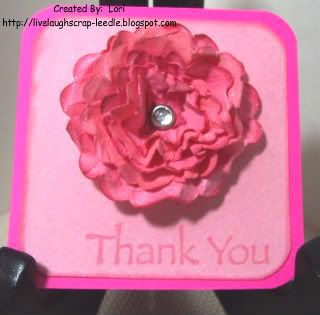
This is just a little 3x3 Thank You card that I made for them for ordering one of my letters.
Details:
3x6 cardstock folded at 3"
2 1/4 x 2x1/4 cardstock spritzed w. homemade glimmer mist (pearl-ex flamingo pink)
Mini Monograms Cricut Cart:
I cut 5 scallop circles @ real dial size 2 1/4, 2, 1 3/4, 1 1/2, & 1 1/4
I colored them with varying shades of pink with chalk ink.
I spritzed them with home made glimmer mist (pearl-ex flamingo pink & Duo Red-Blue)
Scrunched up, unfolded, added a brad to the center & formed with my fingers to my liking.
Spritzed again w/ homemade glimmer mist (pearl-ex macropearl)
Then I dried it with my heat gun.
Again - I can't remember the stamp set that the Thank You came from.

I just wish the glimmer showed up in the pics. It is really pretty in person.

Thanks for looking. Questions & comments are always welcomed.
Lori
Monday, November 16, 2009

Thanksgiving Napkin Rings

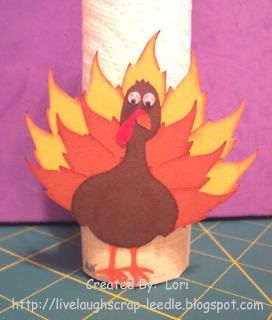
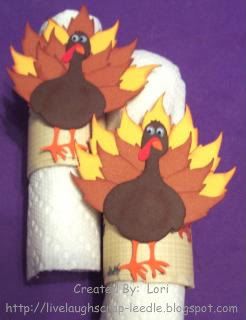
I made these napkin rings for my daughter's Thanksgiving Feast at school. I got the idea from Brigit on the Cricut MB. HERE is the link to her turkey. Mine is made differently - but the idea is the same.

This 1st pic is showing the napkin ring standing up. (the colors are better in the 2nd pic. The orange feathers are not really so orange (more like a burnt orangey brown).

Details: (It seems like a lot - but was really easy.)
TP Roll cut in half for the ring.
Cardstock 4 x 5 3/4 (I think) to cover the TP Roll
Slit the edges & adhere to the inside of the TP Toll. They are long enough to pretty much cover the inside of the roll too. It gives it a more finished look.
Printed Paper 1 3/4 x 5 7/8 to wrap around the holder. (Optional)
Stretch Your Imagination Cart - Leaves (Feathers) (shift & black out) cut at 2" (about 13 per turkey)
Cut 1/2 of what you need flipped
Animal Kingdom Cart - Turkey orange (so the feet would show)
I cut off the feathers from this turkey. I also cut all of the layers in the appropriate colors & layers them.
Googly Eyes
I inked around the turkey body (also added shading between the body & wings) and all of the feathers with brown Color Box Pigment Ink.
I adhered the feathers to the back of the turkey in a pleasing pattern. They are all a little different. I made 14 of them.

In this pic they are laying down. I had to place 2 of them together b/c they rolled the the side.

Thanks for looking. Questions & comments are always welcomed.
Lori
Friday, July 24, 2009

Rainbow inchie Swap (Due: September 30)

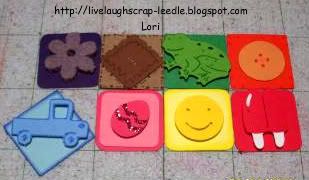
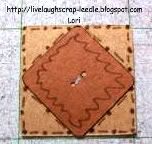
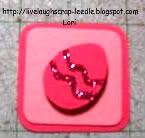
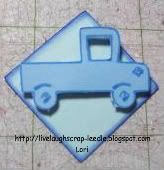
These are the inchies that I made for the Rainbow Inchie Swap on the Cricut MB. We had to make 20 of each color & we could decorate them any way we wanted to. The only stipulation was that they could only include the one color of that group. We could use white minimally as an accent color if needed & black for stamping if needed. The only one that I needed to use whit on was the popsicle (for the sticks - blackout layer). On all of the others I just used different shades of the same color. These are so much fun to do.
Here are the individual pics to show more detail:

Thanks for looking. Questions & comments are always welcomed.
Lori
A Proud member of The Lime Light. Click on over to see what we are doing.