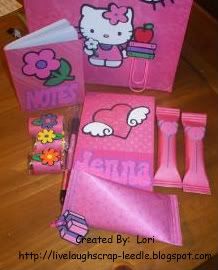
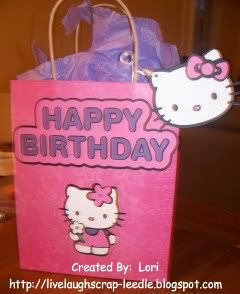
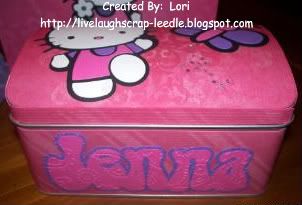
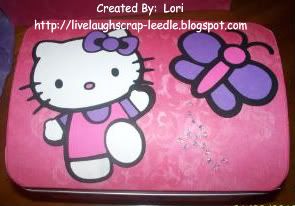
I made this dome tin for my niece for her birthday. I used Okieladybug's Dome Tin cut file, Hello Kitty Greetings Cricut cart., SCAL for her name, and the Cuttlebug with several embossing folders Front: Name (SCAL - Bell Bottom Font)
Top: Hello Kitty & Butterfly
Contents: Mini Composition Book, Flip Notepad, Paperclip Bookmark, Covered Hershey's Miniatures, M&M's in a Sour Cream Container, Covered Mini Twix Bars - all decorated with HKG images.
Giftbag & Tag: Decorated using the HKG Cart.
Thanks for looking. Questions & comments are always welcomed.
Lori
Followers, Guestbook, & Comments
My followers are being shown in the right column. My Guestbook is at the bottom. Please follow, comment on posts, & sign my guest book. Your comments encourage me to keep sharing my work. I love hearing from you all.
When you leave a comment, I have to moderate it before it will be posted. So if you have a questions or comments, feel free to ask & if necessary note that you don't want your comment posted.
Showing posts with label Crimper. Show all posts
Tuesday, February 9, 2010
Tuesday, November 3, 2009
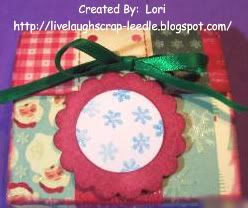
Sticky Note Holders
I made Sticky Note Holders in several different styles. The inspiration for all of theses came from Angie & her Chic'n Scratch Live Videos.
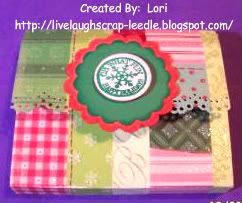
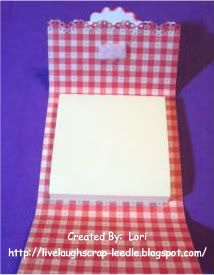
These first 2 holders are an adaptation from the Pocket Card. I just didn't put pockets on the inside, I added sticky notes. The cardstock measurements & score line measurements are just altered to fit the sticky noted.
1st one:
Mini Monograms Cart for scallops & circle
MS Doily Border Punch
Studio G December Stamp Set
Velcro for closure
ATG


2nd one:
Mini Monograms Cart for circle & scallop
Ribbon for decoration & closure
CAD to punch holes for ribbon
Stamp- ?
ATG & Pop Dots


I got the inspiration for this one from This Video of Angie's.
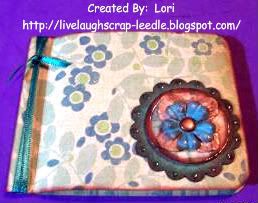
Crimper Book Style:
Fiskar's Crimper
Ribbon
ATG
Mini Monograms Cart for circle & scallop
Glossy Accents
Prima flower
Making Memories Bronze Snap
CAD to attach snap


I think this one is my most favorite of all. The inspiration for this one came from This Video of Angie's.
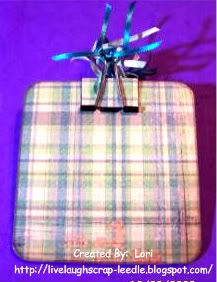
Coaster & Binder Clip Style:
4x4 140 lb. Watercolor Paper (chipboard or coaster work well too)
4x4 Patterned cardstock for both sides.
A small piece of matching cardstock to fit on the binder clip
Ribbon
Mod Podge to cover each side after printed cardstock is attached. I also put some on the edges. I think it helps to seal it a little better.
ATG

The back side. This sticky note holder can be used either way depending on the user's mood. Also the sticky notes are not stuck down, so no damage when they are finished. Just add a new pad of sticky notes.
Thanks for looking. Questions & comments are always welcomed.
Lori
These first 2 holders are an adaptation from the Pocket Card. I just didn't put pockets on the inside, I added sticky notes. The cardstock measurements & score line measurements are just altered to fit the sticky noted.
1st one:
Mini Monograms Cart for scallops & circle
MS Doily Border Punch
Studio G December Stamp Set
Velcro for closure
ATG
2nd one:
Mini Monograms Cart for circle & scallop
Ribbon for decoration & closure
CAD to punch holes for ribbon
Stamp- ?
ATG & Pop Dots
I got the inspiration for this one from This Video of Angie's.
Crimper Book Style:
Fiskar's Crimper
Ribbon
ATG
Mini Monograms Cart for circle & scallop
Glossy Accents
Prima flower
Making Memories Bronze Snap
CAD to attach snap
I think this one is my most favorite of all. The inspiration for this one came from This Video of Angie's.
Coaster & Binder Clip Style:
4x4 140 lb. Watercolor Paper (chipboard or coaster work well too)
4x4 Patterned cardstock for both sides.
A small piece of matching cardstock to fit on the binder clip
Ribbon
Mod Podge to cover each side after printed cardstock is attached. I also put some on the edges. I think it helps to seal it a little better.
ATG
The back side. This sticky note holder can be used either way depending on the user's mood. Also the sticky notes are not stuck down, so no damage when they are finished. Just add a new pad of sticky notes.
Lori
Labels:
ATG,
Crimper,
Crop-A-Dile,
MM,
Mod Podge,
MS Doily Border Punch,
Ribbon,
Stamps,
Sticky Note Holders
Monday, May 18, 2009
Teacher Appreciation Week: Bouquet - Day 3
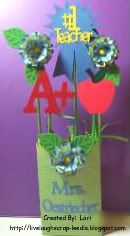
This is the bouquet that I made for my daughter to give to her teacher for the 3rd day (Wednesday) of Teacher Appreciation Week.
Details:
Apple, Ribbon, & #1 Teacher was cut from the Cricut Sampler Cart. (I think)
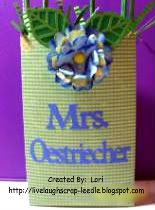
Bag, A+, & Teacher's name was cut from the Plantin Schoolbook Cart. Also Cricut Design Studio was used to weld the letters together.
Flowers & leaves were cut from the Home Accents Cart.
I cut strips of paper & ran it though my crimper to make the grass filler in the bag.
I still have to make a tag to put on it, but that will be done before my daughter has to bring it to school.
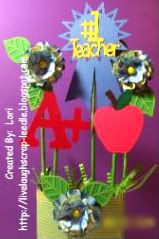
Close up of top:
For the flowers: After I cut them, I crumpled them & rubbed a ColorBox Pigment ink pad over them. I layered them & put a yellow brad in the middle to hold them together. I attached all of the decorations to the painted skewers with Terrifically Tacky Tape.
Close up of bag:
Thanks for looking. Questions & comments are always welcomed.
Lori
A Proud member of The Lime Light. Click on over to see what we are doing.
Details:
Apple, Ribbon, & #1 Teacher was cut from the Cricut Sampler Cart. (I think)
Bag, A+, & Teacher's name was cut from the Plantin Schoolbook Cart. Also Cricut Design Studio was used to weld the letters together.
Flowers & leaves were cut from the Home Accents Cart.
I cut strips of paper & ran it though my crimper to make the grass filler in the bag.
I still have to make a tag to put on it, but that will be done before my daughter has to bring it to school.
For the flowers: After I cut them, I crumpled them & rubbed a ColorBox Pigment ink pad over them. I layered them & put a yellow brad in the middle to hold them together. I attached all of the decorations to the painted skewers with Terrifically Tacky Tape.
Lori
A Proud member of The Lime Light. Click on over to see what we are doing.
Friday, February 13, 2009
Valentine's Party Favors
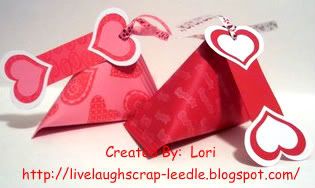
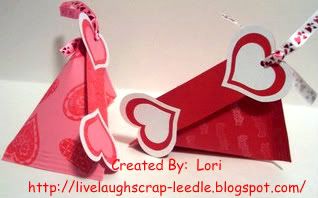
I made 4 red ones for the boys. I stamped the red cardstock with white ink. I used the XOXOXO stamp in the Studio G Feb. set. Then I made bookmarks (using CDS to weld hearts & a rectangle) stamped with red on red hearts & layered silhouette ans solid hearts on the ends of the bookmark. I used white ribbon with red hearts on the end of the bookmarks and to attach them to the sour cream containers. Click HERE for instructions. I also used my crimper & Terrifically Tacky Tape to seal the edges. To make the containers I used 8 x 5 1/2 cardstock. I wanted these to be a little bigger. They are filled with a mini fruit roll up, a fruit by the foot, and a plastic heart maze.
I made 7 pink ones for the girls. The girl's containers are pink with red hearts stamped (misc. stamp that I picked up somewhere). For the bookmarks I used a deeper pink & stamped love on them from the Feb. Studio G set. I made the ends of these with white & lighter pink hearts. The ribbon on these where pink with red hearts.
Thanks for looking. Questions and comments are always welcomed.
Lori
A Proud member of The Lime Light. Click on over to see what we are doing.
Labels:
Bookmarks,
CDS,
Crimper,
Crop-A-Dile,
Gifts,
Party Favors,
Sour Cream Containers,
Stamps,
Valentines
Monday, February 9, 2009
A Purple Cupcake
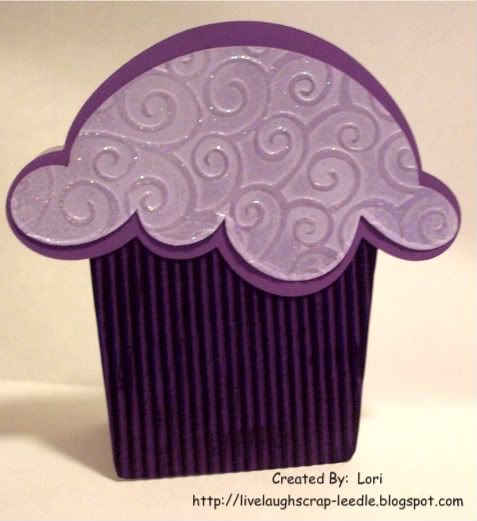
This is the first shape card that I have made with Cricut Design Studio. I have tried this may times, but it just never would come out right. I was bound & determined to get this one right. I used George & Basic Shapes for the bottom part of the cupcake and Doodle Charms for the top part. The fold is at the top of the cupcake. I used my Cuttlebug with the Devine Swirls embossing folder for the top layer of the icing. I also heat embossed the top layer and the wrapper part of the cupcake. I used my crimper to give texture to the cupcake wrapper.
Click HERE for the .cut file.
I made this card for my best friend and there was no choice but for it to be done with all shades of purple. I've got to say she loved it. To tell ther truth though, she would have loved it even if I would have just written happy birthday on a crumpled piece of "purple" paper.
HAPPY BIRTHDAY CHERIE!! You said that this was your best birthday ever and I am so glad. I sincerely hope it only gets better from here, you deserve it. I love you!!
Thanks for looking. Questions and comments are always welcomed.
Lori
A Proud member of The Lime Light. Click on over to see what we are doing.
Monday, October 27, 2008
Sour Cream Container Halloween Treats
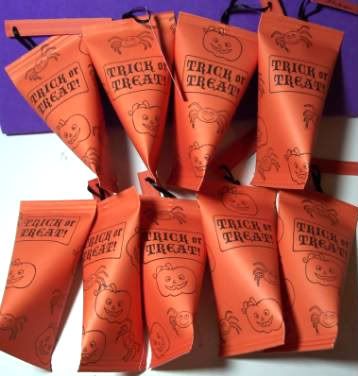
I used misc. orange cardstock 5 1/2" x 6". I stamped them with halloween stamps that I found in the dollar bin at Target. I punched a hole in some extra scraps of the orange cardstock & attached with a ribbon before sealing up the top end. I used my crimper on the ends & I used the Terrificly Tacky Tape (Red Sticky Strip) to seal them. I stamped "From:" with a Stampin' Up Stamp on the tag & my son will write is name.
For instructions on making them go to: Splitcoast Stampers
Thanks for looking. Comments & questions are always welcomed.
Lori
A proud member of The Lime Light. Click on over to see what we are doing.
Labels:
Crimper,
Gifts,
Halloween,
Party Favors,
Sour Cream Containers,
Stamps
Subscribe to:
Posts (Atom)