Followers, Guestbook, & Comments

My followers are being shown in the right column. My Guestbook is at the bottom. Please follow, comment on posts, & sign my guest book. Your comments encourage me to keep sharing my work. I love hearing from you all.

When you leave a comment, I have to moderate it before it will be posted. So if you have a questions or comments, feel free to ask & if necessary note that you don't want your comment posted.
Showing posts with label GBS. Show all posts

Monday, July 12, 2010

Camera Photo Album & Fleur De Lis Candle Bowl

A very good friend of ours was having some visitors in from out of town.  It was their first visit to see them & to our city.  She had asked me to make something for them as a memento.  For the mother she wanted to give her one of my candle dishes that I etched with fleur-de-lis.  I used the fleur-de-lis on the Wild Card Cricut Cartridge.
The daughter likes to take a lot of pictures.  So I figured I would make a photo album.  It had 10 pages (front & back) that I made out of water color paper and painted with acrylic paints.  I then painted cardstock and adhered it to the pages, so that it added room for at least 3 pics per page.  The front & back covers were made from corrugated cardboard that I cut up from a box.  I painted each of these with white Gesso & then acrylic paints.
The pages & covers are 5x7.  The cardstock is 4.5 x 12 & folded so that each part of the cardstock can fit a 4x6 picture or journaling if she wishes.
I cut the camera pieces & painted them with acrylic paint as well.  I added her initials & a fleur de lis as a symbol of our city.  I used heat embossing with UTEE on the fleur de lis to make it glossy & to add dimension.
 
Cartridges Used:  Create A Critter (Camera), Accent Essentials (Fleur de lis), Cuttin' Up (Initials), George & Basic Shapes (Background Rectangle for the initials)
All pieces of the camera were cut from water color paper & painted with acrylic paint.  After assembling the camera, I sealed it with Krylon Preserve It.  I then added the fleur de lis that was heat embossed with UTEE to add dimension & shine.
Thanks for looking. Questions & comments are always welcomed. Lori

Thursday, July 1, 2010

Embossed Flowers Sketch Card

I made this card for 2 Sketches 4 You Challenge #55.  It was super fun to do.  I had not heat embossed stamps in a while so it was fun to get back to that.  I distressed all of the edges using my Cricut Spatula ( a technique that I learned from Momo.) Thanks
Details:
I used my Gypsy & Cricut to design & create this card.  I used my G to layout & size all of the pieces.  So them it was just quicker to have my Cricut cut all of the pieces than to do it by hand.
I used a stamp set by Studio G, Versamark, & Stampendous Embossing Powder.

Thanks for looking. Questions & comments are always welcomed. Lori

Uncle Sam Hat Card

This card is playing double duty for challenges too.
1) The Cuttlebug Spot:  Celebrate Independence Day Challenge
2) Fantabulous Cricut:  4th of July Project
Details:
I used my Gypsy & Cricut to design & create this card
George & Basic Shapes & Stand & Salute Cartridges were used.  I welded the white rectangle to the USA border.
Cuttlebug with the Stars Embossing Folder

Thanks for looking. Questions & comments are always welcomed. Lori

Simple Flower Tag

This tag was made for 2 challenges.
1) Paper Cutz Challenge #47:  Make any project incorporating either circles, stars, or squares.  So on this one I used all three.
2) My Pink Stamper:  Robyn gave a color challenge.  The colors to use were Pink, Orange, Brown, & Green.  At first, I thought "No Way!!!"  But, after seeing all of the sample projects, it didn't seem so bad.  Also, Craft Junkie Too was asked to be a guest designer for this challenge.  On her blog she has a prize for this challenge.
So click on over to all 3 blogs to check out every one's great work & join in on the fun.
Details:
I used my Gypsy and Cricut to design & create this project.
Cartridges used:  Plantin Schoolbook (Tag), George & Basic Shapes (Star), Forever Young (Flower & Circle)
Cuttlebug with the Spots & Dots Embossing folder
Fastenator
Ribbon
MS Glitter
Thanks for looking. Questions & comments are always welcomed. Lori

Monday, June 28, 2010

Tyler "T"

A friend requested this letter for her nephew.  I will be very interested in his response to getting this as a gift.  I know young boys would probably like these letters, but this is for a sophomore in High School.  He plays baseball at the playground and is into bowling.  I did his name in his school colors.
Details:
I used my Gypsy & Cricut to design & decorate this letter.
Cartridges used:  Sports Mania (Glove, Bats, & Baseball), Paper Doll Dress Up & George & Basic Shapes (Bowling Ball & Pins)  The pins are actually the caveman's club.  I just stretched it a bit & added a rectangle for the stripe.
Thanks for looking. Questions & comments are always welcomed. Lori

Monday, June 21, 2010

Father's Day Card 2010

Since we are in Louisiana, given what is going on here with our wildlife, and the fact that my dad has been taking some great pics of pelicans....  This card seemed fitting.  I had fun making it and had no doubt that he would like it.  He always likes the projects that I make.  But, I usually get comments like, "That's neat." or "It turned out good, but..."  Not this time!  This time, his reaction was a very excited, "Wow, I like this!!! I'm going to have to frame this!!"  I could not believe it.  And this was just his card - he had not even opened up his present yet.  HERE is the post about his present.

I used my Gypsy & Cricut to design & create this card.
Front:
 Inside:
The cartridges used were:
Sports Mania (Frame), George & Basic Shapes (Background Piece), Life Is A Beach (Pelican & Piling), Designer's Calendar (Sentiment)
Thanks for looking. Questions & comments are always welcomed. Lori

Monday, June 14, 2010

Dancer Card

This card is for a very special litter dancer in our lives.  Fallyn you did a wonderful job out there.  Especially with all the attitude in your jazz number.  It was just precious!!!!!
I used my Gypsy and Cricut to design & create this card.
The carts that I used are:  A Child's Year (dancer)
                                       George & Basic Shapes (background) or it could just be cut w/ a paper trimmer
                                       Sports Mania (frame)
I pop-dotted the frame w/ dancer welded on to it to the background.  Then pop-dotted the dancer layer onto the welded dancer.  I also inked around the layered dancer.
I will update this post with the .gypsy file as soon as I can get it downloaded.
Thanks for looking. Questions & comments are always welcomed. Lori

Friday, May 21, 2010

Bookmark Challenge @ PDE

I made this bookmark for the Challenge #2 at Pause Dream Enjoy. We had to make a bookmark - any theme, color, style, or medium. I used the little deer on the Create A Critter Cart. At my daughter's school, D.E.A.R stands for Drop Everything And Read. This is what they call their in class reading time. So I used the little deer as a play on that acronym.
Thanks for looking. Questions & comments are always welcomed. Lori

Thursday, May 13, 2010

Cricut Cardz Challenge #24: 3 Circles

Cricut Cardz Challenge Blog is having it's 24th Challenge.  This challenge is to make a card using 3 circles.  Anything else goes.  This was super fun, but it was a challenge for my anyway.  This is why we have a winter card in May - LOL.  So this is what I came up with.
Details:
George & Basic Shapes Cart. for the circles
Winter Woodland Cart for the trees
Studio G stamp for the sentiment
Cuttlebug w/ Divine Swirls Embossing Folder on the cirlces

Thanks for looking. Questions & comments are always welcomed. Lori

Thursday, May 6, 2010

Happy Mother's Day - Flower Pot Slider

I started out making this as a shape card w/ the flowers sliding out. I had made a cupcake slider (on a base) & I liked this for the flowerpot too. I find that it helps me to keep from putting the flowers up too high, (I want it to fit into a regular envie.) & this keeps them within the correct frame.
These 2 cards are for my mom & grandmother. I am also entering this into Tracy's (Craft Junkie Too) Mother's Day Post and Cuttlebug Spot Challenge #4. So click on over HERE to check out every one's projects.
Details:
Gypsy to design & cut w/ Cricut
Flowerpot is from Walk In My Garden (blackout, welded at the bottom & edges glued) Flowerpot pieces were also cut in patterned paper & layered to the front of the blackout pot. The rim was embossed using the Cuttlebug & Floral Screen & Paisley folders.
Tag was cut using the Tags, Bags, Boxes, & More cart.
The slider & base were cut from George & Basic Shapes cart.
Flowers are from Sweet Treats, Accent Essentials, & Forever Young carts. They were made using the wet & scrunch method. I then painted them with a mixture of Pearl Ex, Gum Arabic, & water.
Inked all edges & embossed pieces before assembling. Added tag with ribbon tied around one of the flowers.
.gypsy File
Thanks for looking. Questions & comments are always welcomed. Lori

Monday, April 19, 2010

Teacher Appreciation Gift 2010

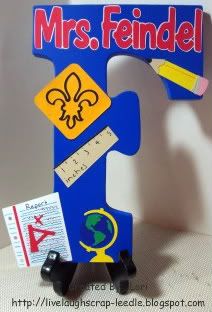
Last year I made a few gifts for my daughter's teacher. She brought her gift almost everyday. This year, I am trying to get together some inventory to do my first craft fair. So, I decided to make just one really good gift for her 3rd grade teacher.
I put all the teacher related items, her name & a fleur di lis on it. She is a huge N.O. Saints fan, so I knew there had to be something on it to represent that part of her personality.
I used my Gypsy, Cricut, Pooh Font Set Cart., Locker Talk Cart., George & Basic Shapes Cart., & Accent Essentials Cart.

Thanks for looking. Questions & comments are always welcomed.
Lori

Thursday, April 15, 2010

Minnie & Micky Mouse Decorated Boxes

HAPPY BIRTHDAY JULIA!!!!!!!!
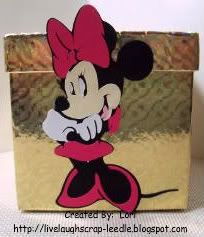
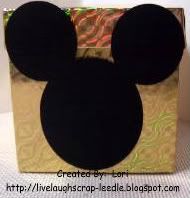
My niece Julia turns 5 this month. Wow, where does the time go? Her birthday party is themed around Minnie Mouse. My sister-in-law got these really cute boxes and asked me if I could decorate them in some way with Minnie Mouse. We didn't want to cover them, since the boxes were pretty on their own. So this is what I came up with. I do not have the Cricut Micky Mouse Cartridge, so I looked around for an SVG file. Kris of Scrappinbykris had one on her blog that she was sharing. Click HERE to check it out &/or to get her file.
I didn't find a file for Micky, so I just made a file using my Gypsy and the George & Basic Shapes Cricut Cart. We didn't really thing that the boys would care very much for a Minnie Mouse in a pink dress - LOL.
Thanks for looking. Questions & comments are always welcomed.
Lori
Friday, April 9, 2010

Fleur di Lis Bookmarks

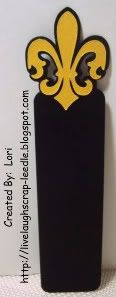
Living in New Orleans the Fleur-di-lis is really big. Now, since the Superbowl, if the Fleur-di-Lis's are black & gold, they are very popular. I made these just to have a little fun and to test out my Gypsy. They came out beautifully.

Details:
Gypsy to design & weld
George & Basic Shapes Cart for the rectangle
Gypsy Wanderings Cart for the fleur di lis
Home Made Glimmer Mist (Sparkle Gold) on the gold fleur di lis. (doesn't show up in the pic, but in person it is beautiful!!!!)
.gypsy File
Thanks for looking. Questions & comments are always welcomed.
Lori
Monday, March 8, 2010

A for Alyssa

This wall letter is for my daughter's friend. Her birthday party is next weekend and this is what my daughter wanted me to make for her. Alexis loved it, so let's hope Alyssa will feel the same way. I'm seriously not too worried about that though. Click HERE and HERE to see what I made for her last year. Her favorite colors are pink & brown and her room is done is those colors too.

White wooden wall letter. (Letter & all embellishments were coated with Krylon Preserve It - Glossy before adhering to make sure they will last.)
Acrylic paint: base color is brown. 2 shades of pink was dabbed all over the brown using a crumpled up plastic grocery bag dipped in the paint.
Name was cut out using SCAL and my Cricut. I Cuttlebugged w/ Floral Fantasy Embossing Folder the top layer of letters & coated with Triple Thick Glaze - thanks to Yoliebean.
The little brown flowers were cut from the George & Basic Shapes Cricut Cart. I glittered them with Martha Stewart Brownstone glitter and added different sized & shades of pink rhinestones in the centers. This is one of my phone book page flowers with a rhinestone center. It's a little hard to tell in the pic, but I added some Diamond Dust randomly to the flower to give the impression of dew. You can check out Scrapsofmine's Video on how to do this. The only thing I do differently is after it is all dry, I add a coat of Glossy Mod Podge over the top to make sure none of the Diamond Dust falls off. These things are like very tiny shards of glass & hurt if stepped on. Ask me how I know!!!!
The butterfly is from the Amanda Blu Summer Solstice paper stack. I cut out 2 matching butterflies, layered them 0 attaching in the center. I curled the wings a bit & attached near the flower.
This flower was made using the grunge flower technique. The flower that I used was cut from the Sweet Treats Cricut Cart. I used 2 different printed cardstocks, inked the edges & the back sides of the flowers. I added Martha Stewart Tourmaline glitter for some sparkle.

Thanks for looking. Questions & comments are always welcomed.
Lori
Thursday, February 18, 2010

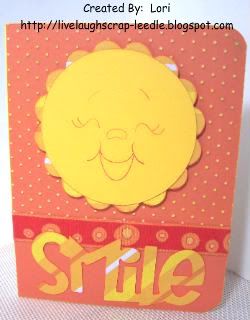
A Smile for Haili

I made this card for a beautiful young lady. She is not only a beautiful girl, but a very lovely person. I have known her since she was in Kindergarten and now she is in high school, whew - hard to believe how fast time flies!!! She got braces yesterday, and just wanted to let her know that we were thinking about her and wishing her well.
I am also entering this into the BBTB2 contest.
Details:
Circle - George & Basic Shapes Cricut Cart.
Scallop Circle - Mini Monograms Cricut Cart.
Smile - Wild Cards Cricut Cart.
Cuttlebug - Swiss Dots Embossing Folder
Ribbon
Peachy Keen Face Stamp
Thanks for looking. Questions & comments are always welcomed.
Lori
Saturday, January 16, 2010

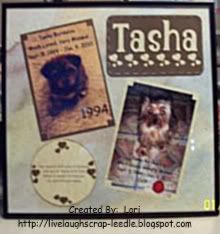
Tasha's Memorial Frame

I made this frame as a memorial to Tasha. I have a picture of her from 1994 and a picture of her in 2009.

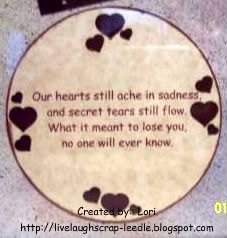
The saying, I thought fit perfectly. I had seen it in a magazine selling a cement paw with the saying on it.

Details:
Alphalicious Cricut Cart. was used for her name. I cut it in cardstock and 140 lb. watercolor paper to give it a little dimension (kind of like chipboard) and layered it. I inked the edges of the letters.
George Cricut Cart. was used to cut the circle. I printed the saying on my computer onto the circle.
Tonic Border Punch System w/ Hearts Punch was used on the base rectangle. I added the punched out hearts to the circle. Inked the circle. I used natural hemp twine threaded around the rectangle.
Tonic Arrowhead 2 in 1 Corner Punch was used on both mats for the pictures. Tucked the corners of each picture into the cut out corner slots.
Thanks for looking. Questions & comments are always welcomed.
Lori

Friday, November 20, 2009

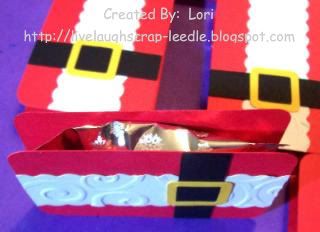
Christmas Party Favors - Part 2: Santa Peppermint Patties

I originally wanted to do the cute little scallop circle Peppermint Patty Sandwiches that I have seen on the blogs & boards everywhere. But when I opened my pack of Peppermint Patties that were not just wrapped in the regular foil wrapping. They were in a plastic foil baggie making it more a rectangle shape. So this is what I came up with. Another take on the Santa Suit candy cover.

Details:
George & Basic Shapes Cart
CDS
Fiskars Paper Trimmer w/ Scallop Blade
Cuttlebug w/ Divine Swirls Embossing Folder
Adhesive of choice

Standing on its side to show the sandwich.
Thanks for looking. Questions & comments are always welcomed.
Lori

Monday, October 19, 2009

Inchie Swaps: Due Jan 15, Jan, 30, & Feb. 15 2010

For those of you that may need a reminder as to what inchies are: They are 1 inch shapes uses as a base. They can be any shape as long as they are 1"x 1". There are also Twinchies 2"x 2" & and Trinchies 3"x 3". These were all made for swaps hosted by KellyScott on the Cricut MB. You can see more of my inchies, twinchies, & trinchies by clicking on those words.

Birthday Theme Swap:
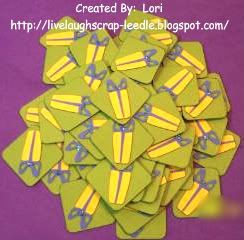
Details: Base was cut from George & Basic Shapes Cart. Present was the icon from the Wild Cards Cart. I added a dot of opal glitter glue at the center of the bow (doesn't show well in pic).

Kid Theme Swap:
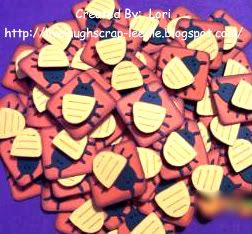
Details: Base was cut from the George & Basic Shapes Cart. Bug was cut from the Doodlecharms Cart. I used pop dots to add dimension to the back of the bug.

School Theme Swap:
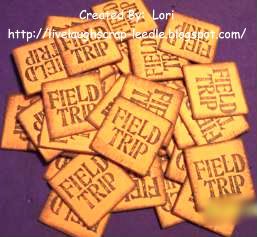
Details: Base was cut from the George & Basic Shapes Cart. Stamp is Studio G $1 stamps from the September set. I also edges around the base with brown pigment ink for a little distressed look.
Thanks for looking. Questions & comments are always welcomed.
Lori

Halloween Party Favors

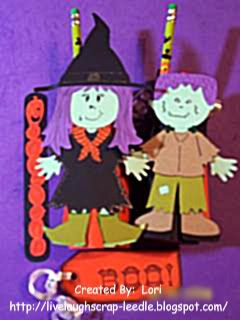
These are the Halloween Party Favors that I made for my daughter's class. I covered toilet paper rolls with either orange or black cardstock. The I attached the Paper Doll Witches & Frankensteins to them. I cut out circles and attached them to the bottoms of the rolls with Zip Dry Glue (This stuff made an excellent bottom - holds great even when filled.)

I filled them with Skittles, Starbursts, Halloween Kaleidoscopes, Halloween Pencils, and Halloween Bookmarks.

Details:
Dolls are all Paper Doll Dress Up Cart.
Faces are Peachy Keen Stamps & hand doodled.
I used markers & gel pens to hand embellish the dolls & clothing.
Bookmarks: Base is from the Tags Bags Boxes & More Cart. The stacked pumpkins are from the Stretch Your Imagination Cart. I cut off the feet, arms, & scarf.
Tag is from the Plantin Schoolbook Cart. "BOO" is stamped from a Martha Stewart Halloween stamp set that I got on clearance at M's last year. I also edged with a black stamp pad


Standing & wrapped in Cello bags.
Thanks for looking. Questions & comments are always welcomed.
Lori

Wednesday, August 12, 2009

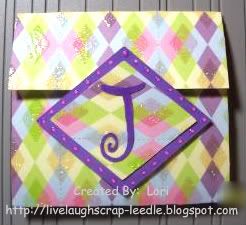
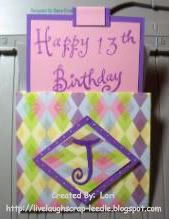
Another Pocket Card/Envie

This one is for some friends' daughter. It's hard to believe we have known Jordan since she was in Kindergarten. Now she is 13.

I used George & Basic Shapes for the diamonds and Mini Monograms (I think) for the J.

Front:
Open & Pull Out:Thanks for looking. Questions & comments are always welcomed.
Lori
A Proud member of The Lime Light. Click on over to see what we are doing.