Followers, Guestbook, & Comments

My followers are being shown in the right column. My Guestbook is at the bottom. Please follow, comment on posts, & sign my guest book. Your comments encourage me to keep sharing my work. I love hearing from you all.

When you leave a comment, I have to moderate it before it will be posted. So if you have a questions or comments, feel free to ask & if necessary note that you don't want your comment posted.
Showing posts with label SCAL. Show all posts

Monday, November 8, 2010

"B" Braden, "G" Gia, "G" Gabriella, & Wreath "Haskel Eugene"

"B" Braden:  This one is for a friend's son.  His school & favorite NFL team's colors are Black & Gold.  Favorite team (Fleur de Lis), School Mascot (Yellow Jackets) & H, he plays football, basketball, and swims.
"G" Gia:  This one is for my friend's niece.  Pink & Purple with a girly theme.
"G" Gabriella:  This one is for another friend's niece.  She had seen another letter that I had done that was very similar to this one.  Pink & Purple with butterflies.
"Haskel Eugene" Baby Boy Wreath:  This one is for my friend's niece that is having a baby boy.
If anyone has questions about the cartridges or techniques used on any of these projects, please leave a comment.  I will look up & try to remember any information that I can.
Thanks for looking. Questions & comments are always welcomed. Lori

Monday, June 21, 2010

Redfish Glass Etching

Ok, so this has been in the works since December.  My dad asked if there was a way to etch a redfish.  I told him that I would have to get the program and find a picture in order to be able to do it.  Well, he bought me the program.  I found a great picture.  Then had to figure out how to convert the picture and make it cuttable.  It took a little while, but I got it done.  I cut it out of plain white cardstock & thought it looked pretty good.  I knew there would be so much weeding of very tiny pieces that I kept putting it off to attempt the etching.
I used SCAL and my Cricut to design & create this project.
Here is the picture that I found on-line.
Here is the cutout from cardstock:
So now, we are on to Father's Day:  I decided on Friday night that I would work on this Saturday morning.  Well Saturday morning turned into 10 hours of trying to get this right.  First, I thought I had the file the correct size for a 8.5 x 11 piece of glass.  It was not, it was too big.  So I resized it, cut it, & placed it on the glass, but it still didn't look right.  I needed to add a shadow to it to give the shape of the fish - w/o having to etch all of the glass.  Now, mind you, my computer is ancient & takes forever on it's own, so working with this file is what took up so much of the time.  So then after 3 more tries (placing issued mostly) I finally got it right!!
So here is the final product:  And he absolutely LOVED it!!!!!!  Now he wants me to make another one.  At least now, I don't think it would take so long.

Thanks for looking. Questions & comments are always welcomed. Lori

Monday, June 14, 2010

Wall Letters - Meagan & Natalie

I made these letters quite a while back.  A friend of mine wanted them for her daughters birthdays.  I had to wait until they received them to be able to post.  Then time got away from me, but there they are.
I used my Gypsy, SCAL, & Cricut to design and create these letters.

Natalie likes swimming, acting, music, & loves writing stories.  Her room is a dark aqua color.  So this is the letter that represents her.
The cartridges that I used for Natalie's letter are:  Tear Drop (Name), Sports Mania (Swimmer), Locker Talk (Paper, Comedy/Tragedy Masks, & Music Plaque), & Stretch Your Imagination (Music Notes)

Meagan is all about high school right now.  She is going to be a freshman this coming school year.  Therefore we have the school mascot (Go Yellow Jackets!!!! - My son is in school with Meagan- LOL) & the "H".  She is on the dance team and softball team.  Her room is a very dark purple.  This is why we have the purple letter with all of the black & gold school themed cuts.
The mascot was done using SCAL.  I want to throw out a HUGE THANK YOU to Aymee @ A Southernbelle's SVG's.  I was having the hardest time making a file for the mascot & she did it and did it quick.  So Thank You Aymee!!!!!  You can visit her blog to get that file if you need it for anything.
The cartridges that I used on this letter are:  Gypsy Font (Name), Beyond Birthdays (Girl - that I converted to a dancer), Locker Talk (Dance Sign), Plantin Schoolbook (H), & Sports Mania (Softball).
Oh, BTW - They Loved Them!!!!
Thanks for looking. Questions & comments are always welcomed. Lori

Thursday, April 15, 2010

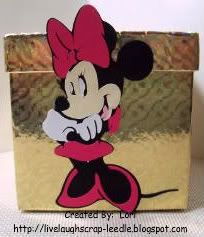
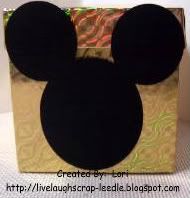
Minnie & Micky Mouse Decorated Boxes

HAPPY BIRTHDAY JULIA!!!!!!!!
My niece Julia turns 5 this month. Wow, where does the time go? Her birthday party is themed around Minnie Mouse. My sister-in-law got these really cute boxes and asked me if I could decorate them in some way with Minnie Mouse. We didn't want to cover them, since the boxes were pretty on their own. So this is what I came up with. I do not have the Cricut Micky Mouse Cartridge, so I looked around for an SVG file. Kris of Scrappinbykris had one on her blog that she was sharing. Click HERE to check it out &/or to get her file.
I didn't find a file for Micky, so I just made a file using my Gypsy and the George & Basic Shapes Cricut Cart. We didn't really thing that the boys would care very much for a Minnie Mouse in a pink dress - LOL.
Thanks for looking. Questions & comments are always welcomed.
Lori

Wednesday, April 14, 2010

Morgan's M & Giftbag

I made these in March for Morgan. A precious little girl that we know that was turning 4.
Details:
Letter:
White wooden M from Michael's painted with acrylic paint. Sprayed w/ Krylon Preserve It along with all of the pieces that were added to the letter.
Name was cut using SCAL.
Princess - Hat was cut from the Sweet Treats cart. Head & hair were cut from the Paper Doll Dress Up cart. face is peachy Keen Stamps. Ribbon is an old hair ribbon that my daughter did not use anymore. Flower is one of my Phone Book Page Flowers.
Giftbag:
Cuttlebug using the Swiss Dots, Happy Birthday & Devine Swirls Embossing Folders
Mini Monograms for the tag w/ My Pink Stamper Stamps.
Cupcake on bag is from the Sweet Treats cart.

Thanks for looking. Questions & comments are always welcomed.
Lori

Sunday, April 11, 2010

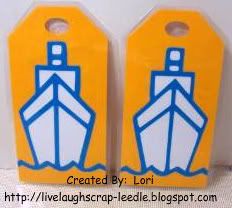
Cruise Luggage Tags

My aunt is going on a cruise next month. I made some luggage tags for her & her friend. I cut them using my Gypsy & SCAL.
Front:
The tags were cut using the Plantin Schoolbook Cart. I got the svg file for the Cruise Ship from A Southernbelle's SVG's. Please click on over to visit her blog. She is very talented & so very generous to share her work.
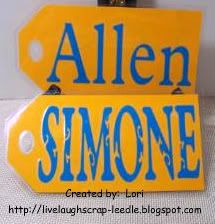
Back:
I put their names on the back.
Allen was cut out with the Plantin Schoolbook Cart.
Simone was cut out using the Gypsy Font Cart.
Thanks for looking. Questions & comments are always welcomed.
Lori

Wednesday, April 7, 2010

4 More Wall Letters - K, T, G, J

I made wall letters for my niece & 3 nephews for Easter. I still find it a little bit of a challenge to make these for boys, but I think they are turning out pretty good.

"K" for Karissa
She will be 2 in July. Everything we have done for her has been pink & purple & involves butterflies. I used the Gypsy Wanderings cart for the butterflies, Home Accents cart for the branch & flowers, & the Alphalicious Cart. for her name.
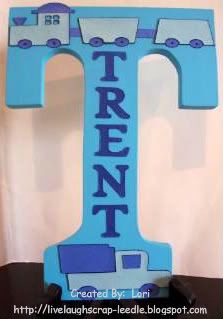
"T" for Trent
He will be 1 in July. I knew I was going with 2 shades of blue. With him being so young, I knew that whatever I did - he will eventually grow out of it. So, I went with a truck & a train from the New Arrivals Cart. His name was cut using the Plantin Schoolbook Cart.
"G" for Garrett
He made 3 in January. He just loves anything to do with balls. So what better cart to use than the Sports Mania Cart. His name was cut using the Plantin Schoolbook Cart.
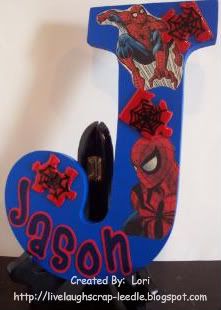
"J" for Jason
Jason is going to be 8 in October. He is a wiz with putting puzzles together and he loves Spiderman. I found some Spiderman comic books (new ones - not collectibles) and cut some of the Spideys out. I sprayed them with Krylon Preserve It so that they will last. Then for the puzzles, I painted some pieces red, freehand painted some spider webs, & coated them with Triple Thick. I cut his name from SCAL.
Thanks for looking. Questions & comments are always welcomed.
Lori

Tuesday, March 16, 2010

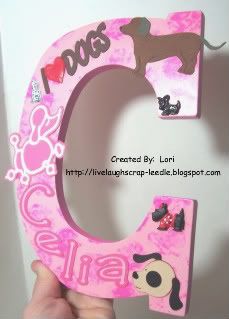
Celia's "C" Wall Letter

A friend of mine (one of Alexis' classmates' mom) asked me to make a wall letter for her daughter. She wanted pink and she loves dogs. So this is what it ended up like. I am happy to say that they both loved it!!
Details:
I painted the entire letter light pink. Then I painted the edges a darker shade of pink. I painted some large bubble bubble wrap with the darker pink paint, & stamped it on the front of the letter. I thought it just gave some texture & broke up all of that lighter pink. But, some people told me that the spots looked like flowers & Liz (the mom) said that some of them looked like paw prints - so that technique was a hit.
I added some dog buttons that I had in my stash.
The name & I{heart}Dogs was from SCAL. I used Triple Thick over the heart to make it dimensional and shiny.
Cricut Carts:
Animal Kingdom - Dachshund & "Spot" dog head
The dachshund was given some texture by using Dawn's Faux Suede Technique. I colored the body w/ distress ink (Vintage Photo) & brown pigment ink. The card & tail were colored w/ distress ink (Weathered Wood)
Cricut Sampler (Paper Pups) - Poodle
The poodle was spritzed w/ homemade glimmer mist (pearl-ex macropearl)
All paper embellishment pieces & the letter was sprayed (front & back) with Krylon Preserve It.

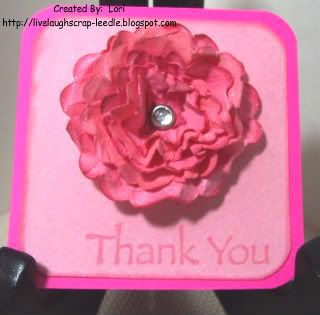
This is just a little 3x3 Thank You card that I made for them for ordering one of my letters.
Details:
3x6 cardstock folded at 3"
2 1/4 x 2x1/4 cardstock spritzed w. homemade glimmer mist (pearl-ex flamingo pink)
Mini Monograms Cricut Cart:
I cut 5 scallop circles @ real dial size 2 1/4, 2, 1 3/4, 1 1/2, & 1 1/4
I colored them with varying shades of pink with chalk ink.
I spritzed them with home made glimmer mist (pearl-ex flamingo pink & Duo Red-Blue)
Scrunched up, unfolded, added a brad to the center & formed with my fingers to my liking.
Spritzed again w/ homemade glimmer mist (pearl-ex macropearl)
Then I dried it with my heat gun.
Again - I can't remember the stamp set that the Thank You came from.

I just wish the glimmer showed up in the pics. It is really pretty in person.

Thanks for looking. Questions & comments are always welcomed.
Lori

Monday, March 8, 2010

A for Alyssa

This wall letter is for my daughter's friend. Her birthday party is next weekend and this is what my daughter wanted me to make for her. Alexis loved it, so let's hope Alyssa will feel the same way. I'm seriously not too worried about that though. Click HERE and HERE to see what I made for her last year. Her favorite colors are pink & brown and her room is done is those colors too.

White wooden wall letter. (Letter & all embellishments were coated with Krylon Preserve It - Glossy before adhering to make sure they will last.)
Acrylic paint: base color is brown. 2 shades of pink was dabbed all over the brown using a crumpled up plastic grocery bag dipped in the paint.
Name was cut out using SCAL and my Cricut. I Cuttlebugged w/ Floral Fantasy Embossing Folder the top layer of letters & coated with Triple Thick Glaze - thanks to Yoliebean.
The little brown flowers were cut from the George & Basic Shapes Cricut Cart. I glittered them with Martha Stewart Brownstone glitter and added different sized & shades of pink rhinestones in the centers. This is one of my phone book page flowers with a rhinestone center. It's a little hard to tell in the pic, but I added some Diamond Dust randomly to the flower to give the impression of dew. You can check out Scrapsofmine's Video on how to do this. The only thing I do differently is after it is all dry, I add a coat of Glossy Mod Podge over the top to make sure none of the Diamond Dust falls off. These things are like very tiny shards of glass & hurt if stepped on. Ask me how I know!!!!
The butterfly is from the Amanda Blu Summer Solstice paper stack. I cut out 2 matching butterflies, layered them 0 attaching in the center. I curled the wings a bit & attached near the flower.
This flower was made using the grunge flower technique. The flower that I used was cut from the Sweet Treats Cricut Cart. I used 2 different printed cardstocks, inked the edges & the back sides of the flowers. I added Martha Stewart Tourmaline glitter for some sparkle.

Thanks for looking. Questions & comments are always welcomed.
Lori

Tuesday, February 9, 2010

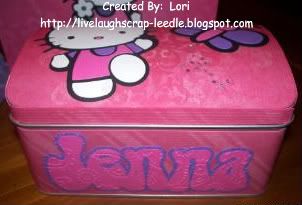
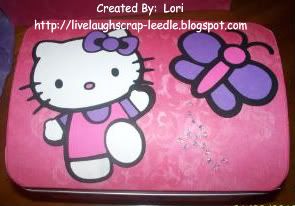
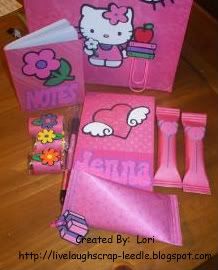
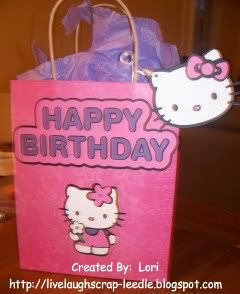
Hello Kitty Greetings Dome Tin Set & Giftbag

I made this dome tin for my niece for her birthday. I used Okieladybug's Dome Tin cut file, Hello Kitty Greetings Cricut cart., SCAL for her name, and the Cuttlebug with several embossing folders Front: Name (SCAL - Bell Bottom Font)
Top: Hello Kitty & Butterfly
Contents: Mini Composition Book, Flip Notepad, Paperclip Bookmark, Covered Hershey's Miniatures, M&M's in a Sour Cream Container, Covered Mini Twix Bars - all decorated with HKG images.
Giftbag & Tag: Decorated using the HKG Cart.
Thanks for looking. Questions & comments are always welcomed.
Lori

Friday, January 15, 2010

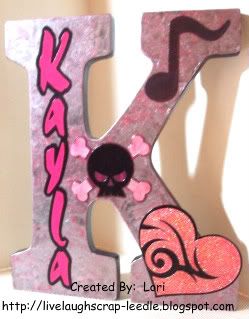
Wall Letter K - Kayla

I can finally show this post. I had to wait until I could give this to my niece.
Ok so this is about the 5th Wall Letter that I have done. I love doing them, but I stress myself out trying to make them fit the person that they are for. Last time I got the first boy one out of the way. Now this one is for my niece, but she is 20 years old. I tried to capture her personality & her interests in this. I hope I did good. She is a very good artist, so I am just praying that she will like it. What was I thinking, trying to give a craft gift to someone that is so talented herself? I can't wait for her to get this to finally stop stressing.

Details:
White wooden letter from Michael's.
SCAL for the letters.
Indie Art Cricut Cart. for the heart and the skull.
Stretch Your Imagination Cricut Cart. for the music symbol.
I painted the letter with black acrylic paint.
I used Tim Holtz Distress Paint (Brushed Pewter) on the top of the letter. I used my fingers to give it some texture. When that dried I brushed over it with Tim Holtz Distress Ink pad (Worn Lipstick). My niece's favorite colors are pink & black. I did the same to the cross bones of the skull.
I used UTEE mixed with glitter and heat embossed that to the top layer of the heart.
After everything was adhered to the letter, I put a layer of Mod Podge over it. Then I sprayed it with Krylon Preserve It for extra protection.
Now for the reaction:
I think she really liked it. I felt really good when she opened it and said "Wow, how did you do that?" Her brother gave me a very good compliment on it too. He said that if he could capture Kayla and put her on a letter, this would be exactly it.
Glad that is over. I think I need to have more confidence in my work. I stress over it too much. I just want the people that I am making things for to really like them.
Thanks for looking. Questions & comments are always welcomed.
Lori

Monday, January 4, 2010

Test Cut for Redfish Etching

Well, my dad bought SCAL (Sure Cuts A Lot) for me at the end of November. Why, you might ask?!! Because I had been doing some glass etching. He asked me how hard it would be for my Cricut to cut a detailed fish with scales & all. So I told him that if I had SCAL it would be no problem. That I could cut any image that I can copy & paste from the internet or on any image that is on my computer.

With Christmas & all I really did not have time to work on it. And the times that I did try were very unsuccessful & frustrating. I was beginning to think that I had made a mistake in getting this program. You had to use inkscape (a free program) to clean up the images & I just was not able to figure it all out. I posted a picture of the fish on the SCAL MB, asking for help. DogCarbon was nice enough to try,Thanks, but the file was not exactly what I was looking for.

I decided yesterday morning to sit down & try to figure it out. To make the .svg file I imported the original picture into Inkscape.  Then I went into Path > Trace Bitmap.  When there all I did was change the Edge Detection to .450.  That's it, nothing else.  Then I Imported it into SCAL and made a few little changes there. You will see the little (very little) changes in the .scut2 file & the .svg file).  Oh yeah, SCAL made some updates on 1/2/09 that makes it easier & less dependent on inkscape!!!

Well, after all of that - sorry it was so long. Here is a pic of my sample cut. I am proud of myself.
I cut it out of white cardstock an placed it over a dark piece of cardstock. When etched, the white parts will be clear class & the dark areas will be etched. When I get a pane of glass I will do the etching & post that pic then. This particular image will fit on an 8x10 picture frame glass. It can be sized up or down, but to size any smaller would loose some of the detail. It was hard to weed out at this size. I would love to try it a little bigger. It would also be nice to try it on t-shirts too. Yeah that's right - forgot to mention that I also got a Yudu for Christmas. I have done the Freezer Paper Technique on T-shirts & would love to see the contrast between the two ways to do this.
HERE is the .svg file.
HERE is the .scut2 file.
Thanks for looking. Questions & comments are always welcomed.
Lori

Thursday, December 31, 2009

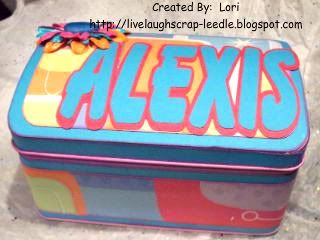
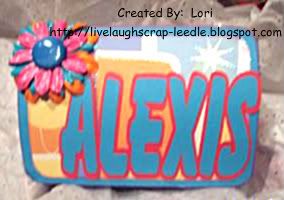
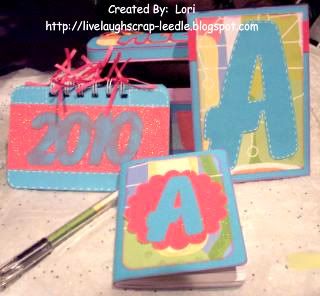
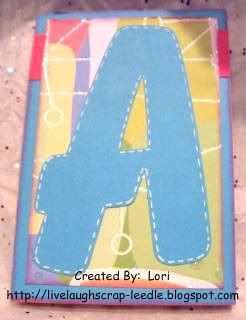
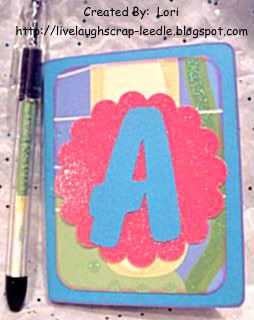
Altered Dome Tin & Stationary Set

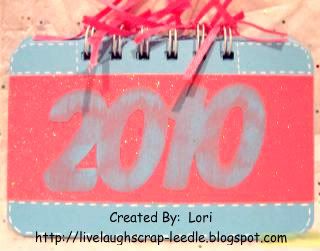
This is what kept me busy most of the time. I made 4 of these in total 1 for my daughter & 1 for each of my 3 nieces. They range in age from 8 to 12. I made them all in different color & patterned paper schemes, but all were basically the same design.
Thank you Okieladybug for the .cut file to cover these tins. I don't think I could have done it with out you.
This is the tin that I made for my daughter. She was so excited b/c she knew I was making them for my nieces, but had no idea that one of them would be for her too.
Front & Top:

Top:

I-Top Brad in Prima Flowers coated in Mod Podge.

Complete Stationary Set Contents:

Flip up notepad with very brightly colored pages:

Altered RSVP pen & Altered mini composition notebook:

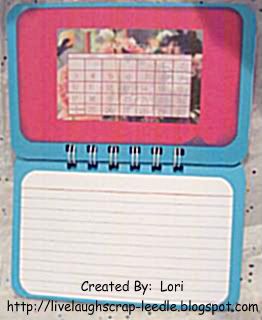
Calendar made with my Bind it All

First page inside of calendar, calendar & note card for note & upcoming dates:

Thanks for looking. Questions & comments are always welcomed.
Lori

Gift Bags & Tags

Ok, here is some of what I have been working on for Christmas. I have been very busy since before Thanksgiving trying to get everything made & finished. So in this & then next 5 posts there might not be much detail. You can always leave a comment or send me an email if you want to know something specific about what i used or how I did something. Also there are some things that I did not have a chance to take pics of, but you all will get most of it. Some still can't be shown b/c we have not done our Christmas with everyone yet. Hopefully I will be able to post the rest after this weekend.

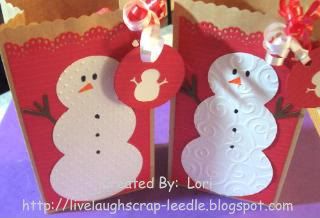
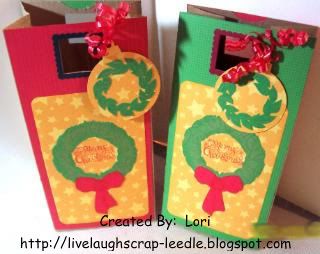
Bags that I made to put giftcards in. I thought it made a nice touch as opposed to just having the giftcard holder. They were made from very small craft paper bags.

These were made from the same small craft paper bags. I made these to put the snowman ornaments that I made for some family members. You can see the Christmas Ornaments HERE.

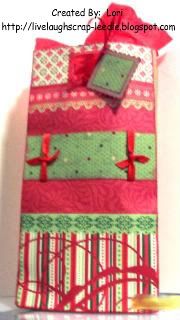
The next 3 pics are bags that I made using regular brown paper lunchbags. The first pic I made 10 of these varying a little, but basically the same design. The other 2 are one of a kind.


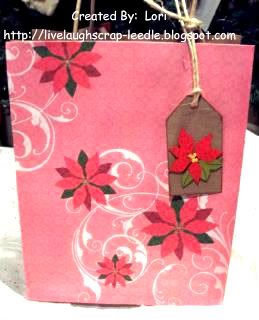
This bag was a medium sized craft paper gift bag that I decorated and made a tag for.

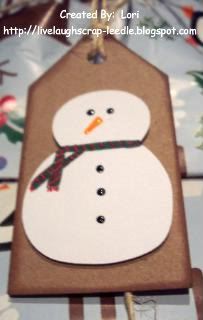
This is the gift tag that I made to put on the small snowman bags.

The rest of these tags were just cut from craft paper cardstock inked and embellished with a decorated Cricut cut.


Thanks for looking. Questions & comments are always welcomed.
Lori