The blog is Everyday Me. Michelle has some beautiful cards on her blog & the most adorable daughter.
What caught my eye was a video. I was on YouTube & found her Christmas Tree. She made it with flower punches, but we know that we could use our Cricut to make this. I just thought it was the cutest tree & wanted to pass on the idea.
Thanks for looking. Comments & questions always welcomed.
Lori
Proud member of The Lime Light Design Team. Please click on over to see what we are doing.
Wednesday, December 17, 2008

Wednesday, December 10, 2008
A Few More Ornaments
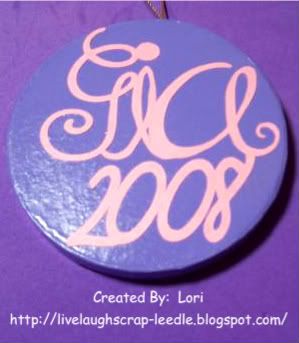
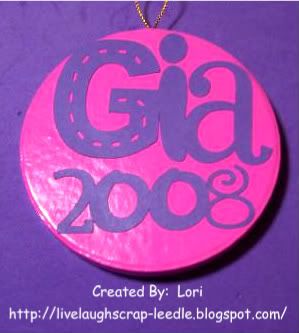
Ok, so here are a few more ornaments. A friend that I had grown up with had seen my Godchild's ornament. He wanted me to make some for his daughter. They give her six new ornaments every year & he wanted me to make four of them for her.
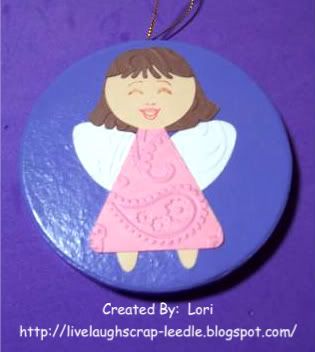
Angel: I made this one using CDS, George & Basic Shapes, and Paper Doll Dress Up. Click HERE for Angel .cut file. When you cut it, you will not use the head on the 2nd body. This angel is very simple, but I really don't design much with CDS. I mostly use it to size things correctly & weld letters to make words, so this was an accomplishment. I think she came out cute. I also used Peachy Keen Face Stamps (Blushing Brides). I also used the Cuttlebug for her dress, wings, & hair.

 Gingerbread Man: He came from the Stretch Your Imagination cart. I used Markers to color in the colored parts of the "icing", then I used Liquid Embossing to give it a little dimension.
 Christmas Stocking: I can't remember which cart this one came from. I used the MS Branch punch for the branches at the top.
 Rocking Horse Wreath: I think this one is my favorite. (I have to check on this one too about the cart.) I appologize - I have been working on so much lately that I don't remember all of supplies used. I used the MS Branch punch to make the wreath. I rubbed a dark green ink pad across the horse & the wreath. I like the way it turned out. It kind of made it look antique-ish.
 Thanks for looking. Questions & comments always welcomed.
Angel: I made this one using CDS, George & Basic Shapes, and Paper Doll Dress Up. Click HERE for Angel .cut file. When you cut it, you will not use the head on the 2nd body. This angel is very simple, but I really don't design much with CDS. I mostly use it to size things correctly & weld letters to make words, so this was an accomplishment. I think she came out cute. I also used Peachy Keen Face Stamps (Blushing Brides). I also used the Cuttlebug for her dress, wings, & hair.
 Gingerbread Man: He came from the Stretch Your Imagination cart. I used Markers to color in the colored parts of the "icing", then I used Liquid Embossing to give it a little dimension.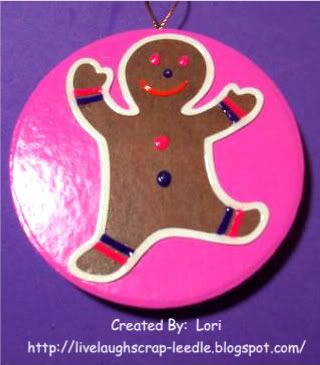
 Christmas Stocking: I can't remember which cart this one came from. I used the MS Branch punch for the branches at the top.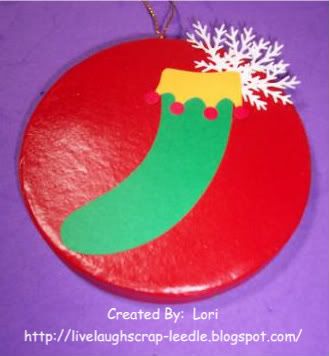
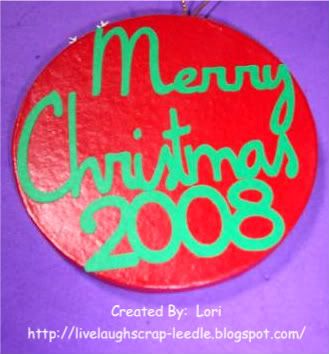 Rocking Horse Wreath: I think this one is my favorite. (I have to check on this one too about the cart.) I appologize - I have been working on so much lately that I don't remember all of supplies used. I used the MS Branch punch to make the wreath. I rubbed a dark green ink pad across the horse & the wreath. I like the way it turned out. It kind of made it look antique-ish.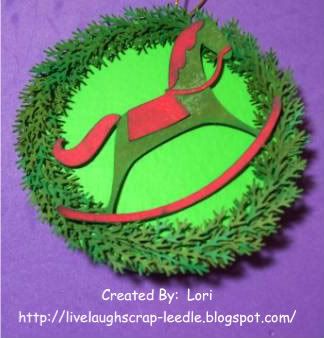
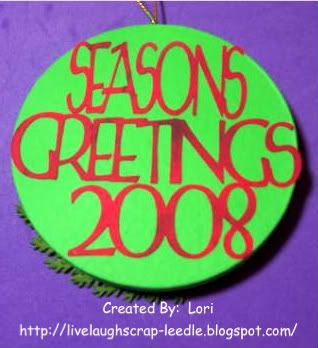 Thanks for looking. Questions & comments always welcomed.
Lori
A proud member of The Lime Light Design Team. Please click on over to see what we are doing.
Karissa's 1st Christmas Ornament
I can finally post some of the projects I have been working on. I gave this ornament to my brother for my Godchild's 1st Christmas. I wanted them to be able to have it on the tree this year.
Front:
 Back:
Back:
 I made her shower invites & favors using the baby bootie from the New Arrivals cart. So, I thought it would be fitting to use it for her 1st Christmas ornament as well. I heat embosses the word Christmas with Red Tinsle Embossing Powder. I used CDS to make sure that all of the cuts would fit on the ornament form. The form is just a paper mache form that I painted pink. I cannot remember off hand which carts I used for all of the words, I will post back later with the info.
Front:
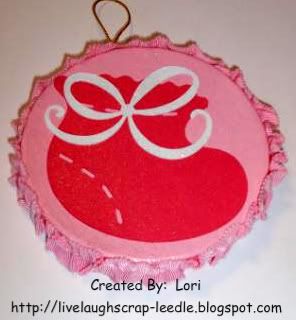 Back:
Back: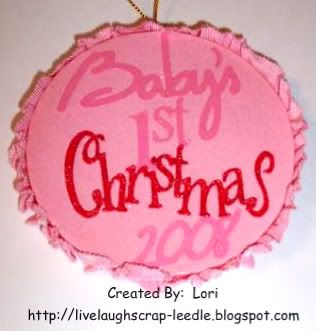 I made her shower invites & favors using the baby bootie from the New Arrivals cart. So, I thought it would be fitting to use it for her 1st Christmas ornament as well. I heat embosses the word Christmas with Red Tinsle Embossing Powder. I used CDS to make sure that all of the cuts would fit on the ornament form. The form is just a paper mache form that I painted pink. I cannot remember off hand which carts I used for all of the words, I will post back later with the info.
Thanks for looking. Questions & comments always welcomed.
LoriProud member of The Lime Light Design Team. Please click on over to see what we are doing.
Wednesday, November 12, 2008
I'm Here & New Video Links
Sorry I haven't posted in a while. I have been busy making Christmas presents & I can't post them on here just yet. I will be having them posted on the Cricut MB as soon as I get some pics taken. (So those of you that are members will know how to look it up.)
Yesterday Mandy_Ferg posted on the Cricut MB about a great video for heat embossing. Thank you Mandy. I looked it up & it was wonderful. There are so many more video tutorials on there. It is a wonderful site. Please take a look at Scrapbooks Etc.
I also have this new link on the right side bar under "My Favorite Videos". Please visit the rest of them on there too. They are all so informative & just fun to watch.
Thanks for looking. Comments & questions always welcomed.
Lori
Proud member of The Lime Light. Please click on over to see what we are doing.
Yesterday Mandy_Ferg posted on the Cricut MB about a great video for heat embossing. Thank you Mandy. I looked it up & it was wonderful. There are so many more video tutorials on there. It is a wonderful site. Please take a look at Scrapbooks Etc.
I also have this new link on the right side bar under "My Favorite Videos". Please visit the rest of them on there too. They are all so informative & just fun to watch.
Thanks for looking. Comments & questions always welcomed.
Lori
Proud member of The Lime Light. Please click on over to see what we are doing.
Monday, October 27, 2008
More Halloween Party Treats
You might have seen the Halloween Treats that I made for my daughter's Halloween Party. If not, click here to see them.
Well one of the room moms called me to ask if I could bring favors for the party. So this is what I made. I adapted this from Dawn's Frankie Card.

Well one of the room moms called me to ask if I could bring favors for the party. So this is what I made. I adapted this from Dawn's Frankie Card.
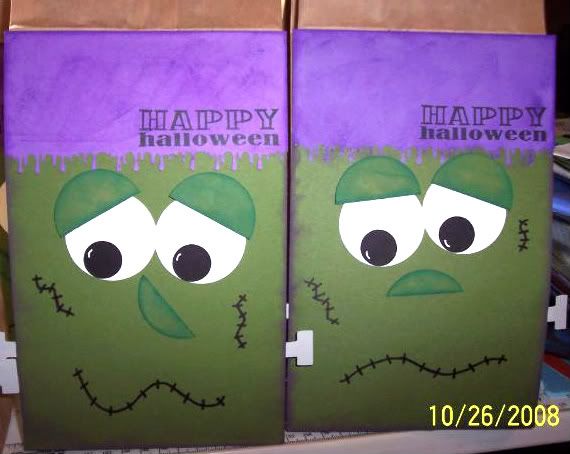
I just made flat faces & adhered them to a paper lunch bag & filled with candy. For the hair, instead of cutting out the jagged edge, I used the MS Drippy Goo Punch. I thought that added a little different touch. I used CDS to cut all of the circles & welded the white parts of the eyes together. I cut the circles at: white 1 3/4", green 1 3/4", & black 3/4". I used George & Basic Shapes for the circles & Opposites Attract for the bolts in his neck (T). I used my white Gelly Pen for the accents on the eyes. I inked over the hair & around the face with purple ink & with green ink around the eyelids & noses. I did the mouths & scars freehand. I also mage all of the face look a little different. The stamp is from the dollar bin at Target. Thanks for looking. Comments & questions are always welcomed.
A proud member of The Lime Light. Click on over to see what we are doing.
Sour Cream Container Halloween Treats
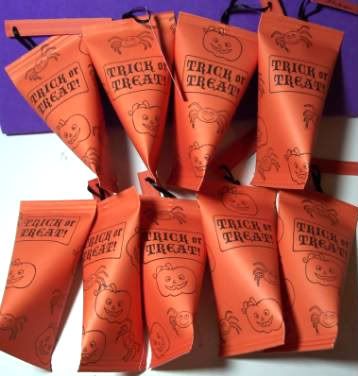 I made these sour cream containers for my son to give to the bus stop kids & his bus driver. They are all between 12 & 14 years old & will probably think I have lost my mind. But, I'm sure they will still like the candy inside. He will give them out on Halloween morning.
I used misc. orange cardstock 5 1/2" x 6". I stamped them with halloween stamps that I found in the dollar bin at Target. I punched a hole in some extra scraps of the orange cardstock & attached with a ribbon before sealing up the top end. I used my crimper on the ends & I used the Terrificly Tacky Tape (Red Sticky Strip) to seal them. I stamped "From:" with a Stampin' Up Stamp on the tag & my son will write is name.
For instructions on making them go to: Splitcoast Stampers
Thanks for looking. Comments & questions are always welcomed.
Lori
A proud member of The Lime Light. Click on over to see what we are doing.
Jason is 6 Years Old!!!!
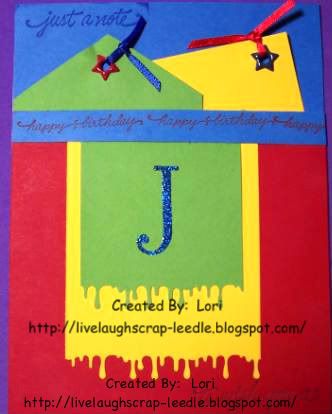
This card was made for my nephew, Jason. He just turned 6 & was so excited about it.
I used a sketch from Card Maker's Sketch Book for this card. It was so much fun to make & really quick. I cut 2 tags freehand. added 2 star eyelets using my Crop-A-Dile, & misc. ribbon. I used the MS Drippy Goo punch for the layered base for his intitial. Sentiments stamps set is from Stampendous, on the bottom (it isn't showing too well) says, "to wish you a" & on the inside it says "happy birthday". I can't remember the stamp set for the "J". I used heat embossing on the initial.
Thanks for looking. Questions & comments are always welcomed.
Lori
A proud member of The Lime Light. Click on over to see what we are doing.
Thursday, October 23, 2008
The Lime Light - 1st Task Cards for Marines
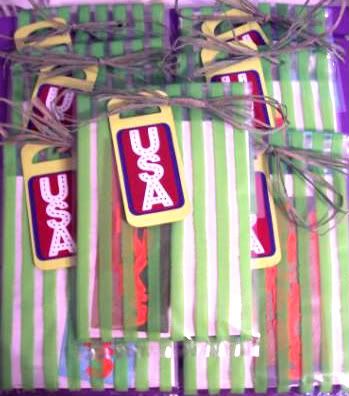 Well this is my contribution to our first task. We each made between 5-10 sets of cards and bookmarks. I made 7 sets of cards & 7 bookmarks. One card is going to the Marine (with a note of gratitude from me), one card is for the Marine to send home, and the bookmark is for the Marine to use or pass along. It had been mentioned that the troops are always looking to things to use as ornaments during the holidays. So, I kept that in mind when making the tags on the packages. I really hope they enjoy it all. Please visit our site, The Lime Light to check out everyone's work. You can also see the cards unbundled & more details on the site. Please stop often to see what we are up to.
Thanks for looking. Questions & comments are always welcomed.
Lori
A Proud member of The Lime Light Design Team.
Monday, October 20, 2008
Lunch Bag "LSU Birthday Card"
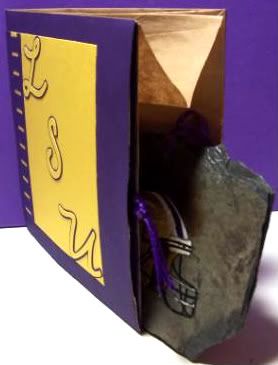
This is the first luch bag card that I made. I got the idea from thriftygranny on the Cricut Message Board. Click here for her blog. She gives instructions here too (post #20).

This card was for a very good friend of ours. He is a very big LSU fan, so I knew this would be perfect. Happy Birthday Sean!!!!
This is the front of the card. I used OA for the letters & LITW punch. This is the front & pull-out . I used george to cut circles, then cut them in half for the border of the pull-out. I can't remember the name of this stamp set.
 This is the back of the crad. I used the LITW punch & George with CDS to make the football. I also embossed the football with the CB using the Swiss Dots folder. I used a brown marker to color the dots.
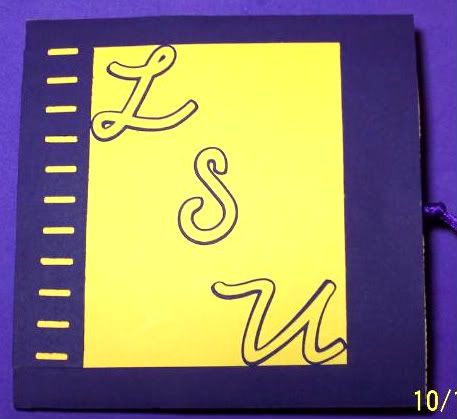 This is the front & pull-out . I used george to cut circles, then cut them in half for the border of the pull-out. I can't remember the name of this stamp set.
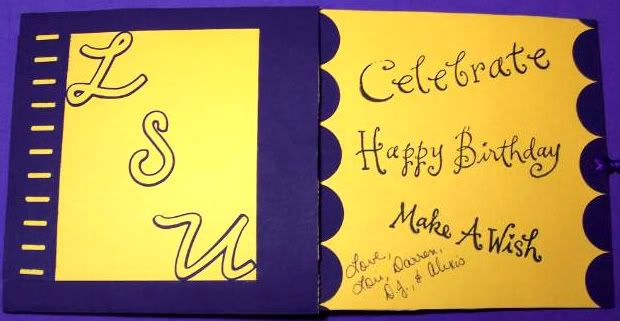 This is the back of the crad. I used the LITW punch & George with CDS to make the football. I also embossed the football with the CB using the Swiss Dots folder. I used a brown marker to color the dots.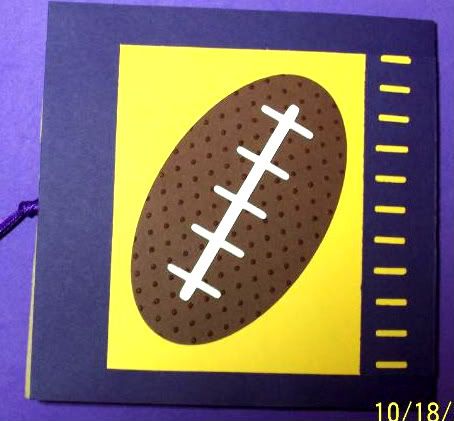
Thanks for looking. Questions & comments are always welcomed.
Lori
A proud member of The Lime Light Design Team
Monday, October 13, 2008
Kids' Birthday Cards
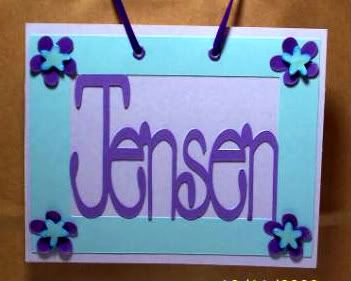
I made this card for my niece's 7th Birthday. I made a flat card & put her birthday message on the back. I made it into a doorhanger & hung it on the handle of her gift bag. She absolutely loved it & so did the rest of the girls at the party.
Details:
The name & frame were cut out as one piece. Then I cut the name in purple & layered it.
Cricut Design Studio to size & weld the name & the frame
Tear Drop for the name
Stetch Your Imagination for the frame - blue flowers were cut from the corners of the frame
George & Basic Shapes for the purple flowers
Ultra Thick Embossing Enamel with a heat gun was used on the flowers then layered
Crop-A-Dile for setting the Making Memories Eyelets
Misc. Ribbon was used for the hanger
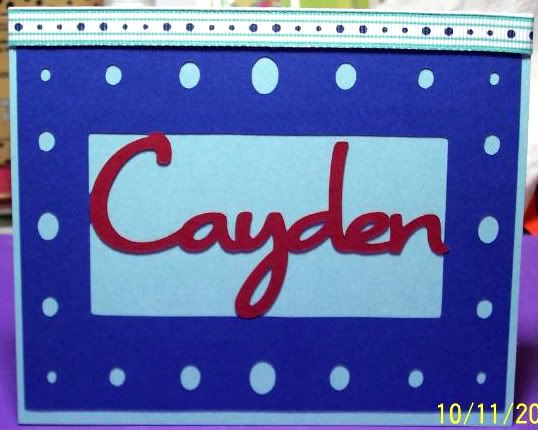
This card was made for the son of some very good friend's. It was for his 5th birthday.
Details:
The name & frame again was ust all in one piece. Then I cut the name in red & layered it.
Cricut Design Studio to size & weld the name & frame
Opposites Attract for the name
Stretch Your Imagination for the frame
Misc. Ribbon
Thanks for looking. Comments & questions always welcomed.
Lori
Proud member of The Lime Light design team.
Thursday, October 9, 2008
Halloween Treats
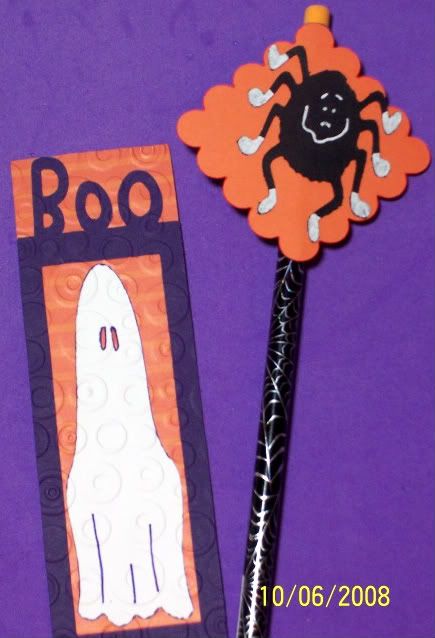
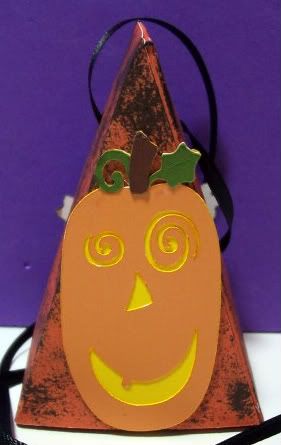
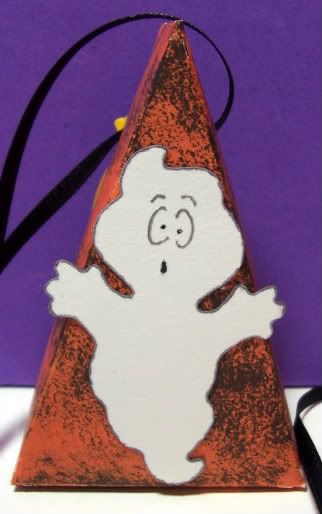 I made these treats for my daughter's Halloween party at school. Each child (11) will get a spider pencil, a boo/ghost bookmark, & a pumpkin/ghost cakebox necklace filled with a halloween marshmallow (pre-wrapped) candy. Each cakebox was sponged with a cottonball & black Staz On ink. They all have a ghost on one side & a pumkin on the other. On the bookmarks, I used the Cuttlebug with the Spots & Dots folder. I wanted to do that on just the base, but I forgot to. I did one after the entire thing was made & my DD loved it, so I did them all.
I have to look up all of the details & will post later.
Thanks for looking. All comments & questions welcomed.
Lori
Tuesday, October 7, 2008
Making Your Own Patterned Cardstock
I forgot how I came across this blog, but it is wonderful. Please check out http://michellesrubberroom.blogspot.com/.
The project that caught my eye was her Paper Napkin Transfer tutorial. I thought this was just amazing. Just think of all the patterned cardstock that we can make now & it even has a textured feel to it. I loaded up with all kinds of printed napkins on clearance at Target. I tried it last night. I had a few issues, but it worked out in the end.
Here is the card that I made & the napkin that I used:


The project that caught my eye was her Paper Napkin Transfer tutorial. I thought this was just amazing. Just think of all the patterned cardstock that we can make now & it even has a textured feel to it. I loaded up with all kinds of printed napkins on clearance at Target. I tried it last night. I had a few issues, but it worked out in the end.
Here is the card that I made & the napkin that I used:
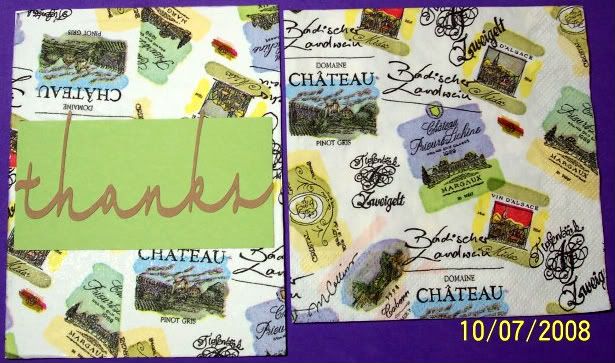
Here is a closer up pic of the card.
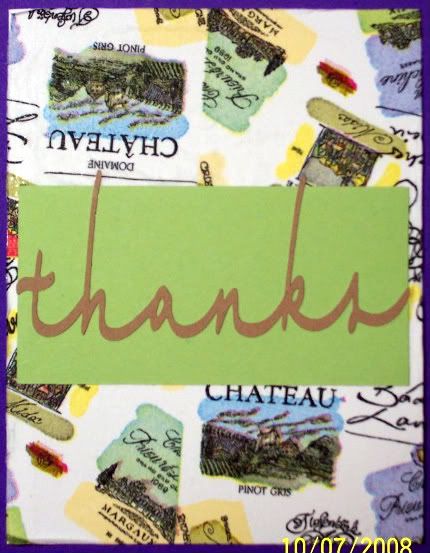
This will be one of the cards going to the marines as part of the 1st task of The Lime Light Design Team.
Thanks for looking. Comments & questions are always welcomed.
Lori
The Lime Light - We Are Up And Running
 Click Icon To Check It Out
I have posted before about this new & exciting design team. We are a charitable design team that is made up of 11 paper crafters. We have just started our first task of making cards for our men & women fighting in Iraq. Although we are taking is a step further. We are sending cards for them to know that they are appreciated, but we are also sending them bookmarks & cards to send to those that they appreciate also.
We will have a new task every month. Please check out The Lime Light often to see what we are doing. There may be times that you will be able to help us out too. There is also a link for you to donate, if you can. This will help us greatly to alleviate some of our costs.
We have bios of all of our design team members along with our blog addresses. Please check us out & visit our individual blogs. I also have them listed on my sidebar to the left. Many of us are doing some wonderful things in addition to The Lime Light.
We also ask that you post a link to The Lime Light on your blog to help spread the word of what we are doing.
Thanks for looking. Comments & questions always welcomed.
Lori
Friday, September 26, 2008
Birthday Card - Collin
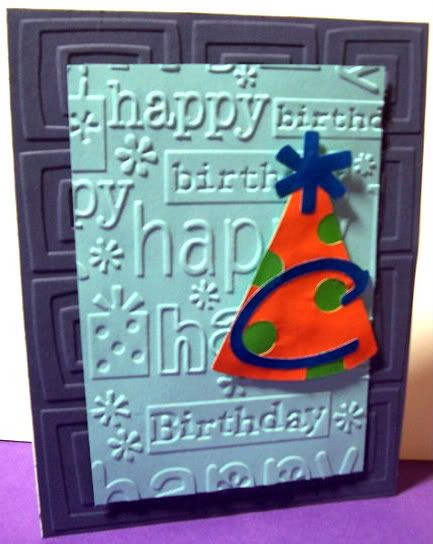
This card is for the son of some very good friends. Happy Birthday Collin.
Card Details:
Misc. Cardstock from my stash
Misc. Colored Paper Scraps from dollar bin at Target
Cuttlebug Folders: Happy Birthday & Traffic Jam
Birthday Hat: Doodlecharms
C: Opposites Attract
Thanks for looking. Comments & questions always welcomed.
Lori
My 1st Waterfall Card

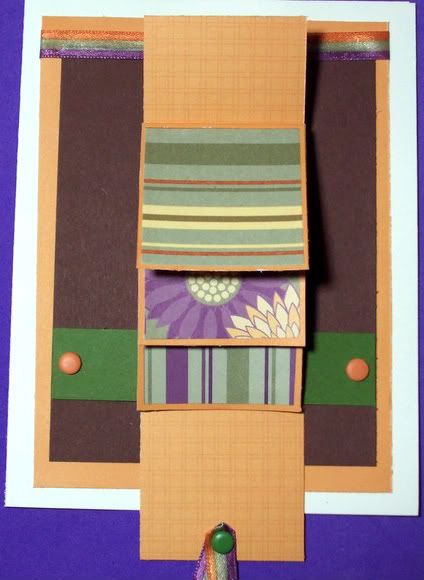

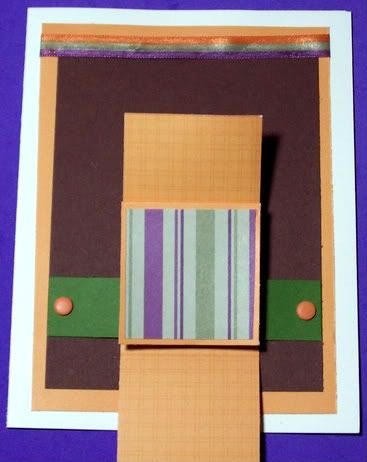
Let me first say that I got inspiration from so many wonderful waterfall cards that I have seen. I ended up using the directions from Dawn. You can click her name to get to her video instructions on how to make this card. Sorry the pics aren't the best.
Not only is this my first waterfall card, it is actually the first card that I have made without someone specific in mind. So, I'm not sure yet who will receive it, but I hope they like it none the less. I thought it would make a great Happy Fall or Happy Thanksgiving Card.
Details:
Misc. cardstock from my stash
Printed Paper Scraps from the dollar bin at Target
Ribbon from the dollar bin at Target
Making Memories snaps
Crop-A-Dile to punch holes & set the snaps
Thanks for looking. Comments & questions always welcome.
Lori
Thursday, September 25, 2008
Heart To Heart Blog Candy
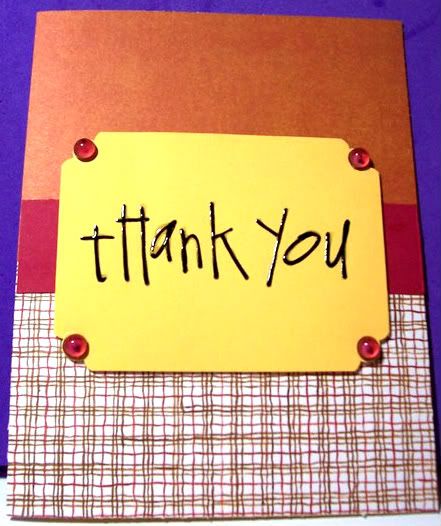
This challenge is on My Blog By Cammie, the post is at Heart To Heart Blog Candy.
This challange was brought to my attention by a fellow Lime Light Design Team Member, Angelique.
Card Details:
Misc. Cardstock & Printed Paper.
Fiskars 3 Design Corner Punch on yellow cardstock.
Heidi Swapp Stamp
Skittles
Liquid Embossing over the stamp
This card is very simple, but I really wanted to get it done. It is for such a great cause - to let others know that they are appreciated. Alzheimer's Caregivers, I'm sure don't always feel that they are. I have not been touched by this disease in anyway. Cammie's story just touched me. And the fact that so many have donated so much for Cammie's cause, that the least I could do was make a card to brighten someone's day.
I will be sending my card to the Altman House. I'm sure they will appreciate everything that Cammie has done to bring this attention to the ones that are sometimes not so appreciated.
Thanks for looking & please visit both, Cammie & Angelique's blogs.
Comments & questions always welcomed.
Lori
PTW Mellow Yellow! / Children In Need Challenge
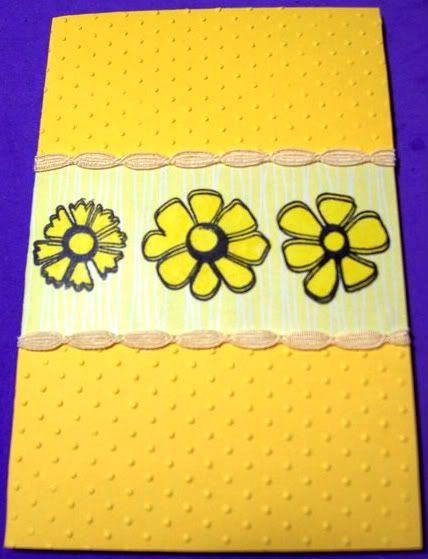 This is my entry for this weeks PTW's Mellow Yellow - Children In Need Challenge.
Click the link to see the details & how you can help in this cause.
Card Details:
Cuttlebug - Swiss Dots
Ribbon - BasicGrey (Oh Baby!)
Stamp - Target (Acrylic Brights Stamp Set - Dollar Bin)
Misc. Cardstock.
Printed Paper - Misc. Scraps from Target Dollar Bin
I stamped the flowers twice just offsetting them a bit. Then I colored them in with yellow LePlume II Double Ended markers.
Thanks for looking. Questions & comments always welcomed.
Wednesday, September 24, 2008
Paying It Forward (4)
I have added a "Paying It Forward" list to my sidebar to highlight those that use their crafts to make a difference in the lives of others.
Papertake Weekly is doing a charity challenge this week. The challenge is to make any type of card, but it has to be ALL YELLOW. It is a benefit to help children. Please click the "Mellow Yellow" link under "Paying It Forward" on my sidebar for the information. PTW will donate money for every person that sends a card or cards. The cards must to be received by 10/6/08.
Please visit & try to participate in these "Paying It Forward" events.
Thanks,
Lori
Papertake Weekly is doing a charity challenge this week. The challenge is to make any type of card, but it has to be ALL YELLOW. It is a benefit to help children. Please click the "Mellow Yellow" link under "Paying It Forward" on my sidebar for the information. PTW will donate money for every person that sends a card or cards. The cards must to be received by 10/6/08.
Please visit & try to participate in these "Paying It Forward" events.
Thanks,
Lori
Paying It Forward (3)
I have started a "Paying It Forward" list on my sidebar to highlight those that are using their crafts to make a difference in the lives of others. The Lime Light is the brainchild of Gracie. It is still in the beginning stages, but in short it is a charitable design team that will be sending cards & crafts for charitable causes or in some cases just to make others feel appreciated & that they are thought about & not forgotten. I am very honored to have been chosen as a member of this design team. Please check out the link to see all of the wonderful members & their blog sites. Please check back often to see what we have been doing. Thanks for looking. Lori
Paying It Forward (2)
I have started a "Paying It Forward" list on my sidebar to highlight those that are using their crafts to make a difference in the lives of others.
I was also touched by Donna (Ruby Stamper) from http://rubystamper.blogspot.com/. She wants to send craft supplies to hurricane victims. You can see why by visiting her blog or click "Giving Craft Supplies" on my sidebar under "Paying It Forward", once you get to her site scroll down to Sept 18 "Giving Craft Supplies".
Thanks for looking. Fell free to link to this post or her original post.
Lori
I was also touched by Donna (Ruby Stamper) from http://rubystamper.blogspot.com/. She wants to send craft supplies to hurricane victims. You can see why by visiting her blog or click "Giving Craft Supplies" on my sidebar under "Paying It Forward", once you get to her site scroll down to Sept 18 "Giving Craft Supplies".
Thanks for looking. Fell free to link to this post or her original post.
Lori
Subscribe to:
Posts (Atom)