OK, so this month our challenge is to do a scrapbook page. This is truly a challenge for me. You all can look through my blog to see how many lay outs I have previously done. NONE!!! I have made a 12x12 frame once, but that was it. Then to add stamps to a lay out!!? Robyn makes everything look so easy!!
So I made this layout using a picture of my kids that my mom had. I loved the black & white photo set on the brown tone card stock. This pic is about 6yrs old (4 & 8 - now 10 & 14). When I saw this pic & was going through my MPS Stamps, I found the perfect sentiment stamp for this pic in the More Faithful Sayings Set. (It's hard to get pics of my kids actually looking like they love each other - LOL)
Since I don't scrapbook I painted & distressed a 12x12 canvas & adhered my lay out to the canvas. It was funny b/c my mom didn't want me to take her photo. She wanted to keep it in the frame that she had it in. When I showed her the finished project she asked if she could keep it. LOL - that was my plan all along!!!
Closeup of pic & stamp:
The following pics are closeups of the flowers with a characteristic that we want to instill in our children. All of these characteristics also came from the More Faithful Sayings Stamp Set.
True: We want to instill truth & always want our children to be true.
Knowledge: We want to instill the knowledge of right & wrong & of course for them to embrace the opportunities for education that they have.
Grateful: We always want them to grateful & appreciative for everything that they have.
Integrity: We want them to have all of the moral & ethical principles that they should have to be honest & sincere.
Humble: We always want our kids to be humble in everything they do.
Details:
The polka dotted scalloped oval in the background is from the Imagine stock images & colored with the Imagine More Cart.
Flowers are from the Accent Essential Cart.
I tore & distressed all of the edges. I used distress inks & gold paint.
For the canvas, I painted it with brown paint. I used Crackle medium then painted with antique white paint. I then used several colors of distress ink, walnut stains, brown paint, antique white paint, & gold paint.
Thanks for looking. Questions & comments are always welcomed. Lori
Followers, Guestbook, & Comments
My followers are being shown in the right column. My Guestbook is at the bottom. Please follow, comment on posts, & sign my guest book. Your comments encourage me to keep sharing my work. I love hearing from you all.
When you leave a comment, I have to moderate it before it will be posted. So if you have a questions or comments, feel free to ask & if necessary note that you don't want your comment posted.
Tuesday, March 22, 2011
Friday, March 11, 2011
My Pinkalicious Blog Hop
Welcome to the My Pinkalicious Blog Hop for My Pink Stamper's Design Team. If you cam here from Julie's Blog ReadySetStamp. You are right on track. If you just happened onto this post, click HERE to get to Robyn's blog to start from the beginning. While you're there you can pick up her Blog Hop Blinkie & join in on the hop with us. I also want to welcome Kristal from Getting Cricky, she is our guest hopper this month.
This month our challenge was to make any type of project that was Spring Themed & to use any of Robyn's stamps (new or old). Well to me nothing says Spring more than Easter. So I made this tag to use on an Easter present.
I just love the patterns on the Nursery Tails Cart and I just fell in love with these butterflies & dragonfly.
Details:
Imagine
Nursery Tails for everything: Tag (pg. 22), Pattern (pg. 36), butterflies & dragonfly (pg. 21)
I inked all of the pieces with distress in. I also used distress in for the stamp.
I added Frosted Lace Stickles to the bodies of the butterflies & dragonfly.
I love dimension, so I cut the butterflies & dragonfly twice. I layered then adhering nly the bodies, leaving the wings to fly.
Stamp: My Pink Stamper's Happiest Moments Set.
Your next stop on the hop is: Christi's Blog
Here's the entire list of our very talented designers in order fro this hop:
Thanks for looking. Questions & comments are always welcomed. Lori
This month our challenge was to make any type of project that was Spring Themed & to use any of Robyn's stamps (new or old). Well to me nothing says Spring more than Easter. So I made this tag to use on an Easter present.
I just love the patterns on the Nursery Tails Cart and I just fell in love with these butterflies & dragonfly.
Details:
Imagine
Nursery Tails for everything: Tag (pg. 22), Pattern (pg. 36), butterflies & dragonfly (pg. 21)
I inked all of the pieces with distress in. I also used distress in for the stamp.
I added Frosted Lace Stickles to the bodies of the butterflies & dragonfly.
I love dimension, so I cut the butterflies & dragonfly twice. I layered then adhering nly the bodies, leaving the wings to fly.
Stamp: My Pink Stamper's Happiest Moments Set.
Your next stop on the hop is: Christi's Blog
Here's the entire list of our very talented designers in order fro this hop:
Robyn - Start & Join In Here
Julie—readysetstamp
Lori - You Are here
Cristi - Next Hop Stop
Shelley
Anges—Flowerdisco
Andrea
Raechel
Bling Queen Wendy
Sonia
Pam
Helen
Edna
Angela’s Simple Creations
Tracy—Craft Junkie Too
Shauna at Craftee She
CarrieAnne
Michelle—Meesh’s Pieces
Kassidy
Courtney—Court’s Crafts
Kristal--Getting Cricky (This Month’s Special Guest Hopper)
Maria
Thanks for looking. Questions & comments are always welcomed. Lori
Labels:
Blog Hop,
Imagine,
MPS DT,
Nursery Tails,
Tags
Reminder: My Pinkalicious Blog Hop Tonight
Please join us in the Blog Hop tonight 8pm Central. To begin, go to Robyn's My Pink Stamper Blog, hop along to see all of the projects our very talented designers have made. Then go back to Robyn's blog to join in with your own projects.
Happy Hopping!!!
Thanks for looking. Questions & comments are always welcomed. Lori
Happy Hopping!!!
Thanks for looking. Questions & comments are always welcomed. Lori
Saturday, March 5, 2011
You're TWEET Imagine Card
This is another Thank You card that I made for some more well wishers. I have some amazing & talents friends in blog world. You are all so very sweet. All of the cards & wishes for my quick recovery is so very much appreciated!!!!!!
Details:
Imagine
Best Friends Imagine Cart for the frame (pg. 20), bird, wing, & banner (pg. 13)
I pop dotted the banner & the wing on the bird.
I used an Action Wobble for the bird.
I used distress ink to ink all of the cut pieces & around the entire card.
Thanks for looking. Questions & comments are always welcomed. Lori
Details:
Imagine
Best Friends Imagine Cart for the frame (pg. 20), bird, wing, & banner (pg. 13)
I pop dotted the banner & the wing on the bird.
I used an Action Wobble for the bird.
I used distress ink to ink all of the cut pieces & around the entire card.
Thanks for looking. Questions & comments are always welcomed. Lori
Labels:
Best Friends,
Cards,
Imagine
Sunday, February 27, 2011
Thank You Berry Much Card
I made several of these for some really special people. Thank you all for your get well wishes.
Details:
Imagine & the Imagine More Cart. for all papers (except for card base) & images.
The flower is from pg. 16 & the strawberry is from pg. 17. The background paper is from pg. 44.
Stamp Set: My Pink Stamper's Fruit & Veggie Puns
I layered all of the pieces & pop dotted the strawberry. I then put the entire image on an Action Wobble.
Thanks for looking. Questions & comments are always welcomed. Lori
Details:
Imagine & the Imagine More Cart. for all papers (except for card base) & images.
The flower is from pg. 16 & the strawberry is from pg. 17. The background paper is from pg. 44.
Stamp Set: My Pink Stamper's Fruit & Veggie Puns
I layered all of the pieces & pop dotted the strawberry. I then put the entire image on an Action Wobble.
Thanks for looking. Questions & comments are always welcomed. Lori
Labels:
Cards,
Imagine,
Imagine More,
MPS DT
Saturday, February 26, 2011
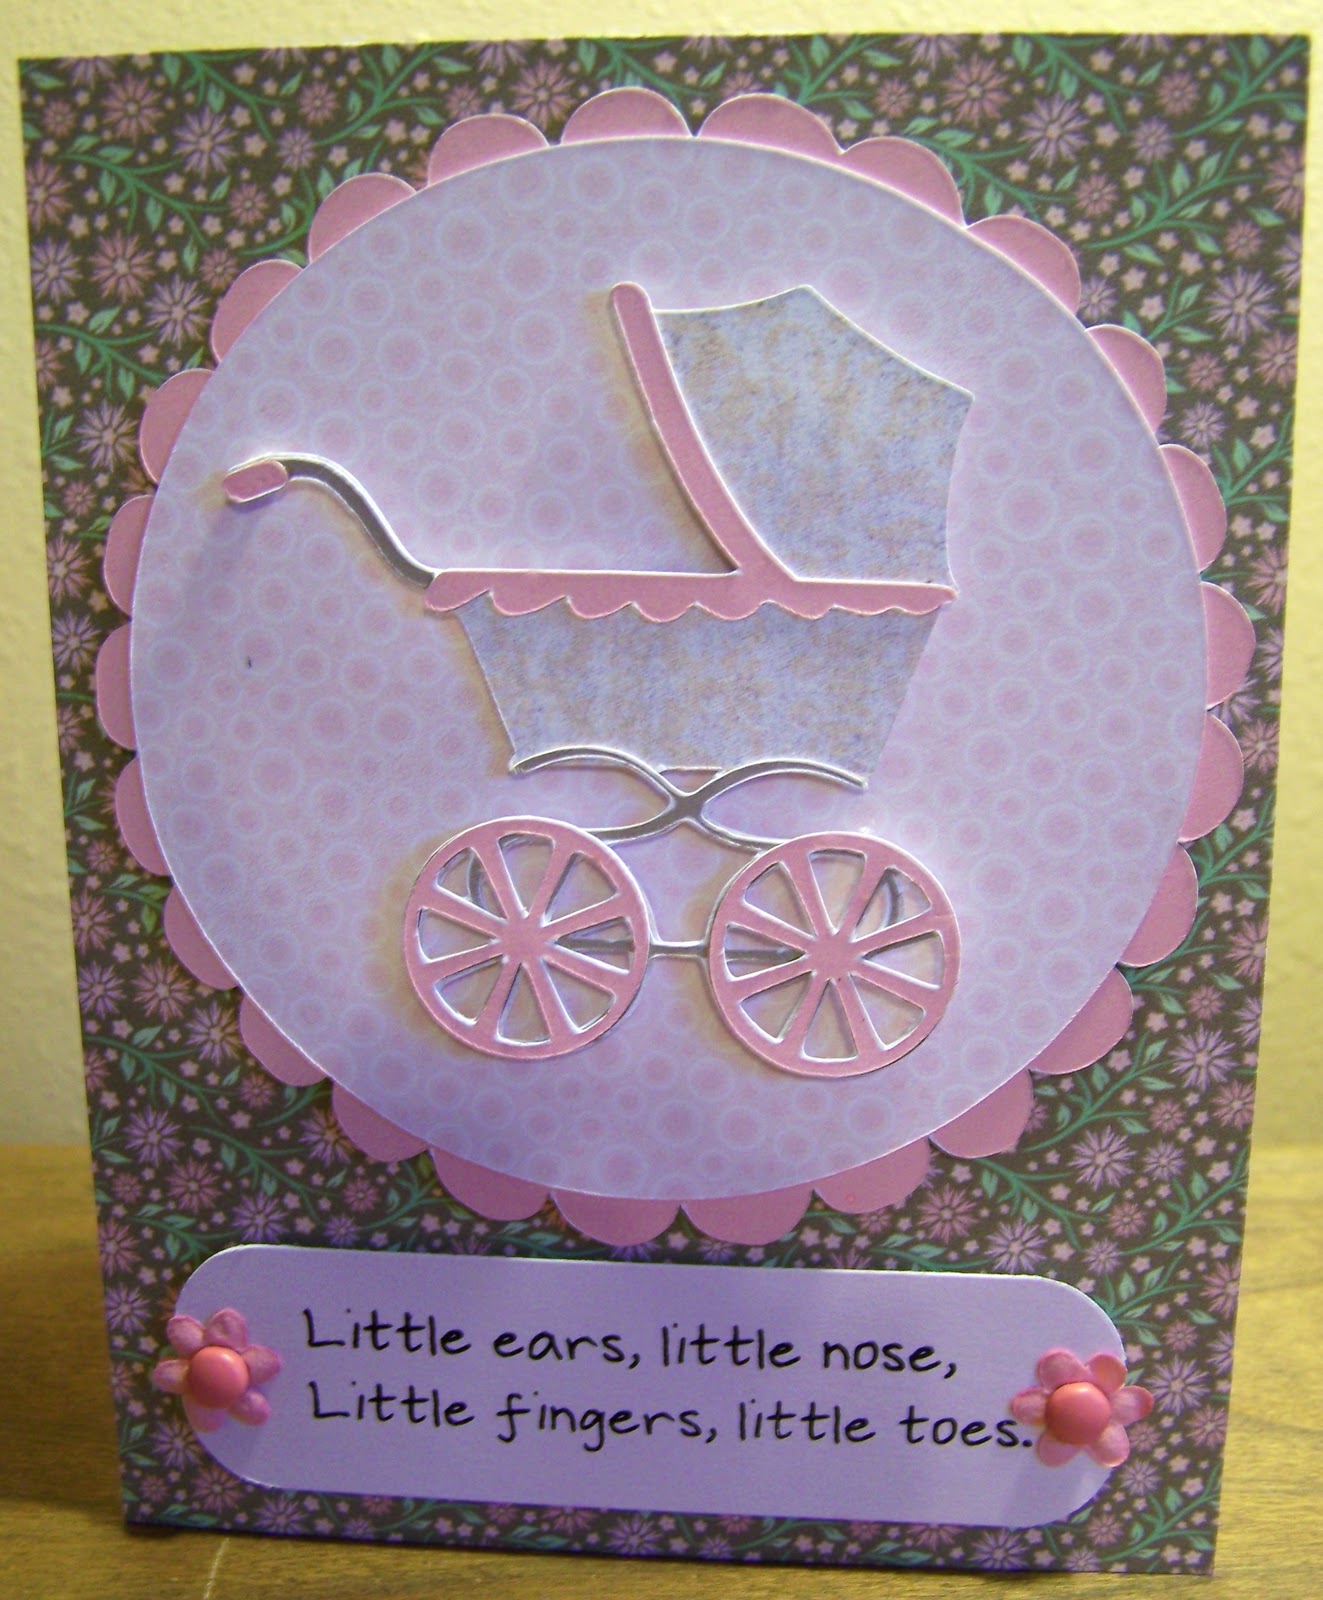
Pink Baby Carriage Card
I just love how this card came out. It was so much fun to make.
Details:
Gypsy for designing & sizing.
Imagine for cutting, printing, & stock shapes - circle & scallop
Nursery Tails for all of the papers.
Wrap It Up for the baby carriage.
Stamp Set: My Pink Stamper's Sweet Baby
I added some brads & little flowers to the end of the sentiment tag.
Thanks for looking. Questions & comments are always welcomed. Lori
Details:
Gypsy for designing & sizing.
Imagine for cutting, printing, & stock shapes - circle & scallop
Nursery Tails for all of the papers.
Wrap It Up for the baby carriage.
Stamp Set: My Pink Stamper's Sweet Baby
I added some brads & little flowers to the end of the sentiment tag.
Thanks for looking. Questions & comments are always welcomed. Lori
Labels:
Gypsy,
Imagine,
MPS DT,
Nursery Tails,
Wrap It Up
Whoot Whoot Basketball Card
This was a really simple & quick card to make. Details:
I used my Gypsy & Imagine to design & create this card.
Boys Will Be Boys Cart for the basketball net
Stamp: My Pink Stamper's Sport-tastic Stamp Set
I added pen stitching around the card & basketball net as a finishing touch.
Thanks for looking. Questions & comments are always welcomed. Lori
I used my Gypsy & Imagine to design & create this card.
Boys Will Be Boys Cart for the basketball net
Stamp: My Pink Stamper's Sport-tastic Stamp Set
I added pen stitching around the card & basketball net as a finishing touch.
Thanks for looking. Questions & comments are always welcomed. Lori
Labels:
Boys Will Be Boys,
Cards,
Imagine,
MPS DT
Let Your Light Shine Card
I have been wanting to use my Inspired Heart Cart. since I got it just after Christmas. When Robyn came out with her More Faithful Sayings Stamp Set, I had the perfect stamp for this card.
Details:
Gypsy for sizing.
Imagine & Imagine More Cart for the background paper.
Inspired Heart for the image.
Stamp Set: My Pink Stamper's More Faithful Sayings
I added gold stickles for some "shine".
I used distress ink to edge the card & the image. I think it adds a little depth & dimension to the card.
Thanks for looking. Questions & comments are always welcomed. Lori
Details:
Gypsy for sizing.
Imagine & Imagine More Cart for the background paper.
Inspired Heart for the image.
Stamp Set: My Pink Stamper's More Faithful Sayings
I added gold stickles for some "shine".
I used distress ink to edge the card & the image. I think it adds a little depth & dimension to the card.
Thanks for looking. Questions & comments are always welcomed. Lori
Labels:
Cards,
Imagine,
Imagine More,
Inspired Heart,
MPS DT
Stamp Shape Thank You card
This is a Thank You card for the host of the card swap that I was in. I have not made a shape card in a while. I had just gotten the Sentimentals Cart & really liked the idea of a stamp shaped card. Details:
A2 (4.25 x 5.5) Card
Gypsy to design, size, & weld the card base. Cricut to create.
Sentimentals Cart. for the base shape & the owl.
Stamp: My Pink Stamper's Everyday Occasions Stamp Set. (One of Robyn's first stamp sets)
Thanks for looking. Questions & comments are always welcomed. Lori
A2 (4.25 x 5.5) Card
Gypsy to design, size, & weld the card base. Cricut to create.
Sentimentals Cart. for the base shape & the owl.
Stamp: My Pink Stamper's Everyday Occasions Stamp Set. (One of Robyn's first stamp sets)
Thanks for looking. Questions & comments are always welcomed. Lori
Labels:
Cards,
Cricut,
Gypsy,
MPS DT,
Sentimentals
Card Swap: Any Theme, Any Colors, Anything Goes
I made 20 of these cards,19 for the swappers & 1 extra for the host for all she has to do. This card is fairly simple, but it was a lot of fun.
Details:
A2 (4.25 x 5.5) Card
Splish Splash Lite Cart for the dolphin
Plantin Schoolbook cart for the waves
I used an Action Wobble behind the dolphin. (Although that does not come across, as I cannot do videos.)
I added stickels to both the dolphin & the waves.
I also added some pen stitching around the card to add that little something extra.
Stamp: My Pink Stamper's Love-alicious Stamp Set
I used my Gypsy & Cricut to design & create this project.
I just love how the dolphin seems to be jumping out of the water. (When you see it in action.)
Thanks for looking. Questions & comments are always welcomed. Lori
Details:
A2 (4.25 x 5.5) Card
Splish Splash Lite Cart for the dolphin
Plantin Schoolbook cart for the waves
I used an Action Wobble behind the dolphin. (Although that does not come across, as I cannot do videos.)
I added stickels to both the dolphin & the waves.
I also added some pen stitching around the card to add that little something extra.
Stamp: My Pink Stamper's Love-alicious Stamp Set
I used my Gypsy & Cricut to design & create this project.
I just love how the dolphin seems to be jumping out of the water. (When you see it in action.)
Thanks for looking. Questions & comments are always welcomed. Lori
Labels:
Cards,
Cricut,
Gypsy,
MPS DT,
Plantin Schoolbook,
Splish Splash
Friday, February 25, 2011
Imagine More Sun Challenge
I found a challenge on the Cricut MB & Jen's Scrap Closet for the Imagine. I thought it would be fun. We had to use the sun on page 4 of the Imagine More Cartridge. Here is the card that I made for the challenge.
Details:
Imagine
Imagine More Cart.
I used the Imagine More Cart for all of the cuts & papers except for the craft card stock base.
I popped up the sun & the "good times".
Thanks for looking. Questions & comments are always welcomed. Lori
Details:
Imagine
Imagine More Cart.
I used the Imagine More Cart for all of the cuts & papers except for the craft card stock base.
I popped up the sun & the "good times".
Thanks for looking. Questions & comments are always welcomed. Lori
Labels:
Cards,
Challenges,
Imagine,
Imagine More
Tuesday, February 22, 2011
My Pink Designers: Baby Card
Welcome to my February post for My Pink Designers. In this post I am spotlighting the Sweet Baby Stamp Set from My Pink Stamper. Before I get to my project, here is a look at the stamp set:
Now, here is my project:
Details:
A2 size card (4.25 x 5.5)
Imagine Nursery Tails Cart. (paper & images) for the dress, background shape, & card base.
My Pink Stamper's Sweet Baby Stamp Set
I edged all of the pieces with distress ink.
The stamp was stamped with Distress ink too.
Please go to Robyn's blog to see what all of the very talented designers have made. She will have a link to all of their blogs so that you can show them some love too. Don't forget to stop by Robyn's products page to pick up some of these very inspiring stamps.
Thanks for looking. Questions & comments are always welcomed. Lori
Now, here is my project:
Details:
A2 size card (4.25 x 5.5)
Imagine Nursery Tails Cart. (paper & images) for the dress, background shape, & card base.
My Pink Stamper's Sweet Baby Stamp Set
I edged all of the pieces with distress ink.
The stamp was stamped with Distress ink too.
Please go to Robyn's blog to see what all of the very talented designers have made. She will have a link to all of their blogs so that you can show them some love too. Don't forget to stop by Robyn's products page to pick up some of these very inspiring stamps.
Thanks for looking. Questions & comments are always welcomed. Lori
Friday, February 11, 2011
My Pinkalicious Blog Hop
Welcome to the My Pinkalicious Blog hop for February. If you came here from Sonia's Blog, you are right on track. You can follow along on the hop or you can even join us. Just go to Robyn's blog to start & get the details on how to join our hop.
Our challenge for this month was to use the color black and our favorite color. Well, I really don't have a favorite color. But since getting on this Cricut obsession I do like really bright green. So that is the color I chose to do my project with. I think it really pops against the dark black.
I decided to make a giftcard holder using a recycled TP roll. I know I have seen this on someone's blog, but for the life of me I can't remember who's it was. So thank you for the inspiration.
Details:
I used my Gypsy & Cricut to design & create this project.
Wrap It Up Cartridge- Football
Tags, Bags, Boxes, & More Cartridge - Stamp, Background, & Tag Shape
TP Roll flattened with the Cuttlebug & covered with black cardstock
I used my Corner Chomper to round the corners of the covered TP Roll.
I glued one end of the TP Roll closed & sealed the edge with a crimper.
My Pink Stamper Stamp Set - Sport-tastic

The next stop on the hop is: Julie - ReadySetStamp
Thanks for looking. Questions & comments are always welcomed. Lori
Our challenge for this month was to use the color black and our favorite color. Well, I really don't have a favorite color. But since getting on this Cricut obsession I do like really bright green. So that is the color I chose to do my project with. I think it really pops against the dark black.
I decided to make a giftcard holder using a recycled TP roll. I know I have seen this on someone's blog, but for the life of me I can't remember who's it was. So thank you for the inspiration.
Details:
I used my Gypsy & Cricut to design & create this project.
Wrap It Up Cartridge- Football
Tags, Bags, Boxes, & More Cartridge - Stamp, Background, & Tag Shape
TP Roll flattened with the Cuttlebug & covered with black cardstock
I used my Corner Chomper to round the corners of the covered TP Roll.
I glued one end of the TP Roll closed & sealed the edge with a crimper.
My Pink Stamper Stamp Set - Sport-tastic

The next stop on the hop is: Julie - ReadySetStamp
Thanks for looking. Questions & comments are always welcomed. Lori
Labels:
Blog Hop,
Giftcard Holders,
MPS DT,
Tags Bags Boxes and More,
Wrap It Up
Thursday, February 10, 2011
My Pink Stamper's Design Team Blog Hops
Join us on the 2nd Friday of every month for our blog hops. You start at Robyn's Blog and follow everyone's blog to see all of the wonderful projects that the design team has done. But there's more. You can join in on the fun and post your projects to Robyn's blog on the Blog Hop post. You can also grab her blog hop button on the side of her blog.
Here it is, isn't it adorable.

Our next blog hop "My Pinkalicious Blog Hop" will be tomorrow night at 8pm Central. Come join in on the fun!!!
Thanks for looking. Questions & comments are always welcomed. Lori
Here it is, isn't it adorable.
Our next blog hop "My Pinkalicious Blog Hop" will be tomorrow night at 8pm Central. Come join in on the fun!!!
Thanks for looking. Questions & comments are always welcomed. Lori
Tuesday, February 8, 2011
MIA & Upcoming Blog Hop
Sorry I have been MIA for a bit. I have been crafting, but forgetting to take pics before I give the projects away. Plus the family & life sometimes gets in the way of craft time, but what ya gonna do? - They come first! I have just recently started working out too, so that is taking up plenty time too. So when I do get to craft & have a project due or a last minute gift or card that has to be made - it gets done but not photographed.
I'll be back with some projects to be posted to showcase some of My Pink Stampers stamps that were just released. Also please stop by Robyn's blog on Friday to follow or join in on our My Pink Stamper Pink-alicious Blog Hop. It will go live at 8pm Central.
Thanks for looking. Questions & comments are always welcomed. Lori
I'll be back with some projects to be posted to showcase some of My Pink Stampers stamps that were just released. Also please stop by Robyn's blog on Friday to follow or join in on our My Pink Stamper Pink-alicious Blog Hop. It will go live at 8pm Central.
Thanks for looking. Questions & comments are always welcomed. Lori
Saturday, January 29, 2011
MPS LoveALicious - WINNER!!!
Please forgive this really quick post, I have a very busy day ahead of me. I just wanted to stop in to post the winner from my My Pink Designer Pink & Love Challenge.
I used Random.org and it chose #41.
The winner of the MPS LoveALicious stamp set is:
Heather from Heather's Krafty Korner.
Heather said... This is soooo cute! I love the pink panda and zebra! TFS!
ra6352 (at) gmail (dot) com
Congratulations Heather!!! I will be emailing you to get your mailing information.
Thanks for looking. Questions & comments are always welcomed. Lori
I used Random.org and it chose #41.
The winner of the MPS LoveALicious stamp set is:
Heather from Heather's Krafty Korner.
Heather said... This is soooo cute! I love the pink panda and zebra! TFS!
ra6352 (at) gmail (dot) com
Congratulations Heather!!! I will be emailing you to get your mailing information.
Thanks for looking. Questions & comments are always welcomed. Lori
Tuesday, January 25, 2011
My Pink Designers: Pink & Love Theme & Giveaway
Welcome to our My Pink Designers Design Challenge!! Robyn gave us designers the challenge to use the color Pink and the theme is Love this month. I decided to make a Love Notes Box. I decorated the box an made 4 coordinating cards to fit in the box.
The box is one of the recipe boxes from Michaels in the dollar bins. I just covered it with red & pink card stock & did a little pen stitching just to add a little something. I added some pink & white polka dot ribbon around the cover with a faux bow & added a heart button to the center of the bow.
The cupid is from Celebrate with Flourish, cut @ 3" in pink, dk pink, & white. I added some doodle dots to it too.
For the front of the box, I welded the hearts & blocks with letters to spell out Love Notes from Simply Sweet. I cut them again, hiding the letters for the coordinating color to show through. I also cut them twice out of cereal boxes & layered them to give some dimension.
The cards are all basically the same except for the image. The base of the cards are pink (embossed using the Cuttlebug & Duff's (The Ace of Cakes) Texture Tiles. The red strip is embossed using the Cuttlebug & the Polka Dots (5x7) embossing folder. I added the ribbon with 2 knot bows. The pink & red hearts are from Simply Sweet. I used My Pink Stamper's "Happiest Moments" Stamp Set.
I will be giving away 1 set of My Pink Stamper's "Love A Licious" Stamp Set. This is the other set we are highlighting for this challenge. (Continental U.S. mailing only). All you have to do is leave a comment on this post with a way for me to contact you. I comment please. I will post the winner on Saturday.
Snail: Create A Critter
Squirrel: Create A Critter
Panda: Pagoda
Zebra: Create A Critter
Thanks for joining or visiting our challenge. You can go to My Pink Stamper to see all of our designer's work & visit their blogs.
Thanks for looking. Questions & comments are always welcomed. Lori
The box is one of the recipe boxes from Michaels in the dollar bins. I just covered it with red & pink card stock & did a little pen stitching just to add a little something. I added some pink & white polka dot ribbon around the cover with a faux bow & added a heart button to the center of the bow.
The cupid is from Celebrate with Flourish, cut @ 3" in pink, dk pink, & white. I added some doodle dots to it too.
For the front of the box, I welded the hearts & blocks with letters to spell out Love Notes from Simply Sweet. I cut them again, hiding the letters for the coordinating color to show through. I also cut them twice out of cereal boxes & layered them to give some dimension.
The cards are all basically the same except for the image. The base of the cards are pink (embossed using the Cuttlebug & Duff's (The Ace of Cakes) Texture Tiles. The red strip is embossed using the Cuttlebug & the Polka Dots (5x7) embossing folder. I added the ribbon with 2 knot bows. The pink & red hearts are from Simply Sweet. I used My Pink Stamper's "Happiest Moments" Stamp Set.
I will be giving away 1 set of My Pink Stamper's "Love A Licious" Stamp Set. This is the other set we are highlighting for this challenge. (Continental U.S. mailing only). All you have to do is leave a comment on this post with a way for me to contact you. I comment please. I will post the winner on Saturday.
Snail: Create A Critter
Squirrel: Create A Critter
Panda: Pagoda
Zebra: Create A Critter
Thanks for joining or visiting our challenge. You can go to My Pink Stamper to see all of our designer's work & visit their blogs.
Thanks for looking. Questions & comments are always welcomed. Lori
Thursday, January 20, 2011
Winner: My Pink Stamper Blog Hop
I used Random.org to pick the winner. (I could not get it to copy a pic of the drawing - sorry)
We had 209 comments and Random.org chose # 150.
So congratulations goes to :
*Star said:
Super cute card! Tfs and have a great day .:)
star24601 at gmail dot com
starspaperpassion.blogspot.com
Star, I am emailing you now to let you know & to get your mailing information!!
Congratulations to *Star & thanks to everyone that played along & hopped with us on our first blog hop.
Thanks for looking. Questions & comments are always welcomed. Lori
We had 209 comments and Random.org chose # 150.
So congratulations goes to :
*Star said:
Super cute card! Tfs and have a great day .:)
star24601 at gmail dot com
starspaperpassion.blogspot.com
Star, I am emailing you now to let you know & to get your mailing information!!
Congratulations to *Star & thanks to everyone that played along & hopped with us on our first blog hop.
Thanks for looking. Questions & comments are always welcomed. Lori
Tuesday, January 18, 2011
One more day to comment!
For those of you (Continental U.S. Residents) that want to be in for the Blog Candy: My pink Stamper Blog Hop
Please comment HERE. The cut off time will be Wed. Jan. 19 @ 5pm Central. I have to have time to check the entries & do the drawing. Remember, please only 1 comment per person. I will be announcing the winner on Thursday.
Thanks for looking. Questions & comments are always welcomed. Lori
Please comment HERE. The cut off time will be Wed. Jan. 19 @ 5pm Central. I have to have time to check the entries & do the drawing. Remember, please only 1 comment per person. I will be announcing the winner on Thursday.
Thanks for looking. Questions & comments are always welcomed. Lori
Owl B-Day Card
This card was for my husband's step mother. She loves owls & I wanted to used this stamp from My Pink Stamper Tweetie Hoo Puns. I thought they went very well together. This is also the first card that I have made using the new Action Wobbles. They are for sale now, YAY!!!! The entire branch & owl wobble on the front of the card.
Recipe:
Hoot and Hollar Cart. - Owl & Branch
Lacy Labels Cart - Label for stamp
MPS Stamps Tweetie Hoo Puns
Cuttlebug - Polka Dots 5x7 embossing folder
Imagine - Colors for Branch & Leaves - used custom colors
Nursery Tails Cart - Color for Owl & Label
Action Wobble for dimension & movement
I used my Gypsy & Imagine to design & create this card.
(Gypsy used to design - not used to cut w/ imagine - still need update)
Thanks for looking. Questions & comments are always welcomed. Lori
Recipe:
Hoot and Hollar Cart. - Owl & Branch
Lacy Labels Cart - Label for stamp
MPS Stamps Tweetie Hoo Puns
Cuttlebug - Polka Dots 5x7 embossing folder
Imagine - Colors for Branch & Leaves - used custom colors
Nursery Tails Cart - Color for Owl & Label
Action Wobble for dimension & movement
I used my Gypsy & Imagine to design & create this card.
(Gypsy used to design - not used to cut w/ imagine - still need update)
Thanks for looking. Questions & comments are always welcomed. Lori
Labels:
Action Wobble,
Cuttlebug,
Gypsy,
Hoot and Hollar,
Imagine,
Lacy Labels,
Nursery Tails
Subscribe to:
Posts (Atom)


