I don't want to give away her surprise, but you have to see her 100th video. Not only is the video awesome as always, but she has a very good surprise at the end. You won't want to miss this one.
Just click HERE to see this video & see what the surprise is. Make sure to see it before April 29, 2009 - you don't want it to be too late.
Glad to share,
Lori
A Proud member of The Lime Light. Click on over to see what we are doing.
Friday, April 24, 2009
Tuesday, April 21, 2009
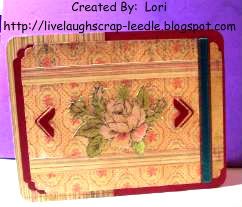
My Grandmother's B-Day Card
Today is my grandmother's birthday. I always seem to make the cutesy cards, but I wanted something a little fancier & more elegant. Not sure if I got there, but I am happy with that way it turned out. I must say that I was determined to use patterned cardstock. I am really afraid of it so this card was a stretch. I don't know why - I see so many cards made with printed paper & cardstock that are so beautiful. Then I see the printed cardstock in the stores & they are gorgeous. But, when it comes down to making a card with them I generally freeze up & have no creativity with them. I think I am afraid of them being too busy.
Details:
I used 3 patterned cardstocks from K & Company. The flow is cut out of one of them. I Mod Podged the flower & the photo corners and Pop-Dotted them on the front of the card. I used the Fiskars punch for the photo corners & a Fiskars decorative corner rounder on the layers. I used my Round-It-All for the corners of the card. I edged the card with a dark maroon inkpad from ColorBox. I used a sheer maroon ribbon & layered a teal ribbon over it & attached that to the layers.
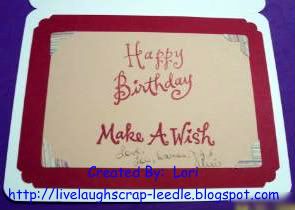
Inside:
Thanks for looking. Questions and comments are always welcomed.
Lori
A Proud member of The Lime Light. Click on over to see what we are doing.
Thursday, April 16, 2009
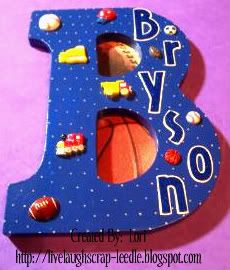
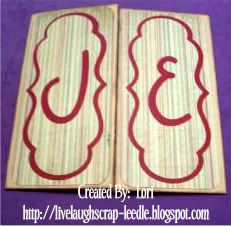
Wall Letters: B & K
I made these for my uncle & his wife. They wanted them for her grandchildren.
Bryson: I was scared of this one because I had never done one for a boy before. They told me that his room was decorated with a sports them and the colors were mostly blue & tan.
I painted the B blue, then painted tan dots all over it. I thought about stripes, but then thought that might be too busy. I had some carstock embellishments (football & basketball) that someone had sent me, so I put them behind the holes in the B. I cut out the letters using Opposites Attract in shadow (tan) & regular (blue) . I heat embossed blue tinsel embossing powder over the blue letters. I them put on some sports buttons and I had some truck, tractor, & train buttons so I added them too. I sealed it all with Mod Podge & Krylon Preserve It. After it was all done - it was the easier one I have done yet.
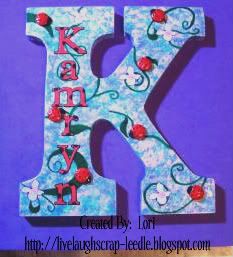
Kamryn: I stressed even harder over this one. All they told me was her room is decorated in ladybugs. When I asked a color scheme they just said red & black. I could not do the letter re or black (& I definitely didn't want to do it solid black), b/c the ladybugs would not show up. So, when I had done the M for my niece HERE, my son said that it looked like flowers. So I thought, ladybugs live in gardens & this K was born.
I painted the base of the K in lavender. I then sponge painted light green, yellow, pink, & light blue over the lavender. I started using some flourish stitching stencils as a guideline (I can't sew or paint) to make some dark green flourishes all over it. It ended up being easier to just free hand them. So what I painted looks like vines growing all over the K. I cut the letters out in shadow (black) & regular (red) from Plantin Schoolbook. I also cut some very small circles out of black. I layered the letters & cut some of the circles & layered them onto the red letters. They look like ladybug letters. I used the 50 States Cart. for the flowers (Missouri - I think). I cut them in light purple with pink centers & placed them randomly on the vines. I also placed some ladybug buttons randomly & facing all different directions on the vines. I sealed all of the paper cuts with Mod Podge before adhering them to the K. I them sealed the entire letter with Krylon Preserve It.
I am most proud of this letter b/c I actually painted it, I love my ladybug letters, & most of all I figured out how to use a black & red theme for a little girl's room.
 Thanks for looking. Questions & comments always welcomed.
Lori
Bryson: I was scared of this one because I had never done one for a boy before. They told me that his room was decorated with a sports them and the colors were mostly blue & tan.
I painted the B blue, then painted tan dots all over it. I thought about stripes, but then thought that might be too busy. I had some carstock embellishments (football & basketball) that someone had sent me, so I put them behind the holes in the B. I cut out the letters using Opposites Attract in shadow (tan) & regular (blue) . I heat embossed blue tinsel embossing powder over the blue letters. I them put on some sports buttons and I had some truck, tractor, & train buttons so I added them too. I sealed it all with Mod Podge & Krylon Preserve It. After it was all done - it was the easier one I have done yet.
Kamryn: I stressed even harder over this one. All they told me was her room is decorated in ladybugs. When I asked a color scheme they just said red & black. I could not do the letter re or black (& I definitely didn't want to do it solid black), b/c the ladybugs would not show up. So, when I had done the M for my niece HERE, my son said that it looked like flowers. So I thought, ladybugs live in gardens & this K was born.
I painted the base of the K in lavender. I then sponge painted light green, yellow, pink, & light blue over the lavender. I started using some flourish stitching stencils as a guideline (I can't sew or paint) to make some dark green flourishes all over it. It ended up being easier to just free hand them. So what I painted looks like vines growing all over the K. I cut the letters out in shadow (black) & regular (red) from Plantin Schoolbook. I also cut some very small circles out of black. I layered the letters & cut some of the circles & layered them onto the red letters. They look like ladybug letters. I used the 50 States Cart. for the flowers (Missouri - I think). I cut them in light purple with pink centers & placed them randomly on the vines. I also placed some ladybug buttons randomly & facing all different directions on the vines. I sealed all of the paper cuts with Mod Podge before adhering them to the K. I them sealed the entire letter with Krylon Preserve It.
I am most proud of this letter b/c I actually painted it, I love my ladybug letters, & most of all I figured out how to use a black & red theme for a little girl's room.
Thanks for looking. Questions & comments always welcomed.Lori
A Proud member of The Lime Light. Click on over to see what we are doing.
Easter Baskets for Family Kids
Finally, here are the other Easter Baskets that I made.
I used Tags, Bags, Boxes, & More to cut the Nut Cup (fit to page on a 12x12 page). I was able to get 2 nut cups out of 1 sheet.
I used Mini Monograms for the scallops (circles & squares) & the regular circles & squares.
For the boys' baskets I just cut a strip of cardstock & punches a hole with my CAD. I attached the handle with brads.
For the girls' baskets i did the same except that I layered 2 strips of paper together. I also used wither the Threading Waters Border Punch or the Doily Border Punch. I also attached these with brads after punching the holes w. my CAD.
Close ups of the decorations on the front of the baskets. For the doodle dots, I used Metallic blue & purple Gel Writer Pens (the 100 pack from Sam's).
Lori
A Proud member of The Lime Light. Click on over to see what we are doing.
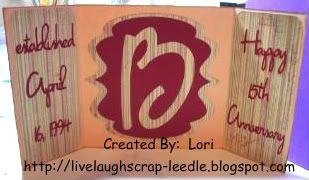
Happy Anniversary Joann & Ernie
Today is my 15th wedding anniversary. But, no this card is not for my husband. I made this card for some very good friends. They were married on the same day as my husband & I. We didn't know them when we got married. Our sons started going to school together in Kindergarten (now in 7th grade). That is how we met. We knew each other for a couple of years before we realized that we shared the same exact anniversary. We will all be celebrating this milestone anniversary this year together. So, I made this card for them.
HAPPY 15TH ANNIVERSARY!! I hope the next 15 & beyond will be as good or better as the past 15.
Darren & I love you both.
Details:
Misc. solid cardstock
K & Company Printed Cardstock
Colorbox Pigment Ink (Bronze) for the edges
Cricut Cartridges used: Opposites Attract, George & Basic Shapes, & Home Accents
I also used Cricut Design Studio for sizing & hiding some elements.
I used my Ultimate Crafter's Companion for sizing & scoring the card & envelope (not pictured).
Thanks for looking. Questions and comments are always welcomed.
Lori
A Proud member of The Lime Light. Click on over to see what we are doing.
Wednesday, April 15, 2009
Inchies Swap May 2009
I joined my first "Inchies" swap hosted by KellyScott on the Cricut MB. For those of you that don't know what "Inchies" are: They are 1" x 1" (usually square - but not always) pieces of material (cardstock or whatever you see fit). They are decorated in whatever way you want, as long as it fits on that 1" piece of material.
The call was to make 50 inchies and we could pick out own theme. Even if someone else had that same theme the likeliness of them coming out the same is very slim.
When I signed up, I thought this would be fun. I cut out my first 50 squares and thought, "Wow, a 1 in. square is really small! There is no way that I can cut anything to put on here." So, I went through my stamps to see if I had anything small enough. I had some cupcake stamps & since they are so popular right now I would do Cupcakes. Well, I was then hooked. I started cutting out my next 50 squares before I even contacted Kelly to let her know that I wanted another spot. I decided to do Ice Cream. When I finished those, I went through my stamps again & found more that I wanted to do. So then, I took 2 more spots Celebrate & Love You.
Well there are some that are cutting out things to fit on these tiny squares & they look awesome. I went with stamps and coloring them in. I stamped all of them with Black Staz-On ink and colored them in with LePlume II Markers. I also inked around the edges of all of them with the LePlume II markers.
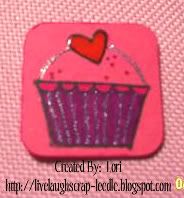
Cupcake:
The Stamp is from Studio G $1 Clear Stamps Sweets Set. I used a Pink Metallic Gel Writer (the 100 pack from Sam's) to outline the top of the cupcake & a Purple Metallic Gel Writer for the lines in the cupcake wrapper. I used Liquid Embossing (All Night Media) for the heart to give some shine & a little dimension.
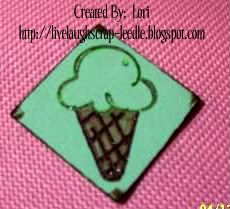
Ice Cream:
The stamp is from Studio G $1 Clear Stamps Sweets Set. I used a Green Metallic Gel Writer to outline the top of the ice cream. I used a Brown Metallic Gel Writer to outline & for the cross marks on the cone (kind of makes it look like a sugar cone).
Celebrate:
The stamps (yes, this one is actually 3 stamps on this 1" square) are from Stampendous! Perfectly Clear Stamps Everything Happy Set. I used a darker & Lighter Yellow Metallic Gel Writer and a Red Gel Writer for the flames. I also used the Liquid Embossing on the flames as well. I added a little pen stitching around the edges with a LePlume II Marker just to give them a little extra something.

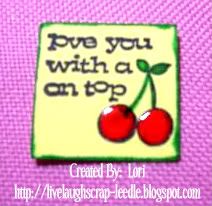
Love You:
This stamp is from Studio G $1 Clear Stamps Sweets Set. I used a Red Metallic Gel Writer for a shiny spot on one of the cherries, but it doesn't show well. I used the Liquid Embossing on the cherries to make them pop.
Thanks for looking. Questions & comments are always welcomed.
Lori
A Proud member of The Lime Light. Click on over to see what we are doing.
The call was to make 50 inchies and we could pick out own theme. Even if someone else had that same theme the likeliness of them coming out the same is very slim.
When I signed up, I thought this would be fun. I cut out my first 50 squares and thought, "Wow, a 1 in. square is really small! There is no way that I can cut anything to put on here." So, I went through my stamps to see if I had anything small enough. I had some cupcake stamps & since they are so popular right now I would do Cupcakes. Well, I was then hooked. I started cutting out my next 50 squares before I even contacted Kelly to let her know that I wanted another spot. I decided to do Ice Cream. When I finished those, I went through my stamps again & found more that I wanted to do. So then, I took 2 more spots Celebrate & Love You.
Well there are some that are cutting out things to fit on these tiny squares & they look awesome. I went with stamps and coloring them in. I stamped all of them with Black Staz-On ink and colored them in with LePlume II Markers. I also inked around the edges of all of them with the LePlume II markers.
Cupcake:
The Stamp is from Studio G $1 Clear Stamps Sweets Set. I used a Pink Metallic Gel Writer (the 100 pack from Sam's) to outline the top of the cupcake & a Purple Metallic Gel Writer for the lines in the cupcake wrapper. I used Liquid Embossing (All Night Media) for the heart to give some shine & a little dimension.
Ice Cream:
The stamp is from Studio G $1 Clear Stamps Sweets Set. I used a Green Metallic Gel Writer to outline the top of the ice cream. I used a Brown Metallic Gel Writer to outline & for the cross marks on the cone (kind of makes it look like a sugar cone).
Celebrate:
The stamps (yes, this one is actually 3 stamps on this 1" square) are from Stampendous! Perfectly Clear Stamps Everything Happy Set. I used a darker & Lighter Yellow Metallic Gel Writer and a Red Gel Writer for the flames. I also used the Liquid Embossing on the flames as well. I added a little pen stitching around the edges with a LePlume II Marker just to give them a little extra something.
Love You:
This stamp is from Studio G $1 Clear Stamps Sweets Set. I used a Red Metallic Gel Writer for a shiny spot on one of the cherries, but it doesn't show well. I used the Liquid Embossing on the cherries to make them pop.
Thanks for looking. Questions & comments are always welcomed.
Lori
A Proud member of The Lime Light. Click on over to see what we are doing.
Monday, April 13, 2009
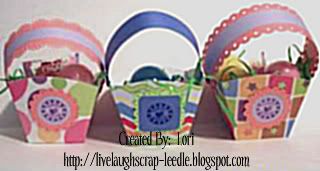
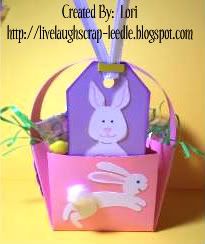
Easter Party Baskets & Bookmarks
I made these Easter baskets for my daughter's class Easter Party. I made 7 pink ones & 4 blue ones. Of course, I also had to make a bookmark to put in it.
Details:
For the basket I used a 8 1/2 x 8 1/2 piece of cardstock. I used my Ultimate Crafter's Companion to score the box. I used the instructions in the DVD for the Pop Out Box and scored on the line for Tri-fold of a US Letter on all four sides then scored the corners from the intersection to the point & folded in. Instead of making a box top, I just glued the points together in the center. This gave 4 triangle pockets on the sides of the basket. I just cut a strip of cardstock for the handle & glues to the inside.
Side 1:
Hopping Bunny is cut from the Cricut Sampler Cartridge. Colored in with LePlume II markers and added a piece of cotton ball for the tail.
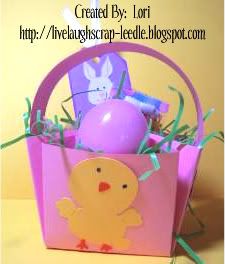
Side 2:
Chick is cut from the Stretch Your Imagination Cartridge.
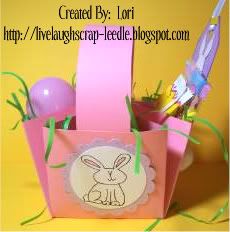
Side 3:
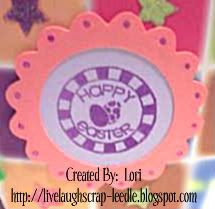
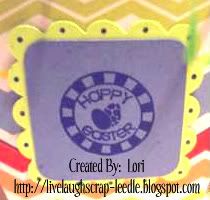
Circle & scallop circle is cut from the Mini Monograms Cartridge. The stamp is Studio G $1 Stamp on a wood block. Colored in with LePlume II markers. I also used a Metallic Pink (Metallic Blue on the boys') pen to make doodle dots around the scallop (doesn't show up in the pic).
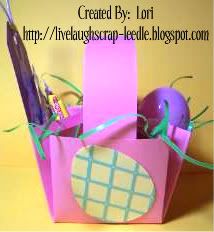
Side 4:
The egg is cut from the Doodlecharms Cartridge. The lattice is cut from the Wild Card Cartridge. Also not showing up in the pic are Metallic Yellow doodle dots at the intersection points of the lattice. On the boy's baskets the colors are reversed for the egg.
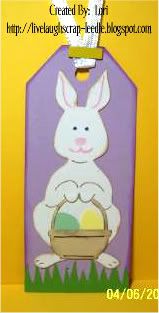
The Bookmark:
The tag and the grass is cut from the Plantin Schoolbook Cartridge. The bunny is cut from the Stretch Your Imagination Cartridge. The eggs and basket are from the Doodlecharms Cartridge. I used ColorBox Pigment Inks to ink around the edges. I used LePlume II markers for coloring in on the bunny & basket. I also used the Fastenator & colored staples to attach the ribbon on the tag. The only difference with the boy's bookmarks is that the tag is blue instead of purple.
Thanks for looking. Questions and comments are always welcomed.
Lori
A Proud member of The Lime Light. Click on over to see what we are doing.
Subscribe to:
Posts (Atom)